RO CSVI
VirtueMart Custom fields import
| RO CSVI
Requirements
- CSVI 6.0+
- Joomla 3.0+
- VirtueMart 3.0 or higher
- PHP 5.4
Background information
To import/export custom fields CSVI uses the Custom field import and Custom field export operations. These operations are available after choosing Import or Export -> VirtueMart under Options.
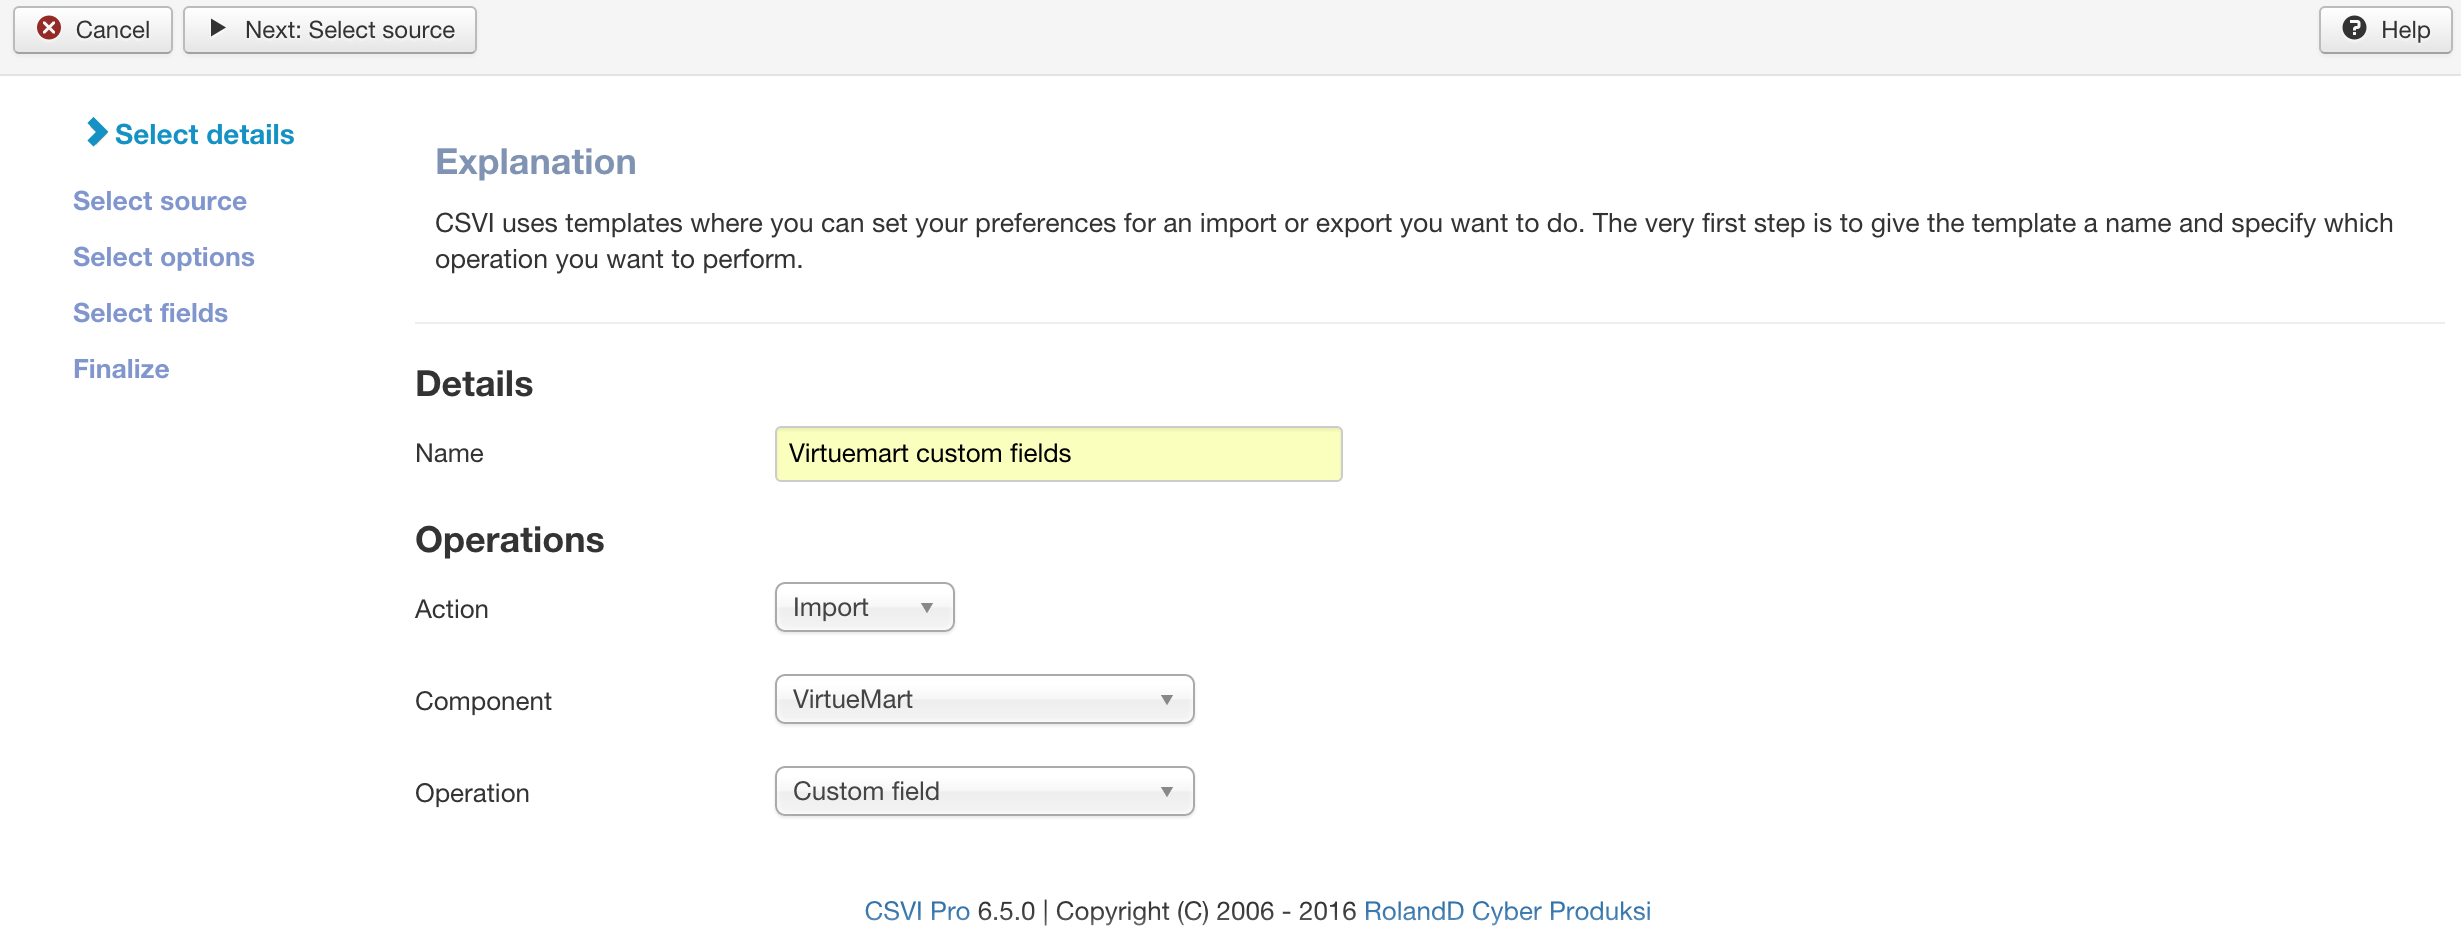
Required fields
The custom fields import requires the following fields:
- plugin_name
- custom_element
- custom_title
- custom_value
- field_type
Optional but recommended fields
- custom_field_desc
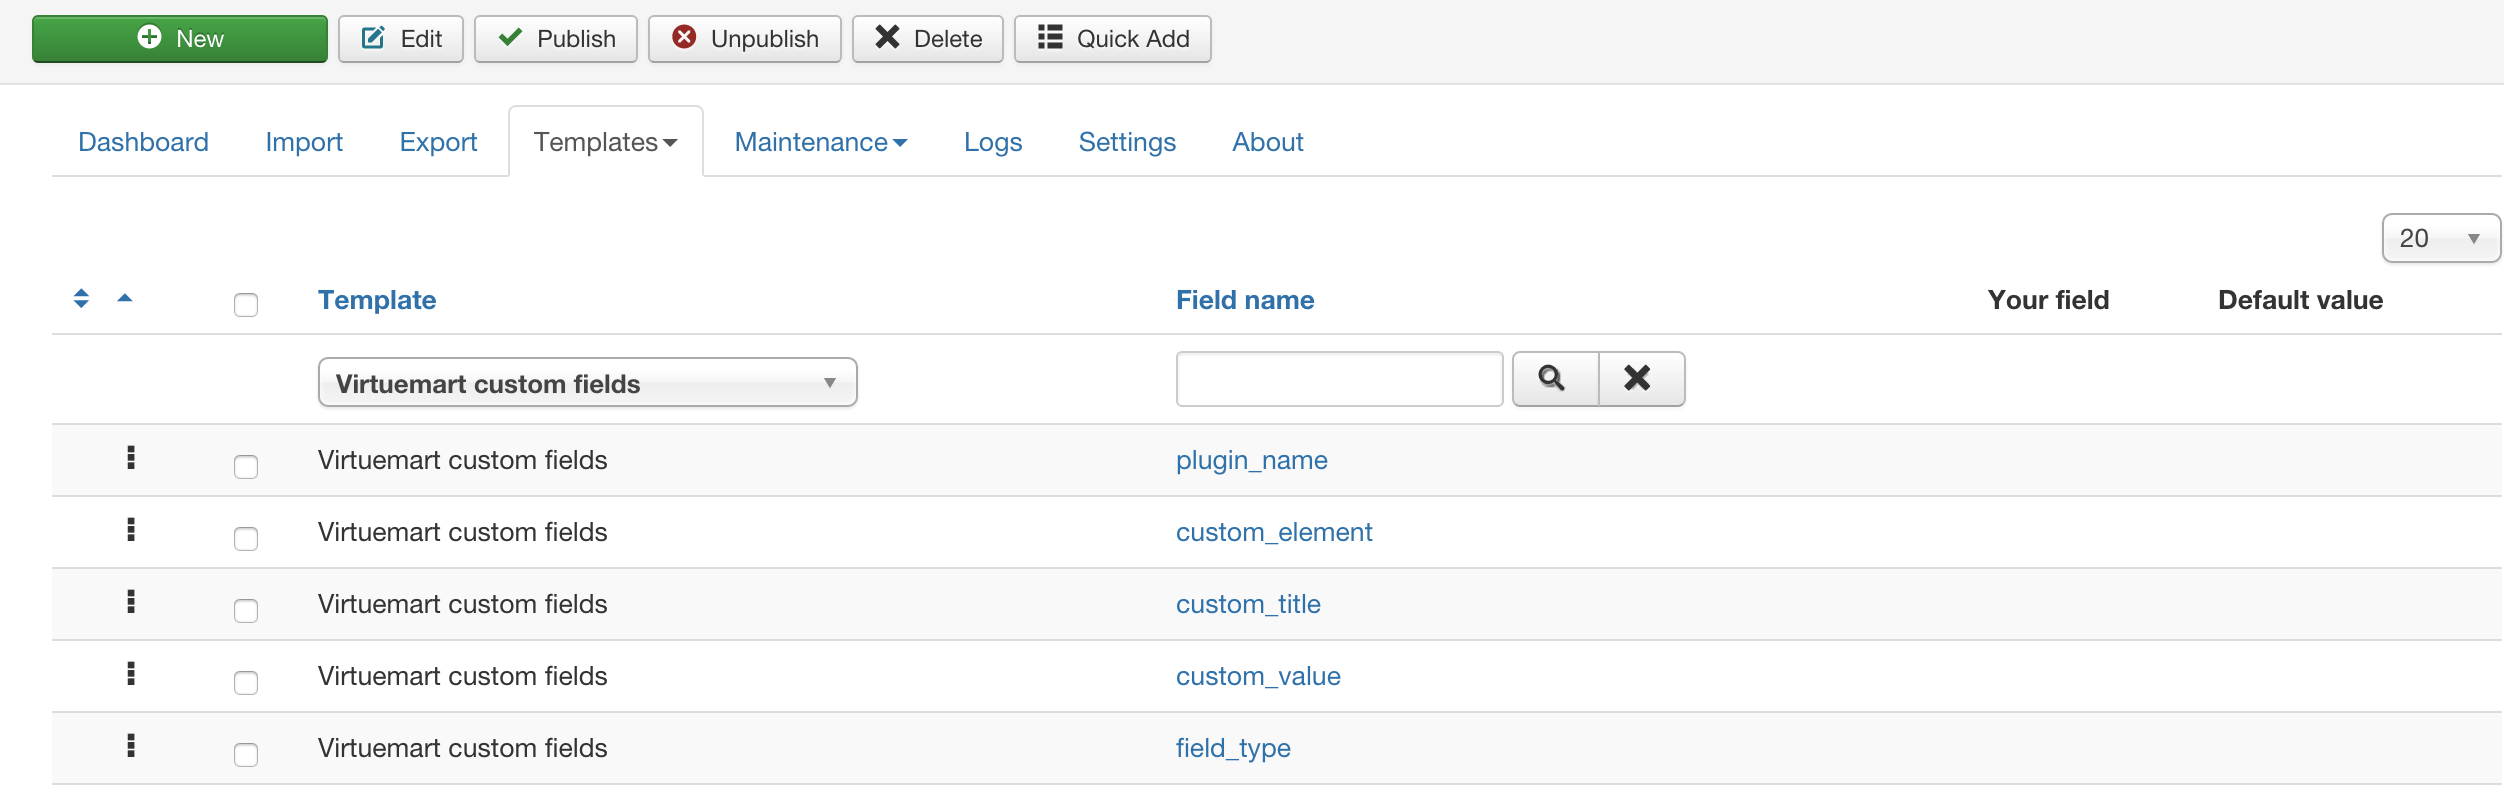
An example CSV file looks like this:
"plugin_name";"custom_element";"custom_title";"custom_value";"field_type"
"Customer text input";"textinput";"CSVI Import";"Type here";"E"
Let's have a closer look at the fields.
plugin_name
This field contains the name of the plugin that is used for the custom field. A list of supported plugins can be found in the Plug-in Manager: Plug-ins section. The Plug-in Name you see here is what needs to be put in the plugin_name field.
custom_element
This is a bit of an odd one. The custom_element you can find in the field called Default when you save the custom field when the Field Type is set to Plugins. When using another field type, this field is left empty.
custom_title
The name of the custom field.
custom_value
This is the same value as custom_element when importing a plugin field type. In any other case this is a text shown to the shopper.
field_type
This must be one of the following values, depending on the type of custom field you are importing:
- S: String
- I: Integer
- P: Parent
- B: Boolean
- D: Date
- T: Time
- M: Image
- V: Cart variant
- E: Plugins
custom_field_desc
A description of the custom field.
Once you have created the CSV file with the necessary data it can be imported like any other import.
Replacements
| RO CSVI

Requirements
- CSVI Pro 6.0+
- Joomla 3.4.3+
- PHP 5.4
Background information
The replacement feature can be used to change data during export or before import.
Types of replacements
There are 2 types of replacements that can be done:
- Regular text
- Regular expressions
Regular text
A regular text replacement is a simple replacement where value x gets replaced with value y. For example replace NL with Netherlands. Any text found to match NL is being replaced with Netherlands.
Regular expressions
A regular expression replacement is a more advanced replacement using regular expressions. For example you can add extra text to the end of a field.
Creating replacement rules
From Components -> CSVI pro ->Templates tab -> Rules, Click New to add a new rule using replace plugin.
For example to create a rule to replacing text "NL" to "Netherlands" in virtuemart product description.
- Give a descriptive name for the rule in name field
- Select Action as Import
- Select Plugin as CSVI Replace
- Click on load plugin button

Find
Give here the text that CSVI needs to look for. When doing:
- A regular text replacement the text here is just plain text for example NL.
- A regular expression replacement the text here needs to be enclosed in forward slashes for example /NL/
It is possible to look for and replace multiple values in 1 replacement rule. Multiple values must be separated by a pipe symbol. When doing:
- A regular text replacement the text is only separated by a pipe symbol for example NL|DE|US
- A regular expression replacement each text is enclosed in forward slashes for example /NL/|/DE/|/US/
Replace
Give here the text CSVI needs to use for replacement for example Netherlands. Multiple values must be separated by a pipe symbol for example Netherlands|Germany|United States.

Multiple values
If your find and replace contains multiple values to look for, set this to Yes so all values will be searched for and replaced independently.
Method
Specify here if CSVI should do a regular text or a regular expression replacement
Examples
Add text at beginning of a value
This example adds the text Before to the value found
Find: /^/
Replace: Before
Method: Regular expression
Add text at the end of a value
This example adds the text After to the value found
Find: /$/
Replace: After
Method: Regular expression
Change text to lowercase
This changes the value to lowercase
Find: /(.*)/e
Replace: strtolower('\1')
Method: Regular expression
This will not work with PHP 7 and higher. CSVI 6.7.0 will have a new rule plugin that makes this possible.
Change text to uppercase
This changes the value to uppercase
Find: /(.*)/e
Replace: strtoupper('\1')
Method: Regular expression
This will not work with PHP 7 and higher. CSVI 7.0 will have a new rule plugin that makes this possible.
Change first letter to uppercase
This changes the first letter of the value to uppercase, if that letter is alphabetic
Find: /(.*)/e
Replace: ucfirst('\1')
Method: Regular expression
This will not work with PHP 7 and higher. CSVI 7.0 will have a new rule plugin that makes this possible.
Replace text
This replaces all occurences of a with aa in the value
Find: /(.*)/e
Replace: str_ireplace('a', 'aa', '\1')
Method: Regular expression
This will not work with PHP 7 and higher. CSVI 7.0 will have a new rule plugin that makes this possible.
Take part of the value
This takes the first 5 characters of the value
Find: /(.*)/e
Replace: substr('\1', 0, 5)
Method: Regular expression
This will not work with PHP 7 and higher. CSVI 7.0 will have a new rule plugin that makes this possible.
Custom tables import
| RO CSVI
Background information
The custom tables import is a special import. This import allows you to import data into any available database table in your system. The table must have a primary key, otherwise it will not work.
Creating the template
First we will create an import/export template in which we can store all our preference. Let's say we are going to do an custom table import
- Go to Components
- Go to RO CSVI -> Templates
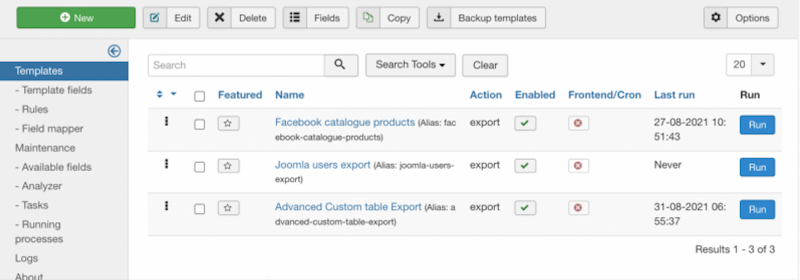
Now you are on the templates page, this is where the import and export templates are created. Click on New button on top corner and follow the Create a template tutorial to create your template.
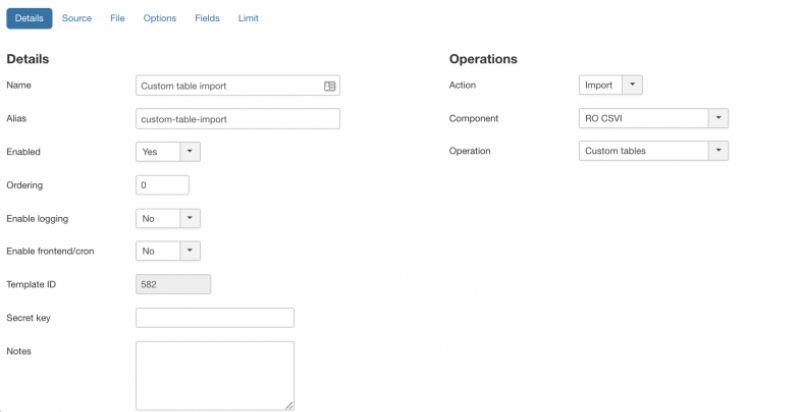
- Give a descriptive name for the template
- Select Import as Action
- Component as RO CSVI
- Operation as Custom tables
- Enable logging if set to Yes
This is a very important option. Setting this to Yes will tell RO CSVI to create a detailed log of all steps taken during export. This is a very useful report to find any potential problems. Whenever you post a question on the forum, make sure you post this file also. It is the only way to help you out. The How to collect debug information article explains this in further detail.
Setting the options
The next step is to tell CSVI for which custom table you want to import, from the options tab, select the table.
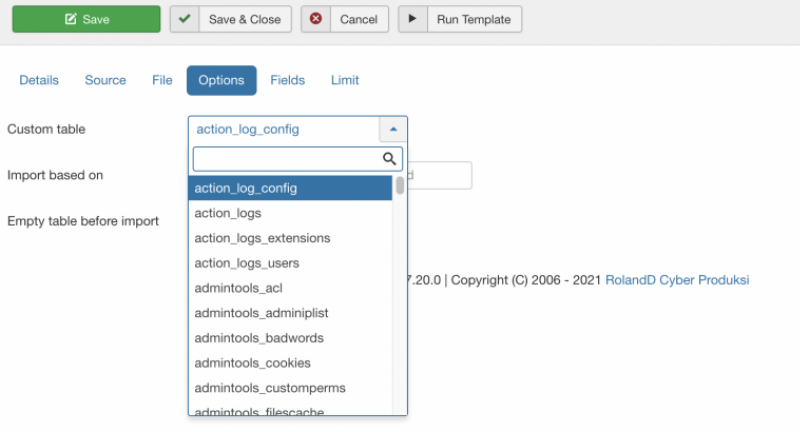
You can now set the field based on with which import should be done. It is now not restricted to primary key field but to any valid column name from the database table. On options tab, under the custom table, you can select the import based on field. If nothing is set then custom table primary key field will be used.
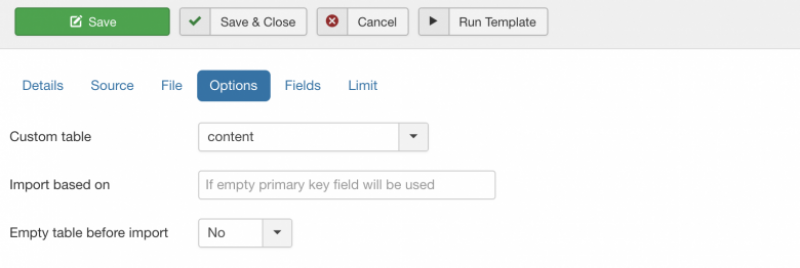
Now that the options are set, Don't forget to click on Save to save your changes in your template and make sure they don't get lost.
Adding the fields
Now that template is created we need to add fields to be imported. Fields depend on the custom table you have selected for importing. In this tutorial, content table is taken as example, so for importing into content table, fields are added like
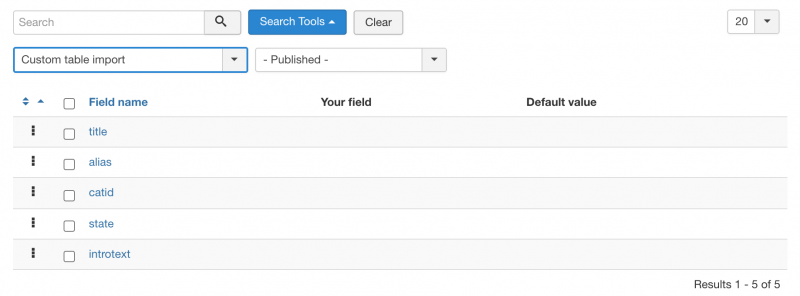
Once the template and template fields are set, importing is done in a normal way as we do for other templates.
Validation
The custom import does not do any validation on the data being imported. You will have to make sure that the import data is correct.
Adding and updating
Data is managed based on the primary key field of the table. If the primary key field is included in the import file, the data is updated regardless if the primary key exists or not. If the primary key field is not included in the import file, the data is added.
Supported tables
RO CSVI supports all tables that are supported in the Joomla installation to be imported/exported.
Creating A Custom Import File
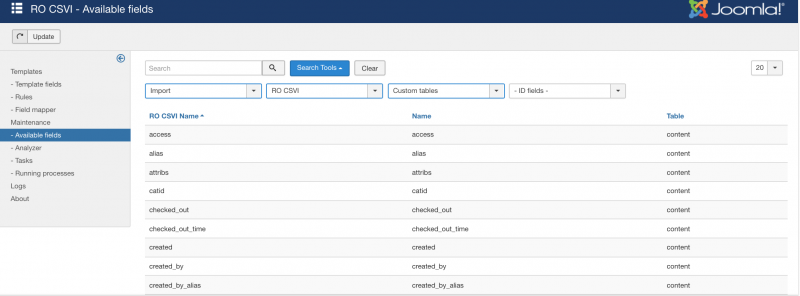
To create an import file for a custom import it is important to know what data is expected for the table you are going to import. To know which fields are available for your custom import, take these steps:
- Go to Components -> RO CSVI ->Maintainence page -> Available Fields
- Select Import
- Select RO CSVI
- Select Custom tables
- Click on Go
- Click on the column Table to sort the fields on Table
- Now scroll to the table you want to import and you can see the fields that are available for import
Import a Custom Import File
To import your custom import file, take these steps:
- Go to Components -> RO CSVI -> Import
- Select Template we created for custom import
- Click Select file
- Choose the file to import and click on Preview from top corner. CSVI will display the lines from the csv file as a preview.
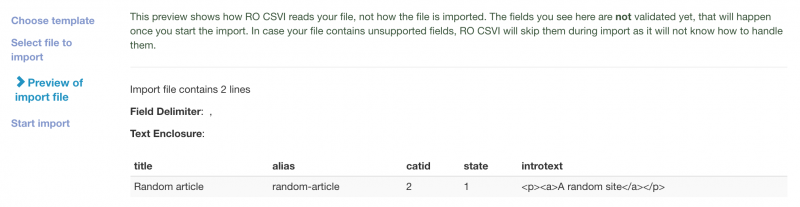
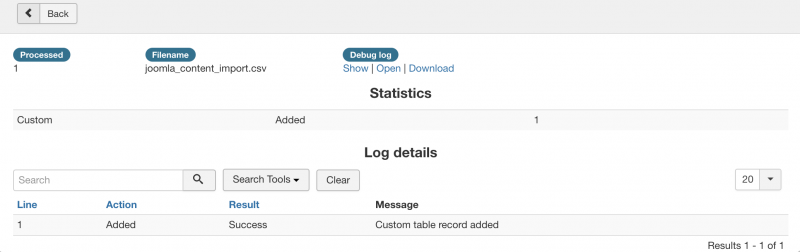
If the data importing is correct, click on Start import from top right corner and RO CSVI will import all data from the csv file. Once import is done status of the import and logs will be displayed as per preferences set in the template.
Support NULL values
Starting from RO CSVI 8.0.0 version, import of NULL values are supported in Custom table import for fields which support it in database. A NULL value can be used to empty a field, to set a field to NULL, the word NULL must be used as shown in the example below.
"name","title","introtext","note"
"sample article","Sample Article","Example sample article to explain usage of NULL values",NULLCustom tables export
| RO CSVI
Requirements
- CSVI 6.0+
- Joomla 3+
Background information
The custom export is a special export which allows you to export data from any available database table in your system.
Creating the template
First we will create an export template in which we can store all our preference. Let's say we are going to do an custom table export
- Go to Components
- Go to RO CSVI
- Click on Templates page
Now you are on the templates page, this is where the import and export templates are created. Click on New button on top corner and follow the Create a template tutorial to create your template.

- Give a descriptive name for the template
- Select Export as Action
- Component as RO CSVI
- Operation as Custom tables
- Enable logging if set to Yes
This is a very important option. Setting this to Yes will tell CSVI to create a detailed log of all steps taken during export. This is a very useful report to find any potential problems. Whenever you post a question on the forum, make sure you post this file also. It is the only way to help you out. The How to collect debug information article explains this in further detail.
Setting the options
The next step is to tell CSVI for which custom table you want to export, from the options tab, select the table.

Now that the options are set, Don't forget to click on Save to save your changes in your template and make sure they don't get lost.
Adding the fields
Now that template is created we need to add fields to be exported. Fields depend on the custom table you have selected for exporting. In this tutorial, content table is taken as example, so for exporting from content table, fields are added like

Once the template and template fields are set, Exporting can be done in a normal way.
Supported tables
CSVI supports all tables that are supported in the Joomla installation to be imported/exported.
To know the avaialble fields which can be exported, take these steps:
- Go to Components -> RO CSVI -> Available Fields
- Select Export
- Select RO CSVI
- Select Custom tables
- Click on Go
- Click on the column Table to sort the fields on Table
- Now scroll to the table you want to export and you can see the fields that are available for exporting

Once template and template fields are set, the last step is to do exporting. To do this, go to Export tab and select the template you just created.

CSVI will prepare the export file and download it to your computer.

Once exported, logs and the exported filename will be displayed.

First character missing on import
| RO CSVI
When importing a file that contains extended characters like óéí and other like that it can happen that these characters are missing on import when they are the first character. For example the word Østerrike is imported as sterrike.
This is not a bug in CSVI but a misconfiguration on your server. The server needs to use the UTF-8 locale to be able to identify these characters, any other locale will cause this failure. To fix this, you will most likely need to ask your hosting provider as it is a change on the server.
A temporary work-around that can be used is to use the PHP function setlocale. To do that you need to find out what locales are available on your server. This can be done by opening an SSH session to your server and execute the comamnd:
locale -a
Let's say you find your locale to be nl_NL.utf8. You can change the encoding by adding this code to the administrator/components/com_csvivirtuemart/csvivirtuemart.php file or administrator/components/com_csvi/csvi.php:
setlocale(LC_ALL, 'nl_NL.utf8');
This is best placed after the line:
defined( '_JEXEC' ) or die( 'Direct Access to this location is not allowed.' );