RO CSVI
Create a template
| RO CSVI
To create a template in CSVI you take the following steps:
- Click on Components
- Click on CSVI Pro
- Click on Templates in the sidebar menu
- Click on New
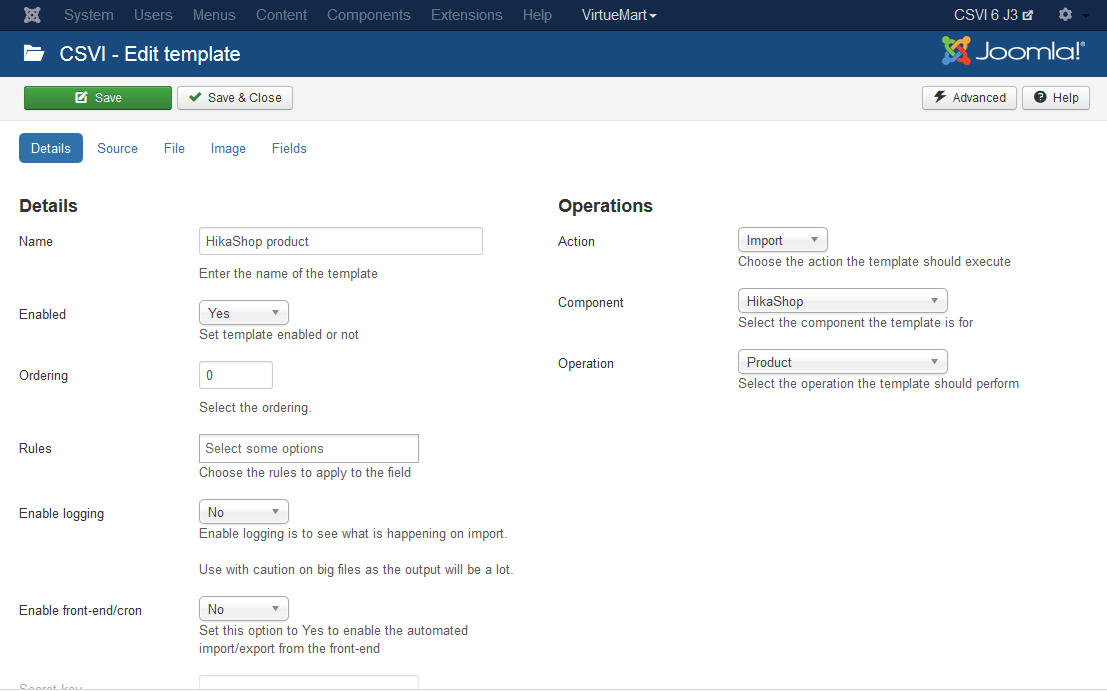
- You will now get the template wizard asking for details. Fill in the details to tell CSVI what kind of template you want it to be.
- After filling in the details click on Select source. Select the source if its import operation or Destination for export.
- Click on Select options and fill in all the options needed.
- Click on Select fields. By default there is no option in import template to add fields so move on to last step of finalizing. The fields are optional for import templates because it is possible to use the column headers in a file as fields. For export, you have an button Edit template fields to add required fields as it is important to tell CSVI which fields you are trying to export. Add fields and moved on to last step of finalizing.
- Click close and save the template.
Special buttons
The toolbar features 2 special buttons in the top right corner, these are:
- Advanced
- Help
Advanced button
The advanced button will show or hide extra options available for this operation, by default only the basic options are shown.
Click on the Advanced button to show the extra options, click again to hide the extra options.
Help button
The help button will show you a description of each field below the field.
Clicking the Help button will show the help information, click again and the help information will be hidden.
Read article How to edit a template to know how to change the settings of saved template.
Using Firefox Web Console to analyze problems
| RO CSVI
Sometimes a process generates an error notification or it simply seems to run forever. In this case the error happens in the background and you can't see what is happening. To make it possible to see what is happening, you can use Web console of Firefox.
Requirements
- CSVI
- Firefox
Analyze the problem
With Firefox we can analyze what happens. Follow these steps:
- Prepare your template if you are doing an import or export, otherwise you can skip this step.
- Go to Tools >> Web developer >> Web console
- Click on the Console tab. The console window will tell us what is going on. Your screen should look like this:
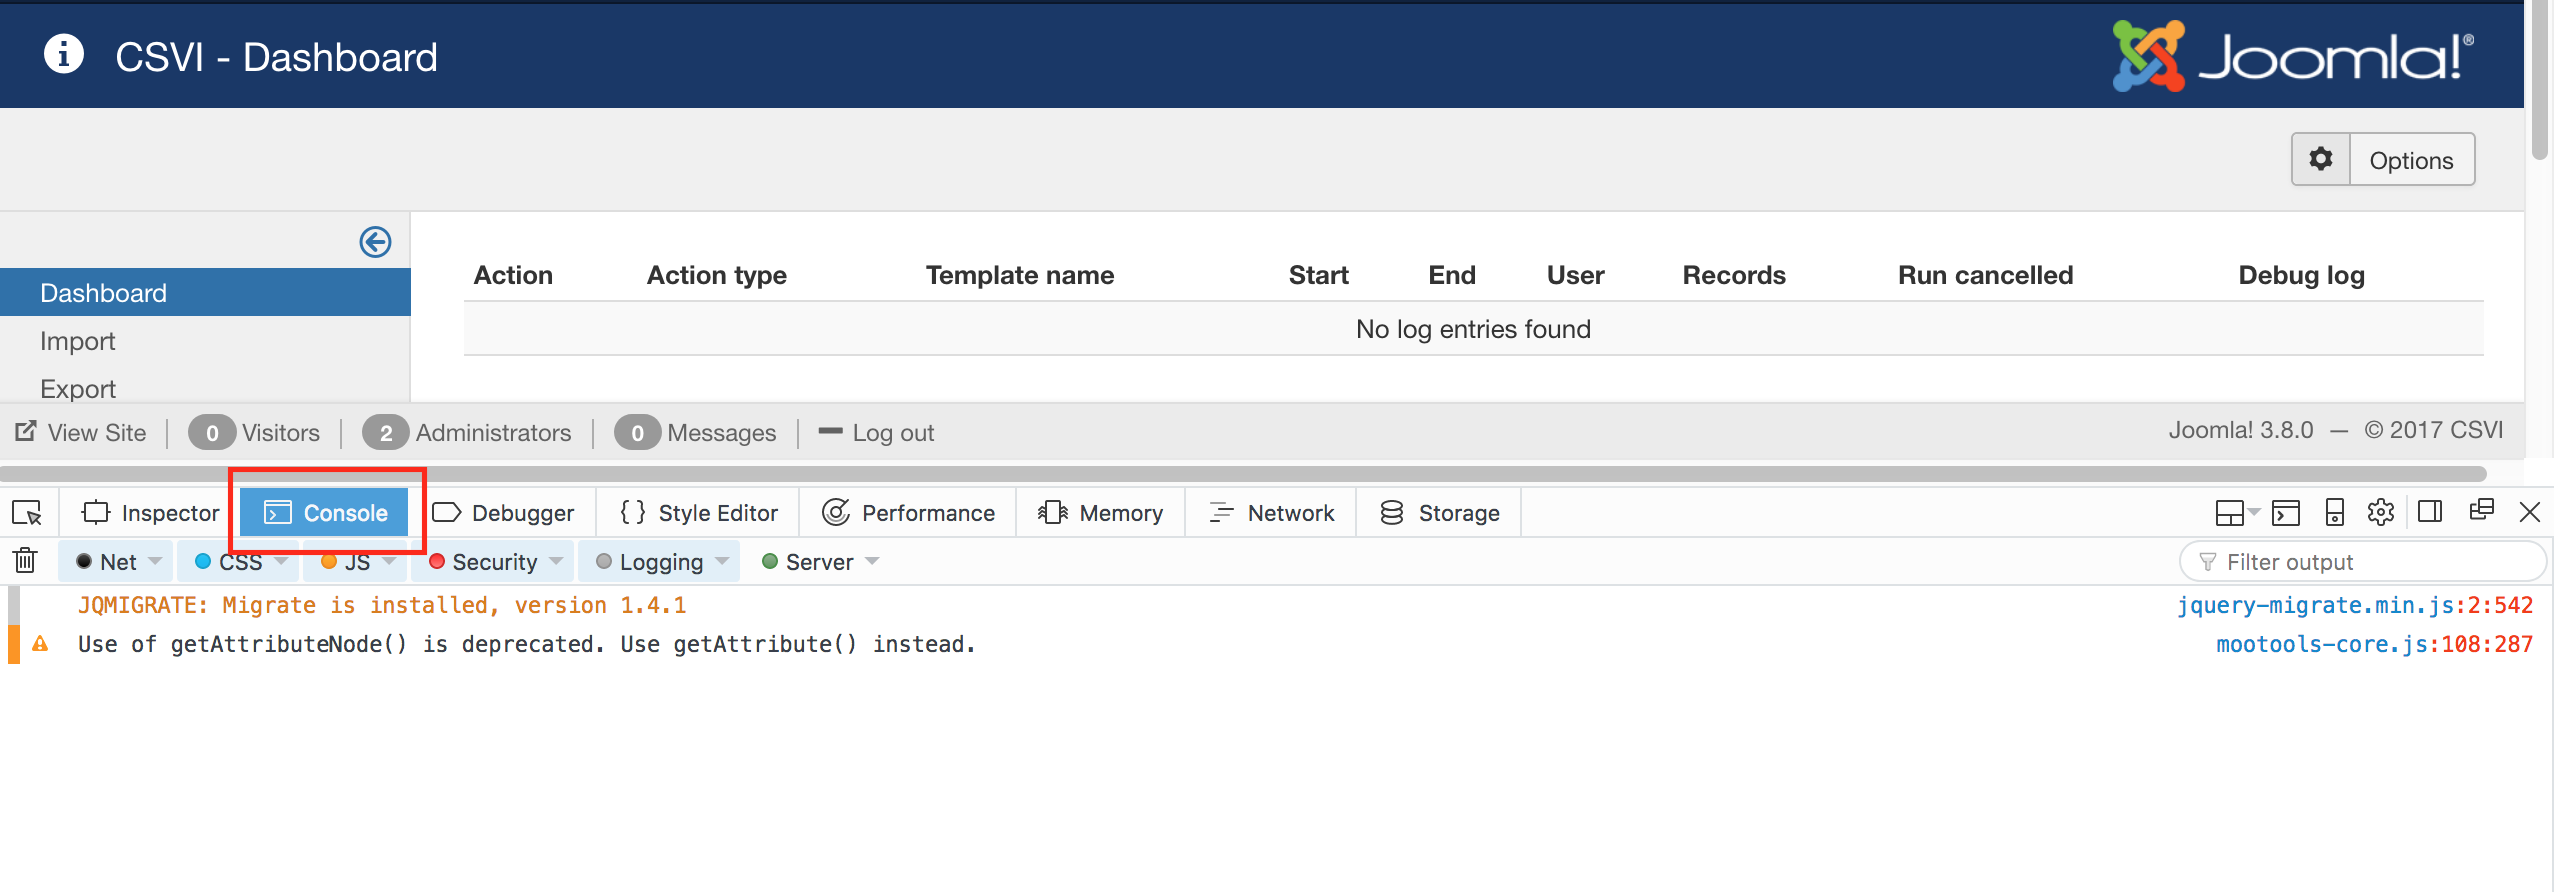
If you do not see the bar with Net, CSS, JS etc. Click on the Filter Output option. - Make sure that Enable Persistent logs is checked in Settings panel so that the import information is not lost.
- Start the import/export/maintenance task
- During the execution you can get a screen like this:
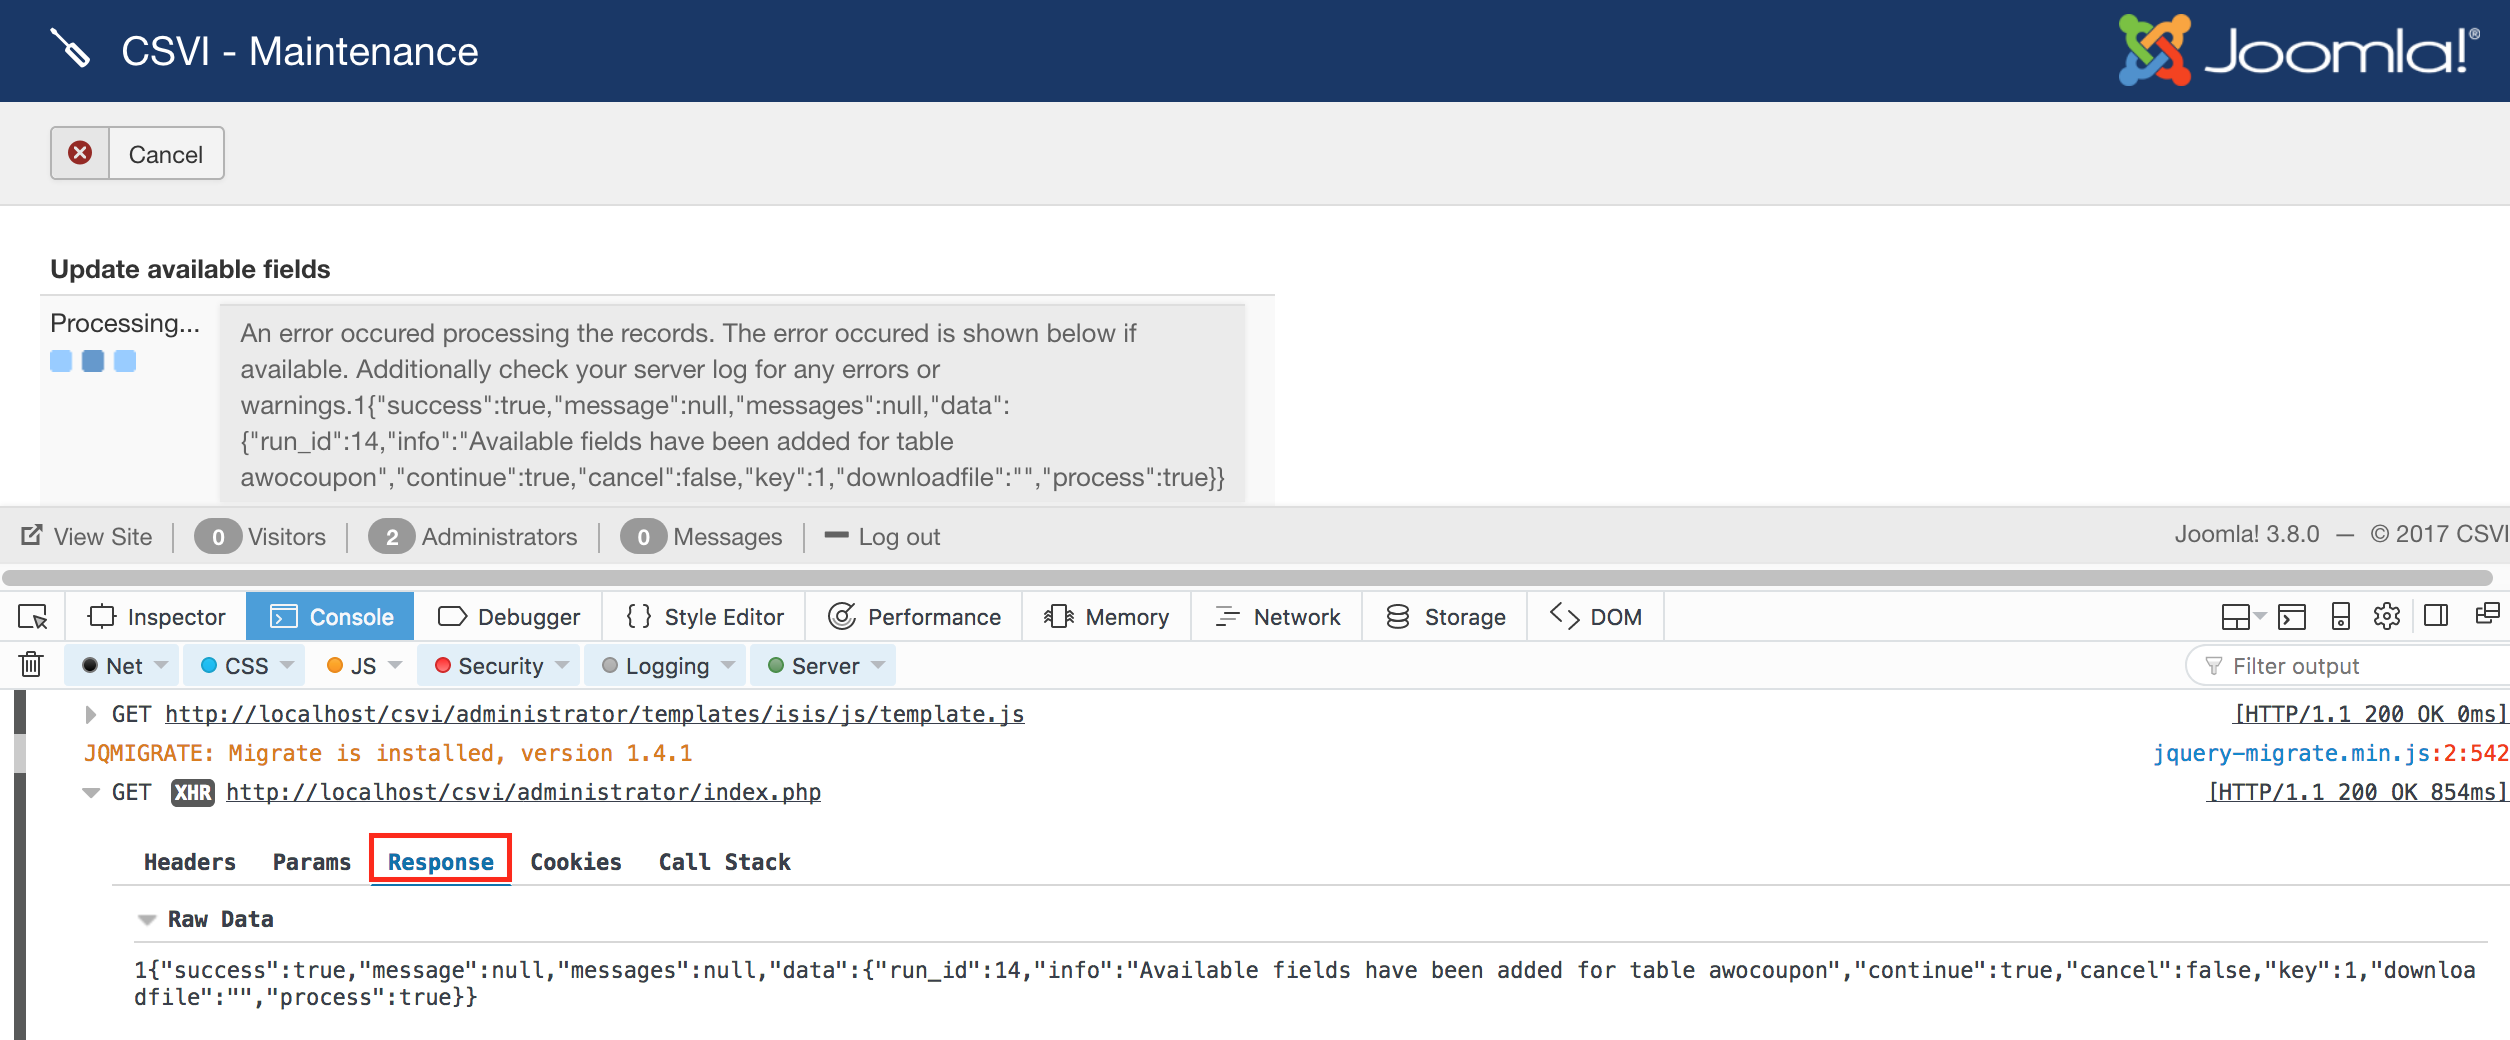
- Click on the URL to see the contents.
- Click on the Response tab
- Here you will either see the error that is causing the problem or some code you may not understand. That is not a problem.
- Either look to fix the error or post the full output on the forum and we will have a look
Custom tables import
| RO CSVI
Background information
The custom tables import is a special import. This import allows you to import data into any available database table in your system. The table must have a primary key, otherwise it will not work.
Creating the template
First we will create an import/export template in which we can store all our preference. Let's say we are going to do an custom table import
- Go to Components
- Go to RO CSVI -> Templates
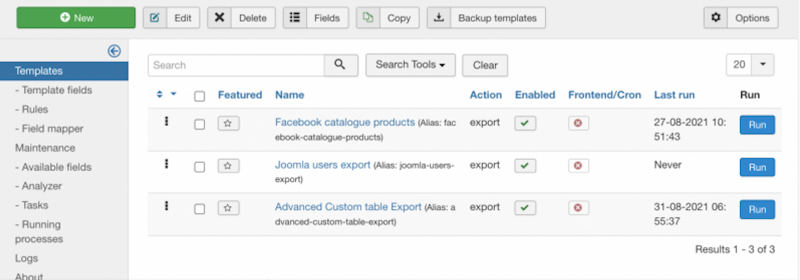
Now you are on the templates page, this is where the import and export templates are created. Click on New button on top corner and follow the Create a template tutorial to create your template.
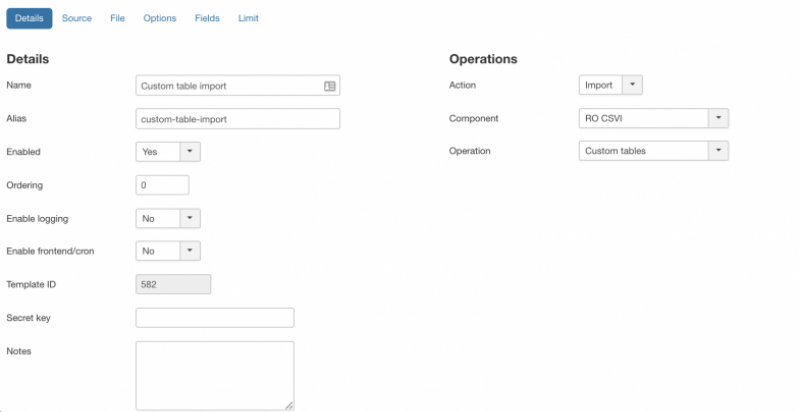
- Give a descriptive name for the template
- Select Import as Action
- Component as RO CSVI
- Operation as Custom tables
- Enable logging if set to Yes
This is a very important option. Setting this to Yes will tell RO CSVI to create a detailed log of all steps taken during export. This is a very useful report to find any potential problems. Whenever you post a question on the forum, make sure you post this file also. It is the only way to help you out. The How to collect debug information article explains this in further detail.
Setting the options
The next step is to tell CSVI for which custom table you want to import, from the options tab, select the table.
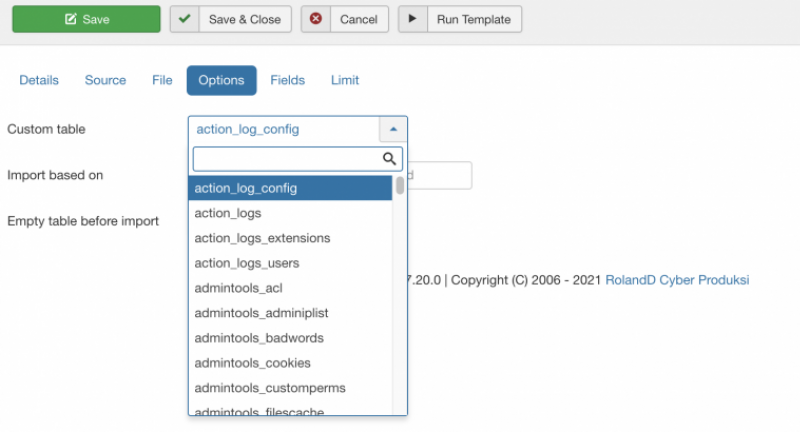
You can now set the field based on with which import should be done. It is now not restricted to primary key field but to any valid column name from the database table. On options tab, under the custom table, you can select the import based on field. If nothing is set then custom table primary key field will be used.

Now that the options are set, Don't forget to click on Save to save your changes in your template and make sure they don't get lost.
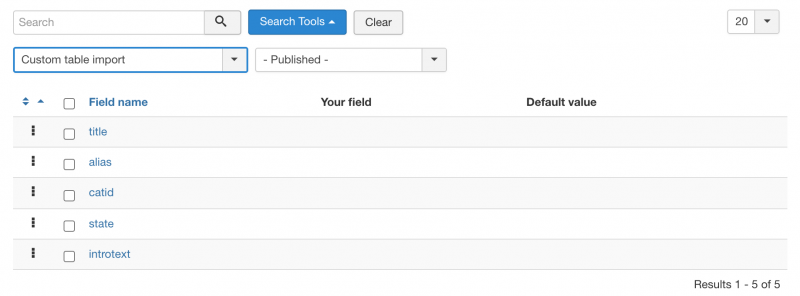
Adding the fields
Now that template is created we need to add fields to be imported. Fields depend on the custom table you have selected for importing. In this tutorial, content table is taken as example, so for importing into content table, fields are added like
Once the template and template fields are set, importing is done in a normal way as we do for other templates.
Validation
The custom import does not do any validation on the data being imported. You will have to make sure that the import data is correct.
Adding and updating
Data is managed based on the primary key field of the table. If the primary key field is included in the import file, the data is updated regardless if the primary key exists or not. If the primary key field is not included in the import file, the data is added.
Supported tables
RO CSVI supports all tables that are supported in the Joomla installation to be imported/exported.
Creating A Custom Import File
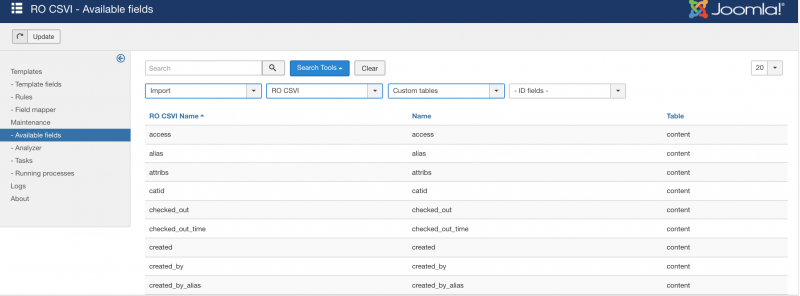
To create an import file for a custom import it is important to know what data is expected for the table you are going to import. To know which fields are available for your custom import, take these steps:
- Go to Components -> RO CSVI ->Maintainence page -> Available Fields
- Select Import
- Select RO CSVI
- Select Custom tables
- Click on Go
- Click on the column Table to sort the fields on Table
- Now scroll to the table you want to import and you can see the fields that are available for import
Import a Custom Import File
To import your custom import file, take these steps:
- Go to Components -> RO CSVI -> Import
- Select Template we created for custom import
- Click Select file
- Choose the file to import and click on Preview from top corner. CSVI will display the lines from the csv file as a preview.
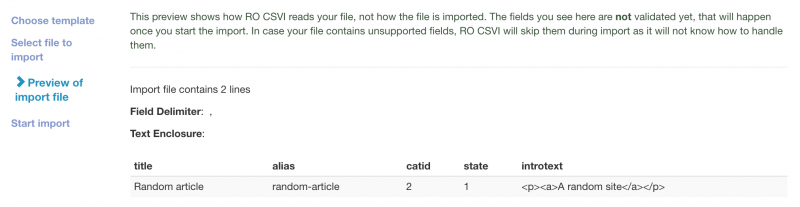
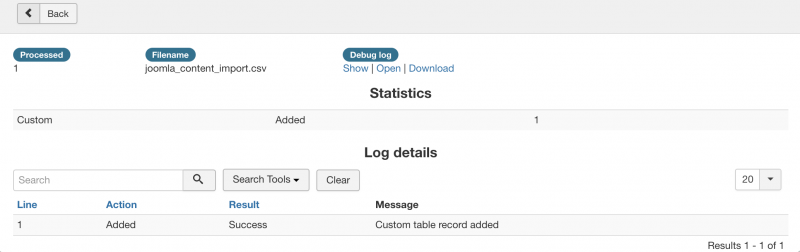
If the data importing is correct, click on Start import from top right corner and RO CSVI will import all data from the csv file. Once import is done status of the import and logs will be displayed as per preferences set in the template.
Support NULL values
Starting from RO CSVI 8.0.0 version, import of NULL values are supported in Custom table import for fields which support it in database. A NULL value can be used to empty a field, to set a field to NULL, the word NULL must be used as shown in the example below.
"name","title","introtext","note"
"sample article","Sample Article","Example sample article to explain usage of NULL values",NULLCan I mix fields from different imports/exports?
| RO CSVI
No, this is not possible. You can only use the fields available to one chosen import or export type.
How to CSVI?
| RO CSVI
How to CSVI?
This is the question that most people ask themselves when they get to the point where they want to maintain their inventory. Though updating inventory via the provided user interface is possible, it is far from convenient if you have more than a few dozen products. Many suppliers will give you a list of products in CSV format, surely you do not want to type out that list by hand.
At this point you have 2 options:
-
Import the list directly into the database using a tool like phpMyAdmin
-
Import the list using CSV Improved
The downside of the first option is that you have to know the database structure of VirtueMart. This is where CSV Improved steps in. Through the same backend where you manage your shop, you can manage your imports and exports. CSV Improved gives you a friendly user interface for importing and exporting your data.
The alternative to using CSV files is using XLS (Excel) files for import. In case of XLS files the Delimiters section can be skipped because it is not applicable for XLS file.
A friendly warning beforehand, there is a steep learning curve but for those who persist you will be rewarded.
What is CSV?
CSV stands for comma separated values and is a common format to exchange data between different systems. A typical file looks like this:
field1,field2,field3
While this works fine for numeric data or plain text with no special characters, the trouble starts when a field contains product descriptions. According to the standard, a comma cannot be used as this separates each field. This is where the delimiters step in.
Delimiters ... a matter of separation
An example:
field1,field2,field3
tube1,Green, blue and red,Mixed paint
The system will find the first line and see 3 fields however the second line will lead the system to think there are 4 fields. The comma in the color description breaks the system. The name might imply the comma is to be used for separation, actually any kind of character can be used as a delimiter. There are 2 kinds of delimiters:
-
field delimiter
-
text delimiter
The field delimiter
The field delimiter separates the different fields in a CSV file. Though this originally is a comma, other characters can also be used.
The text delimiter
The text delimiter is used to mark the beginning and end of each text field. This makes it easier and more accurate for the system to determine the beginning and ending of each field. Changing the example shows the following result:
"field1","field2","field3"
"tube1","Green, blue and red","Mixed paint"
The data is now easy to distinguish and the system will read it correctly. Now the system can recognize each field correctly as the comma in field2 is enclosed between double quotes.
Matchmaking ... a fine art
With the data clearly separated the system needs to be told what data is going to be imported. The names field1, fied2, tube1, mixed paint etc. do not mean anything. To the system it is only a combination of numeric and alpha-numeric characters.
The way to tell the system what data is going to be imported is by giving each field a name that the system already knows. All the field names that the system knows are collected in the available fields page. Most fields are specific to a certain import or export.
With the list of available fields at hand, the field names can be matched (or not). The first field we have is field1. Looking at the data on the second line, it tells me this is the unique identifier for this product. A search through the list will come up with product_sku as the field name needed here. A first match is made.
"product_sku","field2","field3"
"tube1","Green, blue and red","Mixed paint"
The second field is next. Again going through the list will show that product_desc is the field name best applicable here. Another match has been made.
"product_sku","product_desc","field3"
"tube1","Green, blue and red","Mixed paint"
Repeat this procedure for each field in the file until all field names have been filled. When a field cannot be matched, the field cannot be imported and should be removed from the file. After all fields are matched the example looks like:
"product_sku","product_desc","product_name"
"tube1","Green, blue and red","Mixed paint"
Even though no field is always mandatory, the product_sku field is probably the most needed field as this tells the system what product the data is for.
Templates ... give the answers
With the file ready for import, the system needs a few answers before the file can be imported. Instead of answering the same questions on every import, CSV Improved makes use of templates. Templates contain all the answers and settings needed for an import or export.
First step is to create a new template by clicking New on the template list page. This shows the template settings page, here the different settings can be set that are going to be needed for import.
The import type is the type of import to perform. Since the test file is for adding a new product, the choice here is product import. The name of the template can be anything descriptive. The delimiters will be the ones used in the file. For the test file the field delimiter is set to ^ and the text delimiter is set to ~.
Now the import tab is important because the test file is going to be imported. The first line in the test file contains all the necessary information so the import will use the column headers for configuration. The skip the first should not be checked as we need the first line for the configuration. To be able to update the product in case it already exists overwrite existing data is also checked.
The template can now be saved as all preferences have been set.
Take off ... buckle up
With both the template and file ready, the import can begin. Steps to take to import:
-
From the control panel click on Import
-
Select the template to use for import
-
Select the file to import
-
Click on import
Now sit back and enjoy.
The end
After the import has been completed a result screen is displayed stating how many records were processed and how they were processed.
That is how to CSV!