RO CSVI
Source tab option to Load from server
| RO CSVI
Set the absolute path of import file to load directly from server. The path will be set under Load from server field. Test Path button is used to check if the path is valid or not. This option is very useful when running the import as cron so RO CSVI can load the file automatically for cron import.

If the path is not a valid path, a message is shown as

If the path is a valid path, a message is shown as

How to enable updates in RO CSVI?
| RO CSVI
Updating RO CSVI is easy using Joomla installer.
Getting the Download ID
The first thing to get is the download ID. You can get the Download ID by following these steps:
- Log in to the website https://rolandd.com
- After you have logged in, click the My Subscriptions link
- You will then find the Download ID for each subscription. Copy the Download ID from here.

Setting up the Download ID
With the Download ID, go to your website and follow these steps:
- Login to the backend of Joomla
- Go to System
- Under Update click on Update Sites
- Look for RO CSVI in the list
- Click on the title RO CSVI
- You can enter your download key
- Save the changes

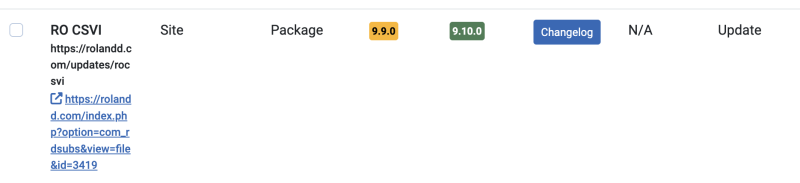
Updating RO CSVI
You can now update RO CSVI using the Joomla updater.
- Go to System
- Under Update click on Extensions
- Click on Check for Updates button in toolbar
- You should now see RO CSVI in the list
- Select RO CSVI and click on Update
- Your RO CSVI should now be updated by Joomla.
After the update has finished you can return to RO CSVI.
Save a CSV file as UTF-8
| RO CSVI
Often it is almost impossible to know if your CSV file has been encoded as UTF-8. Programs cannot tell you for certain because there is no setting in the file that contains this information. The closest to come to determining a file's encoding is an educated guess or ask the person who created the file. Usually the person creating the file doesn't know either. All is lost then? Not really, you can create your own file and save it with a known encoding.
The choice of spreadsheet in this case is OpenOffice or LibreOffice. If you use Excel to do all your work in, you are out of luck as Excel has no option for enforcing an encoding when saving a file as CSV. This does not mean you can no longer use Excel but when saving the file for CSV open your Excel file with OpenOffice or LibreOffice.
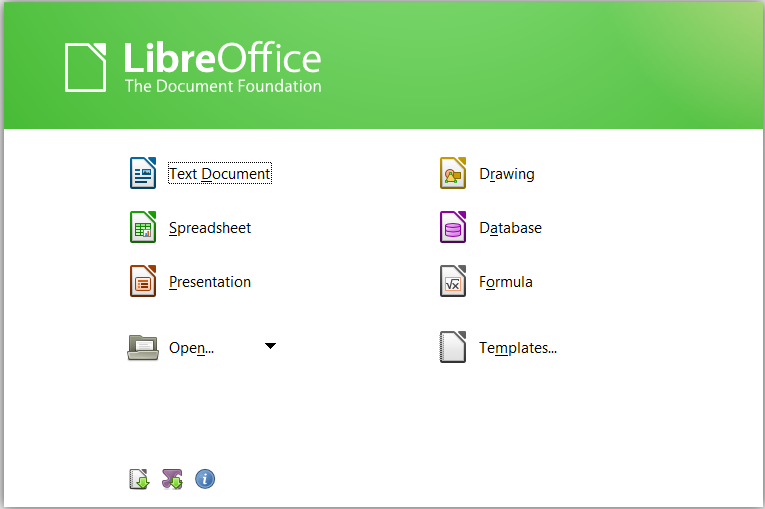
Start OpenOffice/LibreOffice
In this example I will be using LibreOffice (the screens are the same for OpenOffice).
Open the file
Click on Open and select the file on your computer that you want to save as UTF-8 encoded file.
Save the file
We are not going to use CTRL-S to quickly save the file but we choose File -> Save As (CTRL-SHIFT-S) and then you get this screen:
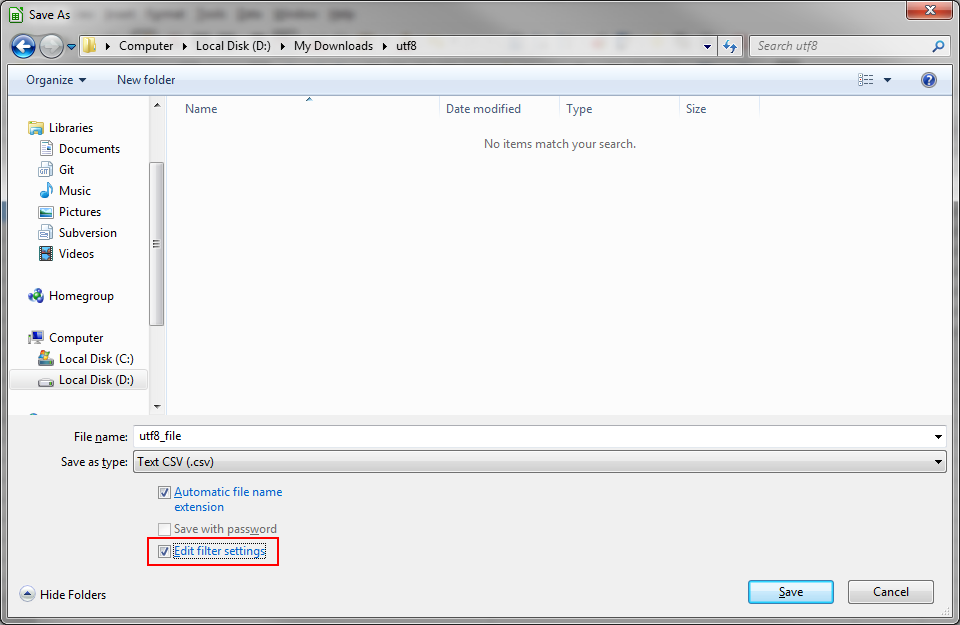
There are a few things that are important:
- Give your file a name
- Save as type must be set to Text CSV (.csv)
- You must enable the Edit filter settings
After that is done click on Save.
Setting the filter settings
After you have clicked on Save, LibreOffice will ask you what settings you want to use for the file.
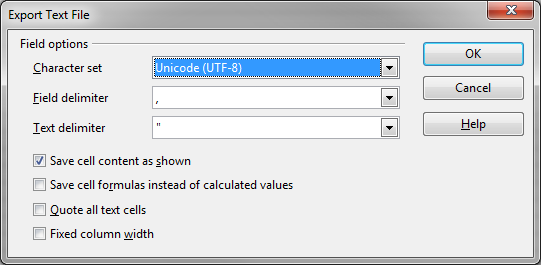
The character set must be set to Unicode (UTF-8) as this is what we want to achieve, a UTF-8 encoded file.
The field and text delimiter you can set as you wish or leave it as it is, all other settings can be left unchanged.
After that is done, click on OK.
You now have a UTF-8 encoded file.
Use of Group by and Sort by fields
| RO CSVI
Required fields
- CSVI Pro 6.0+
- Joomla 2.5 /3.x
When an export template is created, in the fields tab, there are two options Group by and Sort by fields that can be set. Here we will explain what is the use and how to use them
Group by Fields
Often when we do exporting data from database tables, there is always chance of seeing duplicate rows getting exported. By setting group by fields this can be avoided. Say for example, if we are exporting Virtuemart product and we need unique product name to be exported, simply by setting the product_name field in group by field will do the trick.
Also, grouping will be done in the order of fields added. In this example first grouping will be done using product_name and then with the retrieved result again grouping will be done with the second field, here it is category_id and so on.
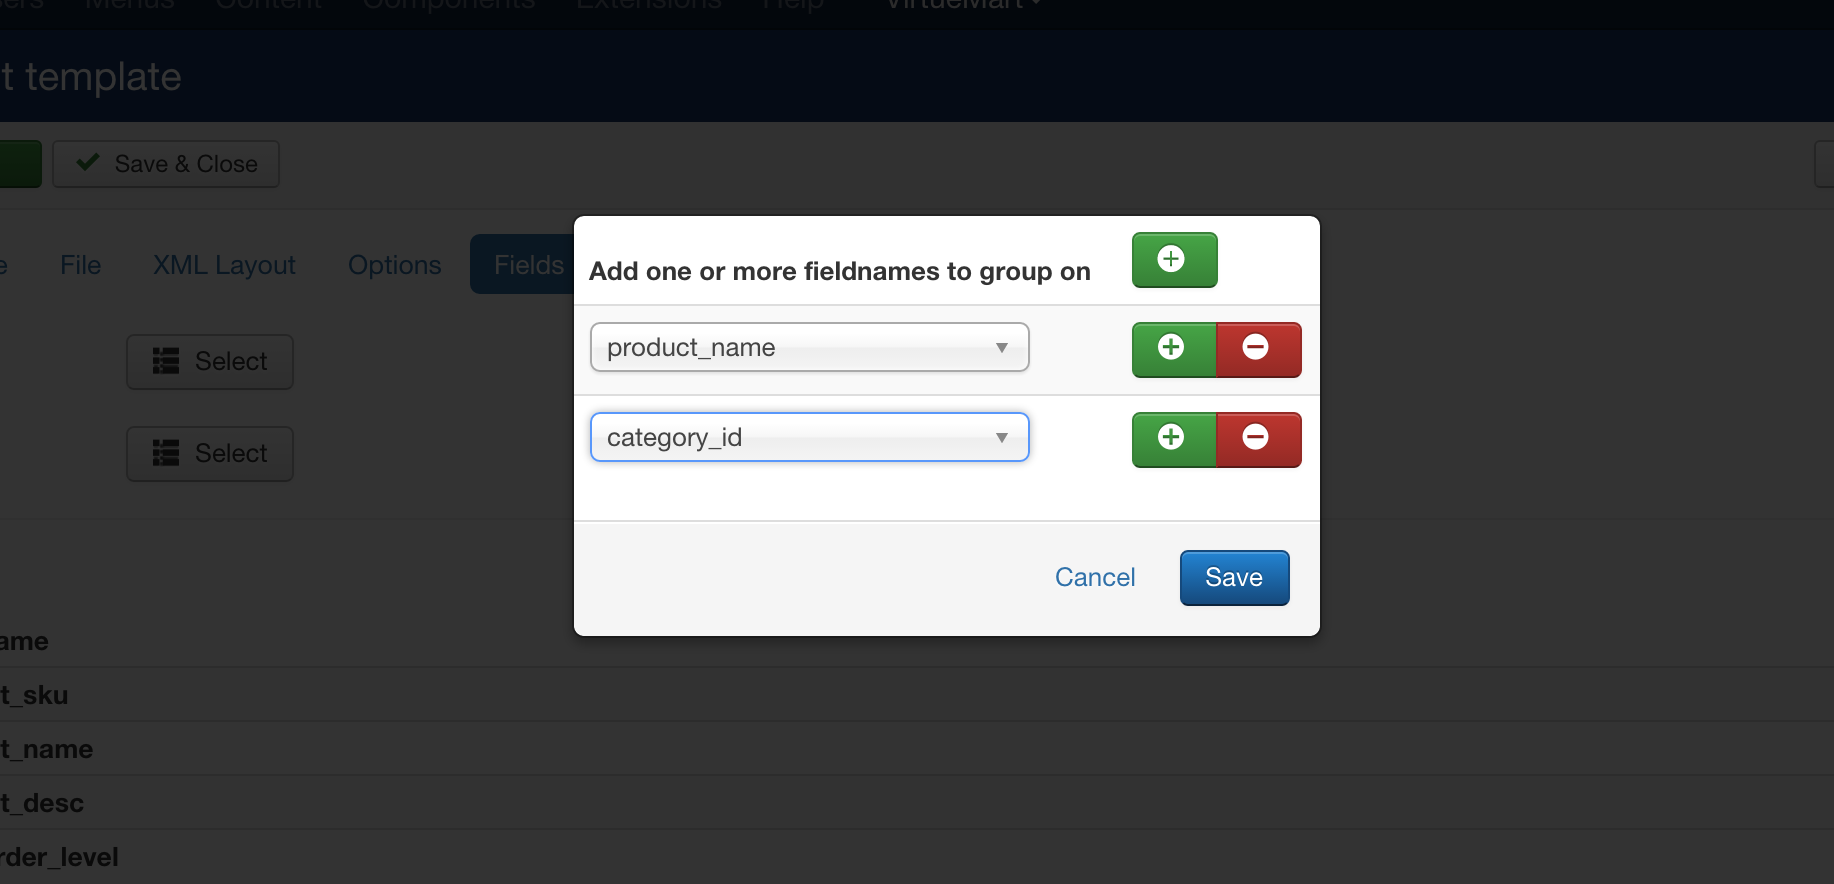
Multiple fields can be added/deleted by clicking "+/-" next to each field. Dont forget to save the fields by clciking Save button.
Please note that in case you want to group on a field which you do not want to include in export, add the field to the template, set it to unpublished so the field is not included in export file. After that you can select the field here to group on that field.
Sort by Fields
Not only we can group by data but we can even sort them as required. Sort by will sort string type fields in alphabetical order and by default in number type fields in ascending order. It depends on type of field added for sorting.
For example, in Virtuemart product export template to sort by product_name and product_price simply add the fields as shown. Multiple fields can be added/deleted by clicking "+/-" next to each field
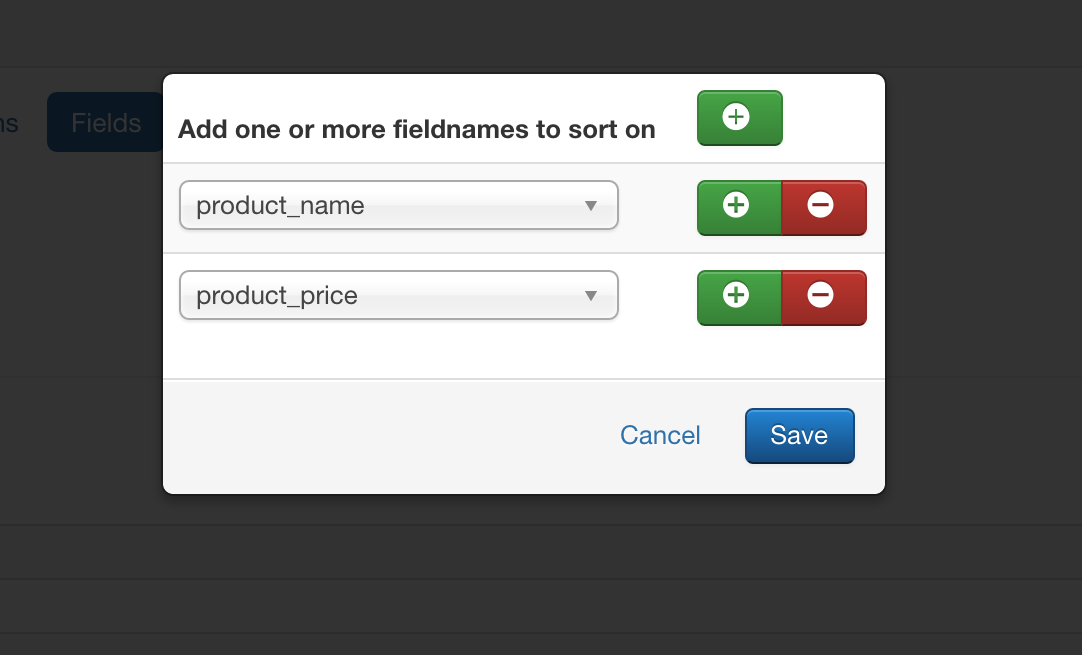
Same like groupby, sorting is also done based on the order of fields added. As per the example here Sorting is first done using product_name field and the result will be again sorted using product_price fields and so on.
Source tab option to Load from computer
| RO CSVI
The option to load import file from user computer. This option of selecting the import file can be seen after selecting the import template from RO CSVI Import page. The selected file content is then shown in Import preview page and thereafter used for import.
