RO CSVI
Import multiple files from folder
| RO CSVI
Its more often that users think that CSVI can import only one file at a time but that is not the case at all, CSVI can run import for multiple files if the location is set to be a folder instead of file. The below steps will explain how an import from folder can be set for an import routine.
1. Create a import template needed for the routine as explained in the Create template tutorial.
2. Now edit the template and go to Source tab.
3. In the drop down list, select the option "Load from Server".
4. A text box to give the path is shown, enter the path of the folder where CSVI needs to read the files from.
5. Save the template.
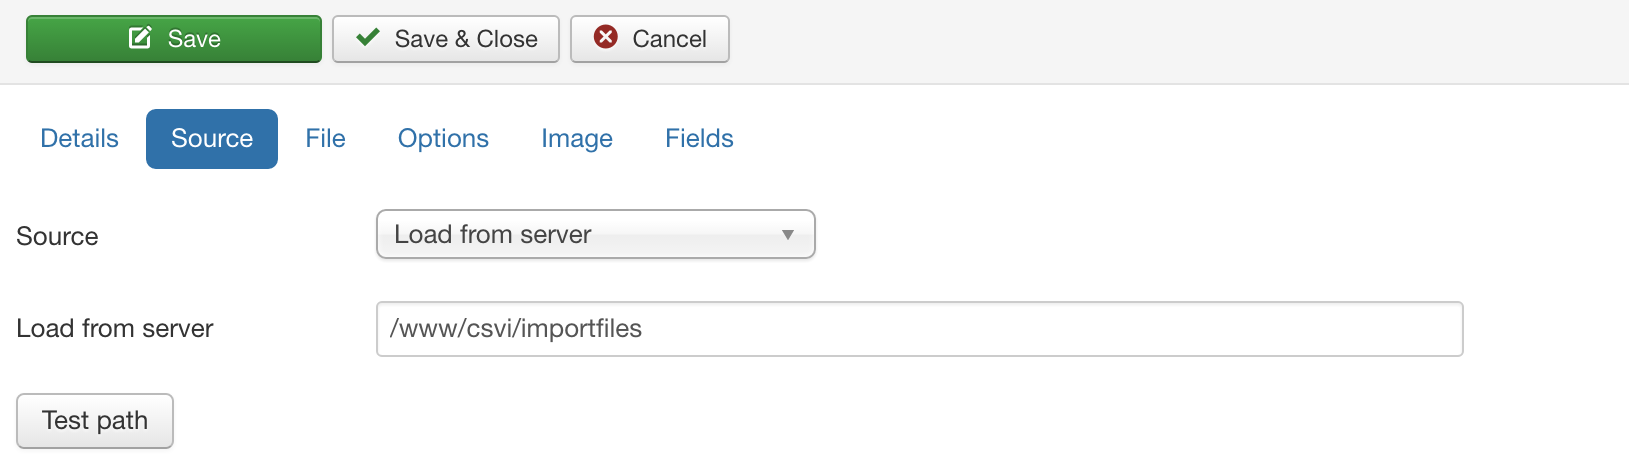
And thats all has to be done for importing multiple files. Now run the import and CSVI will read the files one by one from the folder and does the import.
Edit a template
| RO CSVI
To edit a template in CSVI you take the following steps:
- Click on Components
- Click on CSVI Pro
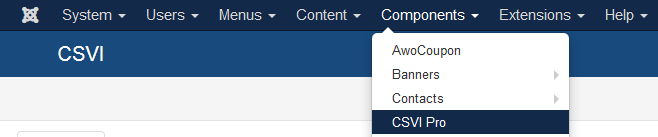
- Click on Templates in the sidebar menu
- Click on Template name you want to edit
- Edit the options of Template by going to corresponding tabs.
- Click on Save or Save and Close and save the template settings.

RO CSVI supported operations
| RO CSVI
In RO CSVI we offer a number of import and export routines to manage your data. This is the complete list of RO CSVI supported operations. The majority of operations are available for both import and export although some are for a specific task so they can only be used for either import or export.
Writing a rule plugin
| RO CSVI
Rule plugins are a powerful new tool in CSV Improved because it allows us with surgical precision to tailor the import and export process. Out of the box CSV Improved comes with 4 such plugins:
- Combine
This adds the option to combine fields - Copy
This adds the option to copy the content of one field to other fields - Margin
This adds the option to recalculate prices - Replace
This adds the option to replace values in a field
These four plugins are useful but not always what you are looking for as you may need something specific. That is why CSV Improved can be extended by writing your own plugins.
Structure of a rule plugin
A CSVI rule plugin is actually a regular Joomla plugin of the type csvirules. A plugin consists of these files:
- foo.php
- form_foo.xml
- foo.xml
The main file
The main file is foo.php, this file contains all the code that does all the work. This is a class that is created like this:
class PlgCsvirulesFoo extends RantaiPluginDispatcher
A rule plugin must always extend the RantaiPluginDispatcher as this dispatcher calls the plugin.
The class contains several mandatory functions and variables:
-
private $id = 'csvifoo';
-
public function getName() {} -
public function getSingleName($plugin) {} -
public function getForm($plugin, $options=array()) {} -
public function runRule($plugin, $settings, $field, CsviHelperFields $fields) {}
$id
This is the unique ID of your rule.
getName()
The getName() function provides CSVI with the name and ID of your rule, this is shown in the dropdown of available rules when creating a new template field.
getSingleName()
The getSingleName() function provides CSVI with only the name of your rule. This is used for display purposes.
getForm()
The getForm() function provides CSVI with a form the user can fill in if your rule requires certain settings. For example a field that allows the user to set which fields should be affected, or a field with values that needs to be matched. It can be almost anything. This function relies on the existence of the form_foo.xml file.
runRule()
The runRule() function does the actual work, this is where the magic happens. In this function you put all the logic of your rule and update the fields with their new values.
The form file
The form file is form_foo.php. This file is optional and only needed if you want to get input from the user. The fields used are standard JForm fields so you can use any field available in Joomla. The structure of the file looks like this:
<?xml version="1.0" encoding="utf-8"?>
<form>
 <fields name="pluginform">
 <fieldset name="foo">
 <field name="source"
 type="textarea"
 rows="5"
 required="true"
 class="input-xxlarge"
 filter="raw" />
 </fieldset>
 </fields>
</form>
The only requirement is that the fieldset name matches the name of your rule, in this case foo.
Running your code
The runRule() function is the heart of your rule, without it, nothing is going to happen. Here are some pointers to help you understand what is going on in runRule(). The function takes 4 arguments:
- $plugin
- $settings
- $field
- $fields
$plugin
This is the ID of the plugin being called. So you need to check if it is your name being called, if not, do not run your code.
$settings
This is an object with data saved by the user from the form provided by your rule.
$field
The current field being processed.
$fields
An instance of CsviHelperFields. This is the class to use to manipulate the fields because it contains all the fields.
There are 2 ways in which you can modify a field that is being imported:
- $fields->updateField()
This function is the same for both import and export - $fields->set()
This function takes different arguments depending on whether it is an import or export. The updateField() is the preferred method of modifying a field.
Identifying a field
Fields are always identified by the value in the xml_node variable. This variable contains the unique identifier for that field. One word of caution, when dealing with XML files that have duplicate nodes, this field may contain a value that is the same for multiple fields.
Installation XML
To be able to install a plugin in Joomla, an XML file is required. This is a regular Joomla XML file, just make sure the group is set to csvirules as shown here:
<extension version="3.3" type="plugin" group="csvirules" method="upgrade">
Language files
In case you want to make your rule plugin multi-lingual you can include language files as per the Joomla standard.
Examples
If you want to check out some examples, have a look at the rule plugins that come with CSV Improved, they contain all kinds of ways of handling the fields.
Creating own HTML export file
| RO CSVI
This article explains how to create your own HTML export file for personalised customisation. By doing this there is no core files modified so updating CSVI extension is easy and the personalised changes are not lost.
To do this, under the folder administrator\components\com_csvi\helper\file\export, look for the file csvimproved.php. This is the actual file which is used for exporting html content. To have your own file, make a copy of this file in the same location. Say for example we are making a copy of the file with name customhtml.php.
Now open the duplicated file and check for the text CsviHelperFileExportHtmlCsvimproved (class name in the file) change it to name matching to the name of the new file. Here it is customhtml.php so the text will be changed to CsviHelperFileExportHtmlCustomhtml and save the file.
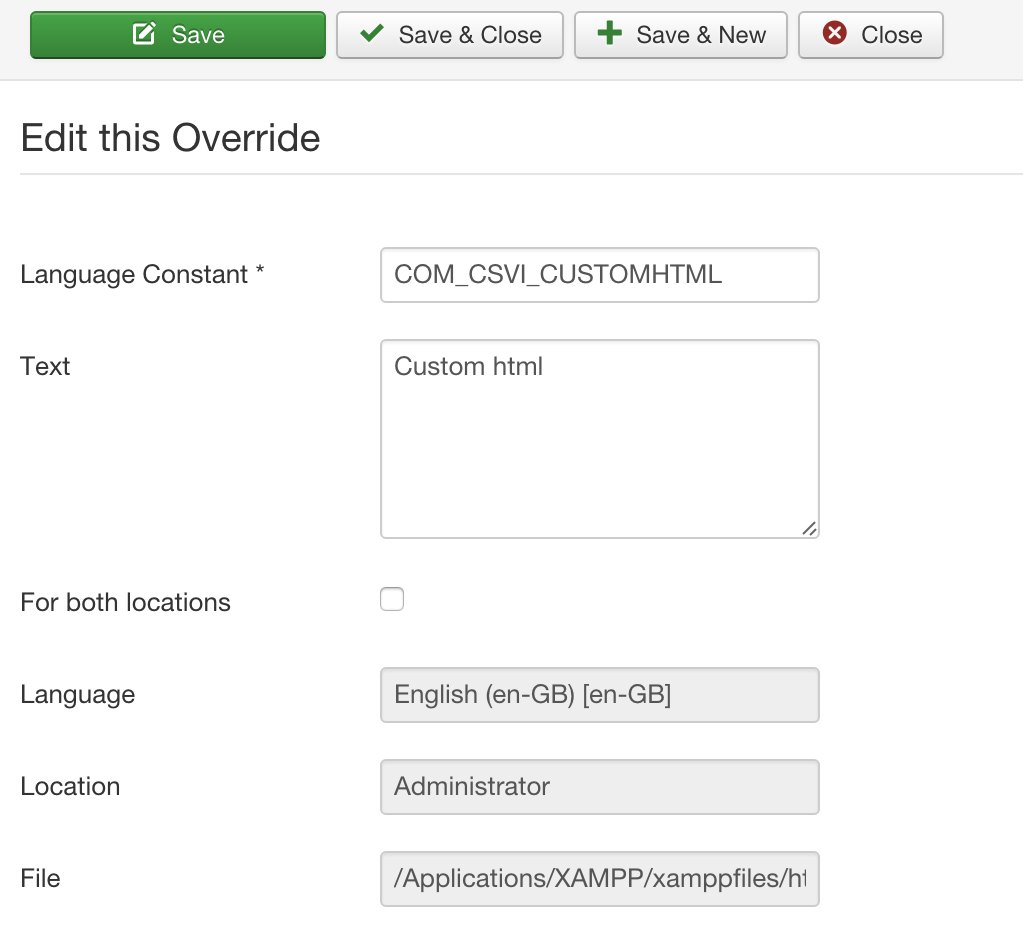
On Joomla administrator interface, go to Extension >> Languages. Click on Override on the side menu. Select the override for the language you have as default. Remember we are doing the language override for administrator as it is for CSVI export template settings. For English, it is English(en-GB) - Administrator, click on the new button on top.
Create a language override string for the new class file we created just now and Save it.
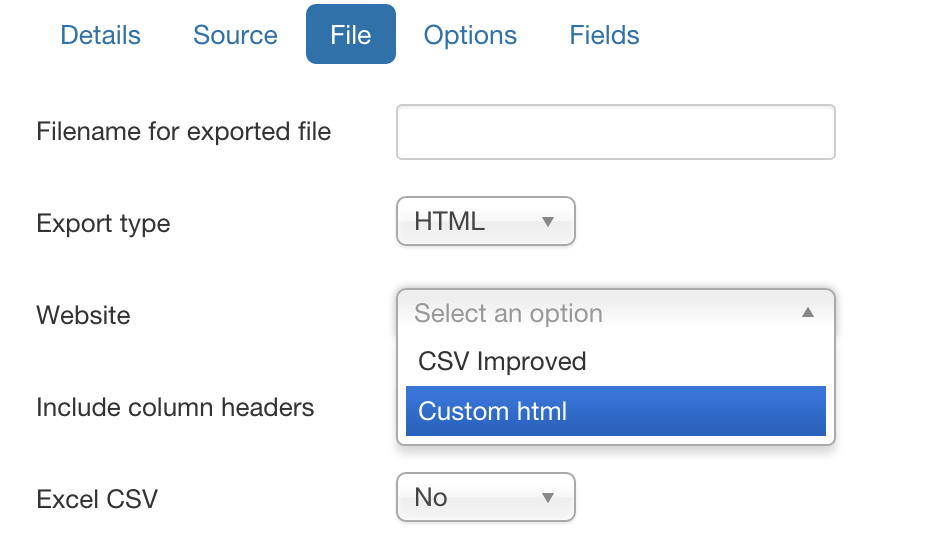
Now the new custom html file will be available in the export template settings under file tab.