RO CSVI
500 Internal Server Error
| RO CSVI
The Internal Server Error is probably the worst error you can get. The error means that the server is telling you something went wrong but not what has gone wrong. It is now up to you to find out what has gone wrong.
Kown causes
There are a number of known causes and easy fixes:
- Folder and or files do not have the correct privileges
- Solution: Set the correct privileges for the folders and files
Folders should have permission 755
Files should have permission 644
- Solution: Set the correct privileges for the folders and files
- Missing folders and or files
- Solution: Re-install necessary packages and/or patches
- Trying to resize images that are too large
- Solution:
- Make sure your large images are not too large
- Create your own thumbnails
- Set the maximum size of the large image RO CSVI should create a thumbnail for
- Solution:
- Old PHP version
- Solution: Check that the PHP version used is at least 7.4 but recommended is PHP 8.0 or higher
- BOM in your file
- Solution: Set the Auto-detect delimiters to No in your template and specify them manually in the template.
- Export of SEF URLs
- Solution: When exporting SEF URLs it can be a huge strain on the server. Instead of generating SEF URLs during export you can pre-fetch the SEF URLs by going to Maintenance -> Select your extension -> Refresh SEF URLs. This will populate the database with the generated SEF URLs and the export will read them from the database instead of requesting them from the server. Make sure you have set the Domain name in the RO CSVI Settings.
- Incompatible addon versions
- Solution: Check that RO CSVI and the addons are all the same version. Enable the option Check addon version in the RO CSVI Settings
Error reporting
In some cases the 500 Internal Server Error can be changed to a visible error by setting the Error Reporting to Development as explained in the steps below.
- Go to System -> Global Configuration
- Click on the Server tab
- Set Error Reporting to Development
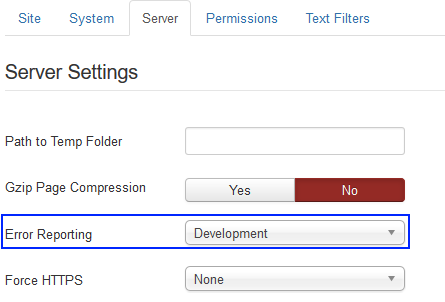
- Click on Save & Close
Once the Error Reporting is set to Development, run the import again and see if you get the real error. If not, you will have to check the Server error log section.
Server error log
The real error is in the server error log. This may not be a log you have access to, so contacting the hosting provider is advised in that case. Explain to them the situation and that you would like to know which error has been generated by the server. With the real error in hand it should be easy to fix the issue. If you need help, post the real error in the forum and we will gladly assist you.
Error building Admin Menus
| RO CSVI
This is an issue caused by Joomla and the only way to fix this is to manually clean up your system. To clean up your system take the following steps:
- Delete all references in the jos_extensions table where element is com_csvi. Replace jos with your own prefix. Find them with this command:
SELECT * FROM `jos_extensions` WHERE element="com_csvi"
- Delete all references in the jos_assets table where name is com_csvi. Replace jos with your own prefix. Find them with this command:
SELECT * FROM `jos_assets` WHERE name="com_csvi"
- Delete all references in the jos_menu table where title is like com_csvi. Replace jos with your own prefix. Find them with this command:
SELECT * FROM `jos_menu` WHERE title LIKE "COM_CSVI%"
- Now install CSVI again as outlined in the Install CSVI in 5 steps tutorial.
Adding tempate fields
| RO CSVI
Required fields
- A template has already been created as explained in the Create a template tutorial
Template fields are needed by CSVI to know which fields you want to import/export.
To start adding fields to your template go to Templates -> Template fields and you will see:
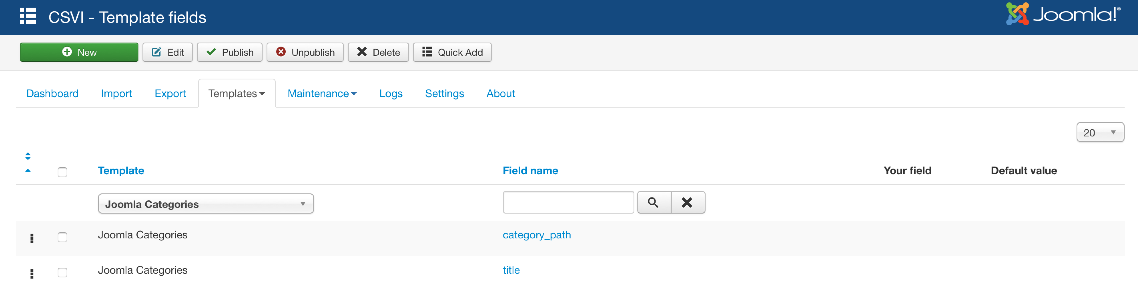
There are 2 ways to add fields:
- Use the New button
- Quick Add button
New button
After clicking the New button you will get a new screen to add your field. The screen you will see depends on your template.
Import field
An import template will show this screen:
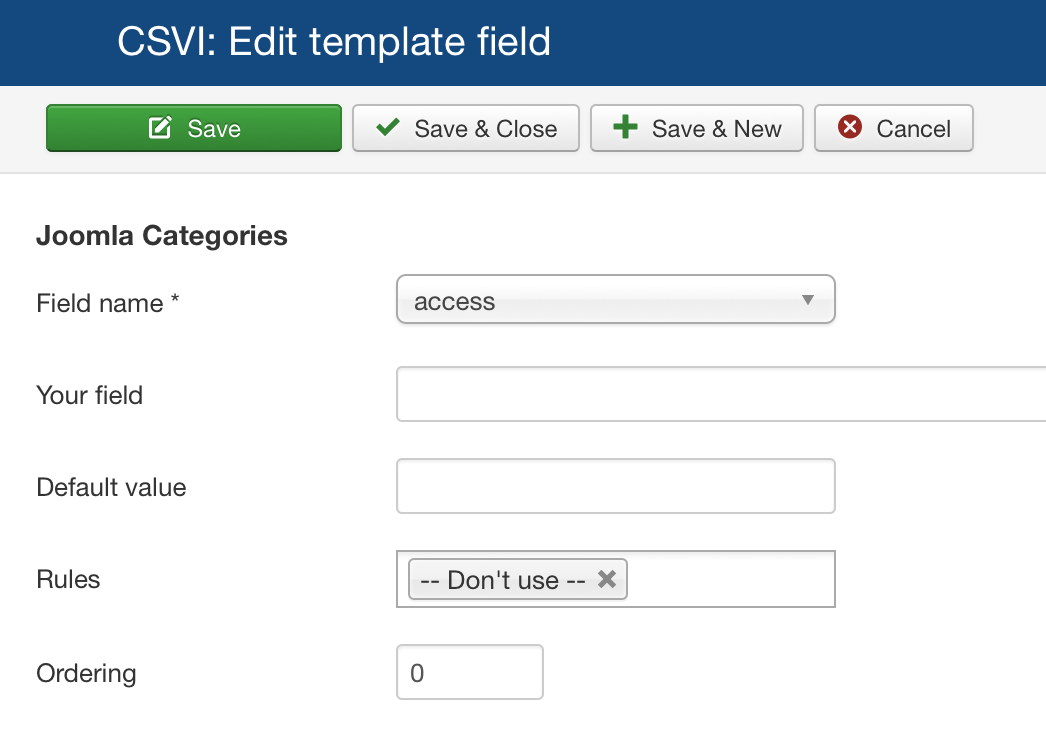
Import fields
- Field name
Select the field that CSVI knows. A full list of fields can be found on the Available Fields page. - Your field
CSVWhen using CSV files with fields you want to combine, set the Field name to combine and in Your field enter the name of the field in your CSV file.XMLEnter the full XML node path where the data is to be found. Unsure which path to use, use the Analyzer to see how CSVI reads your XML file. - Default value
Enter a default value.This value will be used when the field in the import file is empty. - Rules
Choose the rules to apply to the field. - Ordering
Enter the order the field should be in.
An export template will show this screen:
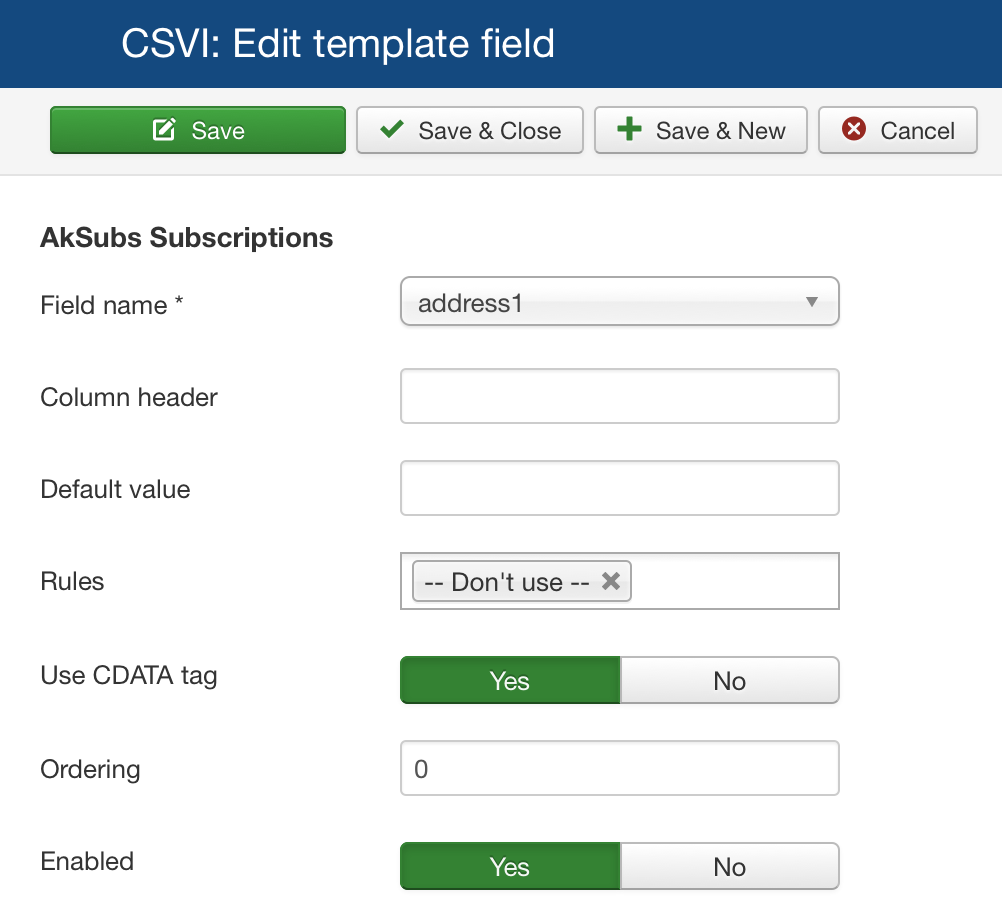
Export fields
- Field name
Select the field that CSVI knows. A full list of fields can be found on the Available Fields page. - Column header
Enter a custom column header. This header will be used instead of the field name. - Default value
Enter a default value. This value will be used if the export finds no value in the database. - Rules
Choose the rules to apply to the field. - Use CDATA tag
Only used for XML. Set this to yes if your field requires CDATA tags in the XML output file. - Ordering
Enter the order the field should be in. - Enabled
Set if the field should be exported. If you are combining fields, set this to No to prevent this field from being added to the export file. The field will still be used for the rule operations.
After you have filled in all the fields click on one of the Save buttons to store the field. You can add as many fields as you need.
Quick Add
The Quick Add button can be used to quickly add multiple fields to your template.
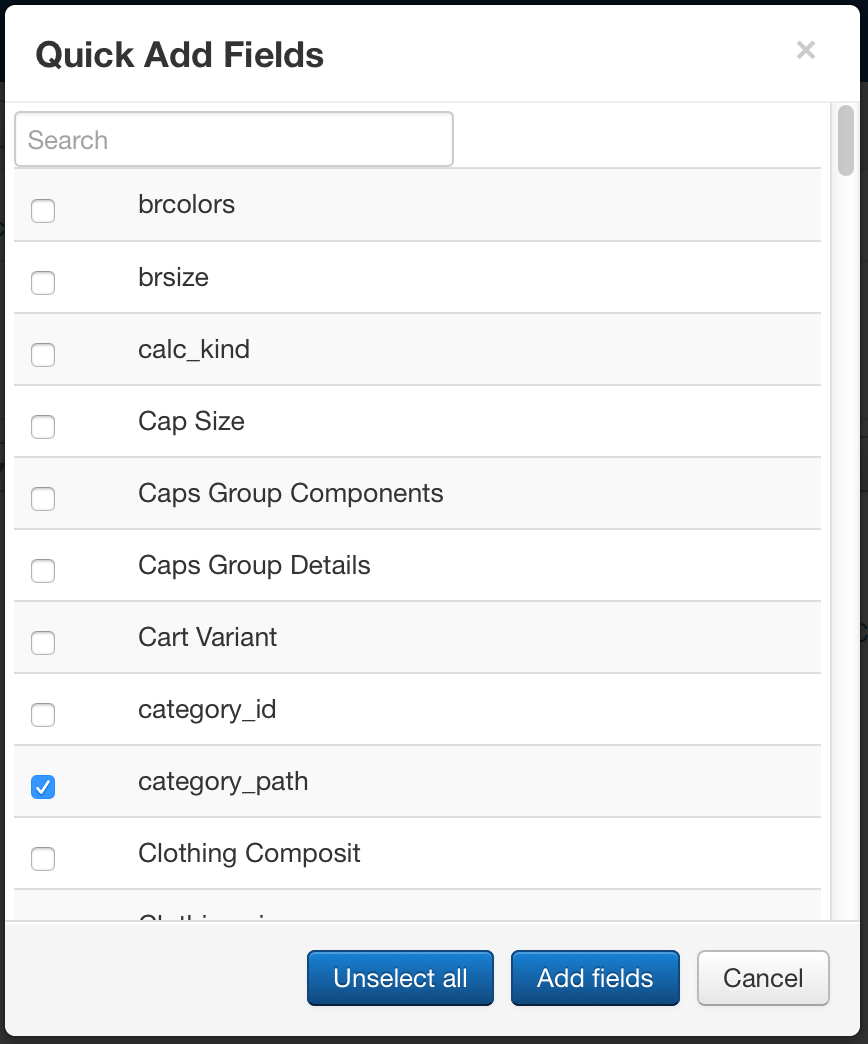
You can select one ore more fields form the list and then click the Add fields button. At first only the Cancel button is visible, the other buttons will appear as soon as a field is selected. The search box at the top will filter the list of fields, this will help to locate fields faster when you have a long list. Previous selected fields will not be lost, they are just hidden while you search.
If you want to edit one of the fields after they have been added, you can either click on the field name or on tick the box and click on the Edit button in the toolbar.
Logged out on import
| RO CSVI
When importing a file you can run into this screen:
Why does this happen?
This happens because you are importing a file that contains a BOM (Byte Order Mark) and your template is set to auto-detect delimiters. A BOM is a set of extra invisible characters at the start of the file, CSVI tries to detect them but this doesn't always work. In more technical terms, your file is encoded as UTF-8Y instead of UTF-8.
How to fix this?
Save your file as a real UTF-8 file or set the option of auto-detect delimiters to No and specify your field delimiter and text-enclosure in your template.
The administrator area is empty?
This means your session is broken, you can logout and then login again and the administrator area should show normal again. If not, the solution below can be used.
I can't login to the administrator area anymore. How do I get in?
The BOM will also break your session, that is why you get logged out. To be able to login you either need to delete your session cookies or wait for your session to expire.