RO CSVI
Excel and CSV
| RO CSVI
The flexibility of Excel with CSV files is quite limited, so limited even that you cannot use your own field delimiter, text enclosure and encoding when opening a CSV file.
VirtueMart Custom fields import
| RO CSVI
Requirements
- CSVI 6.0+
- Joomla 3.0+
- VirtueMart 3.0 or higher
- PHP 5.4
Background information
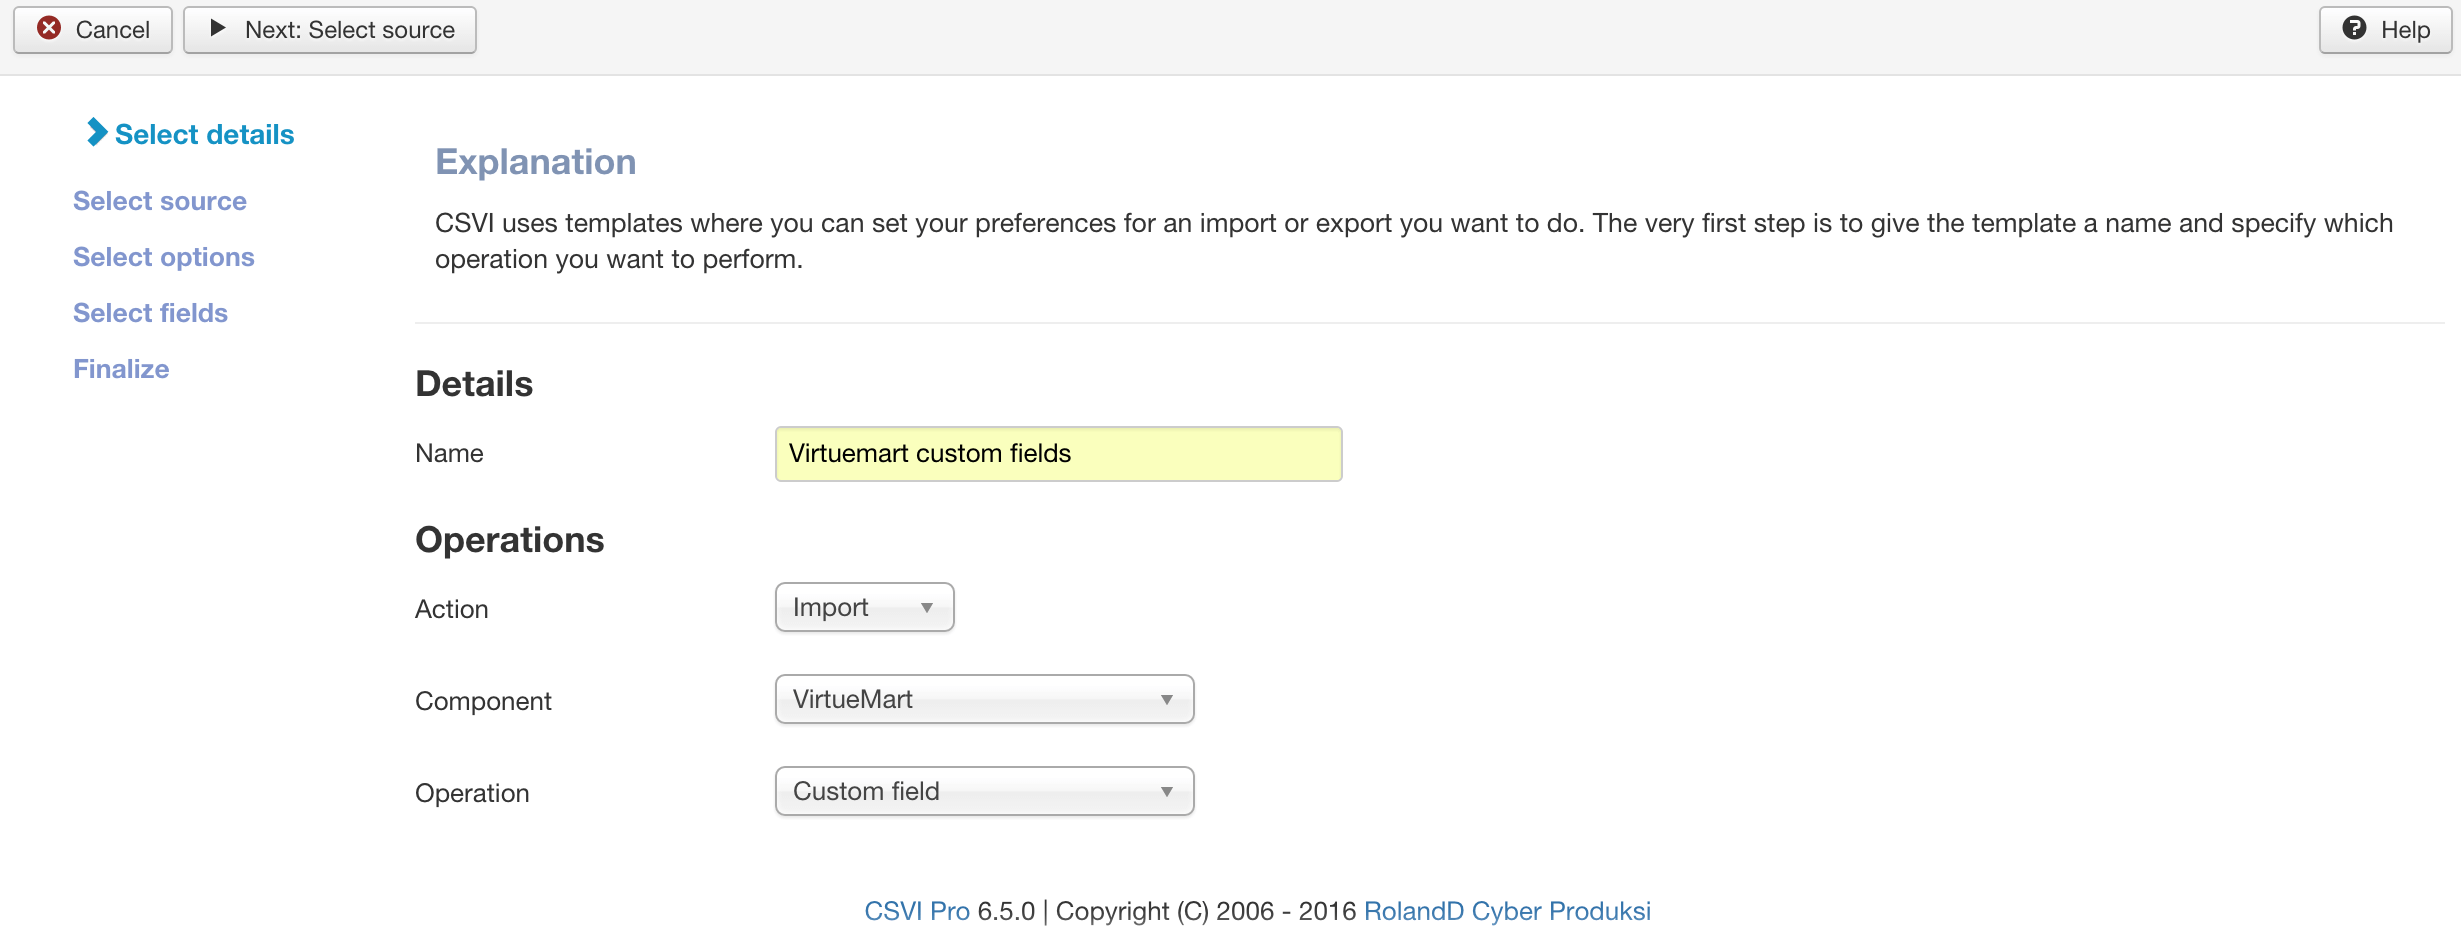
To import/export custom fields CSVI uses the Custom field import and Custom field export operations. These operations are available after choosing Import or Export -> VirtueMart under Options.
Required fields
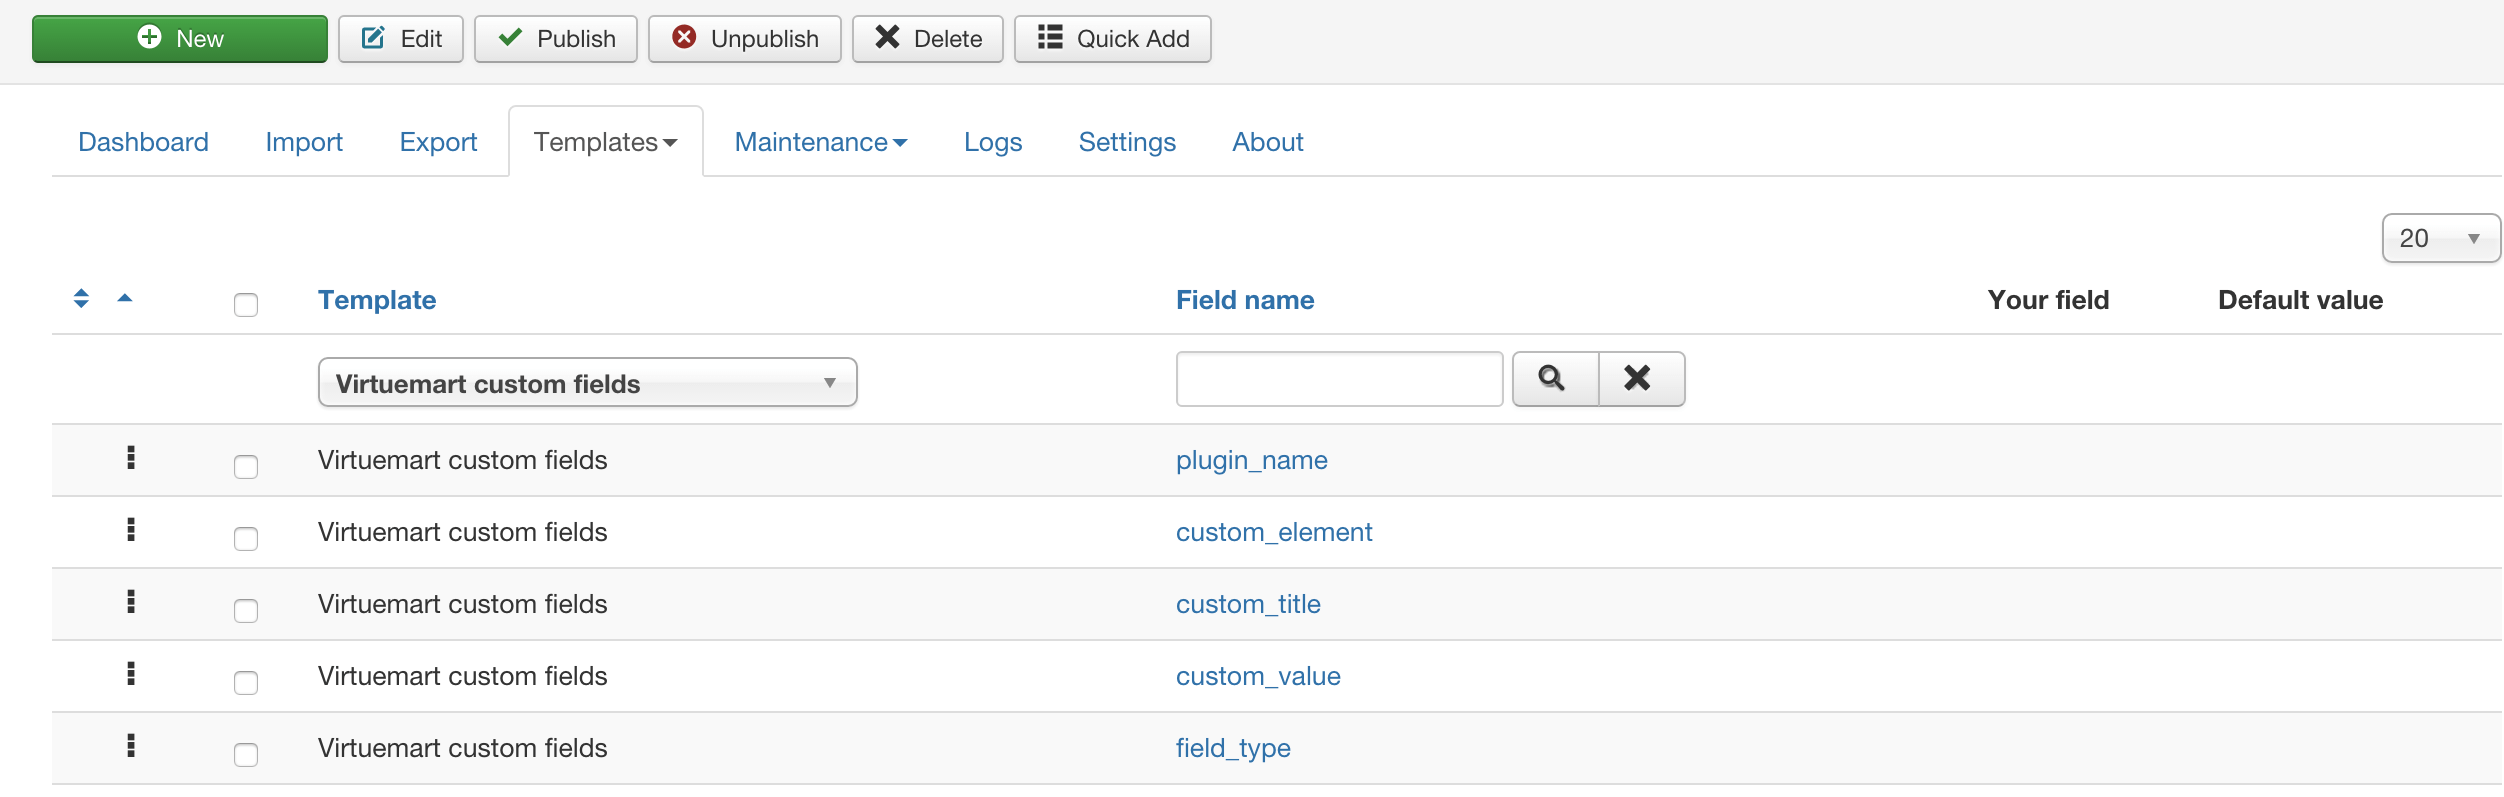
The custom fields import requires the following fields:
- plugin_name
- custom_element
- custom_title
- custom_value
- field_type
Optional but recommended fields
- custom_field_desc
An example CSV file looks like this:
"plugin_name";"custom_element";"custom_title";"custom_value";"field_type"
"Customer text input";"textinput";"CSVI Import";"Type here";"E"
Let's have a closer look at the fields.
plugin_name
This field contains the name of the plugin that is used for the custom field. A list of supported plugins can be found in the Plug-in Manager: Plug-ins section. The Plug-in Name you see here is what needs to be put in the plugin_name field.
custom_element
This is a bit of an odd one. The custom_element you can find in the field called Default when you save the custom field when the Field Type is set to Plugins. When using another field type, this field is left empty.
custom_title
The name of the custom field.
custom_value
This is the same value as custom_element when importing a plugin field type. In any other case this is a text shown to the shopper.
field_type
This must be one of the following values, depending on the type of custom field you are importing:
- S: String
- I: Integer
- P: Parent
- B: Boolean
- D: Date
- T: Time
- M: Image
- V: Cart variant
- E: Plugins
custom_field_desc
A description of the custom field.
Once you have created the CSV file with the necessary data it can be imported like any other import.
Incorrect column count
| RO CSVI
The single most seen message by users is probably the "Incorrect column count".
What does it actually mean?
The incorrect column count means that the columns CSV Improved has found in your file is not the same as the columns in your configuration. Let's clarify this with some examples.
Example 1, incorrect delimiters:
The CSV file looks like this:
"product_sku","poduct_name","category_path"
The template has delimiters set to:
Field delimiter: ^
Text delimiter: ~
Having incorrect delimiters makes it impossible for CSV Improved to read your file. As CSV Improved looks for the ^ character but it cannot find one, it will read the complete line as a single field. This cannot be identified as a supported field and as a result it gives the error message. Always make sure the delimiters match.
Example 2, the trailing field delimiter:
The CSV file looks like this:
product_sku,poduct_name,category_path
PROD1,Product 1,Products/Software,
The field delimiter used is a comma, this means we have a total of 3 fields:
- product_sku
- product_name
- category_path
The product information we want to import has a total of 4 fields:
- PROD1
- Product 1
- Products/Software
Now we can clearly see that there is an incorrect column count because 3 is not the same as 4. Why are there 4 fields for the product information? As we use the comma as field delimiter, after every comma a new field starts. So the comma after Products/Software also creates a new field. The trailing comma must be removed. Always check your file for trailing field delimiters.
Example 3, the duplicate fields:
The CSV file looks like this:
product_sku,poduct_name,product_name,category_path
PROD1,Product 1,Product 1,Products/Software
The field delimiter used is a comma, this means we have a total of 3 fields:
- product_sku
- product_name
- category_path
The product information we want to import has a total of 4 fields:
- PROD1
- Product 1
- Product 1
- Products/Software
Since the product_name field already exists already the same name again is ignored. This leaves you with 3 fields to import while the data contains 4. Either rename or remove the column to solve the issue.
Example 4, the missing field:
The CSV file looks like this:
product_sku,product_name,category_path,product_publish
PROD1,Product 1,Products/Software
The field delimiter used is a comma, this means we have a total of 4 fields:
- product_sku
- product_name
- category_path
- product_publish
The product information we want to import has a total of 3 fields:
- PROD1
- Product 1
- Products/Software
Here we have a situation where the configuration fields are more than the data fields. What happens is that in a spreadsheet program like Excel a cell is not exported until it is "touched". In this case the column header product_publish was added but no value was put in for the product. To solve this the cell must be given a space or anything actually so it becomes a used cell after that it will be exported.
Example 5, the wrong number of fields:
It is possible to use the column headers in a file to tell CSV Improved what fields you want to use. There is another way and that is to assign fields to the template used for import via the templates menu.
The CSV file looks like this:
PROD1,Product 1,Products/Software
The template fields assignment looks like:
product_sku
product_name
attribute
category_path
This means we have a total of 4 fields:
- product_sku
- product_name
- attribute
- category_path
The product information we want to import has a total of 3 fields:
- PROD1
- Product 1
- Products/Software
This is another situation where the configuration fields are more than the data fields. The solution here is to remove the assigned fields that are not being used.
Adding your own custom available fields
| RO CSVI
Requirements: CSVI 5.6+
In CSVI Pro it is possible to add your own custom available fields without having to modify any core files.
Adding fields
Steps to add your own available fields:
- Go to the folder administrator/templates/<template name>/html/com_csvi/<component name>/install/
For example: administrator/templates/isis/html/com_csvi/com_virtuemart/install/ - Create a file called override.sql
- Add the following code in the file:
INSERT IGNORE INTO `#__csvi_availablefields` (`csvi_name`, `component_name`, `component_table`, `component`, `action`) VALUES
('skip', 'skip', 'product', 'com_virtuemart', 'import');
Explanation of the fields:- csvi_name
This is the name of the field used by CSVI (this is usually the same as the component_name) - component_name
The name of the field used in the component table - component_table
The name of the import/export routine where the field is to be used with - component
The name of the component the field is used for
- csvi_name
- Add more lines if needed
- Run the Update from the Available Fields to add your custom available fields
A file with multiple lines could look like this:
INSERT IGNORE INTO `#__csvi_availablefields` (`csvi_name`, `component_name`, `component_table`, `component`, `action`) VALUES
('skip', 'skip', 'product', 'com_virtuemart', 'import'),
('combine', 'combine', 'product', 'com_virtuemart', 'import');
Processing fields
To have CSVI process these custom available fields, you will need to write your own code.
How to collect debug information?
| RO CSVI
Why?
Debug information is very valuable information. The information gives an in-depth look into what is happening inside the program. Troubleshooting problems is made a lot easier as the programmer can see step by step what the program is doing.
How to enable debug info?
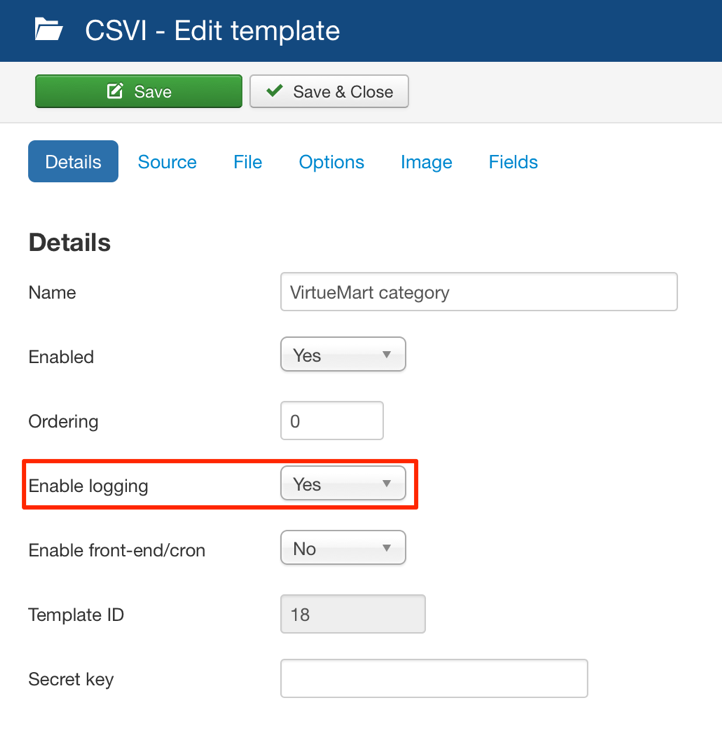
- Go to Templates -> Templates
- Click on the name of your template to Edit the template
- Select the Details tab
- Set the Enable logging to Yes.
- After you ran an import or export, you will be shown the results page and here you can find the debug log options:
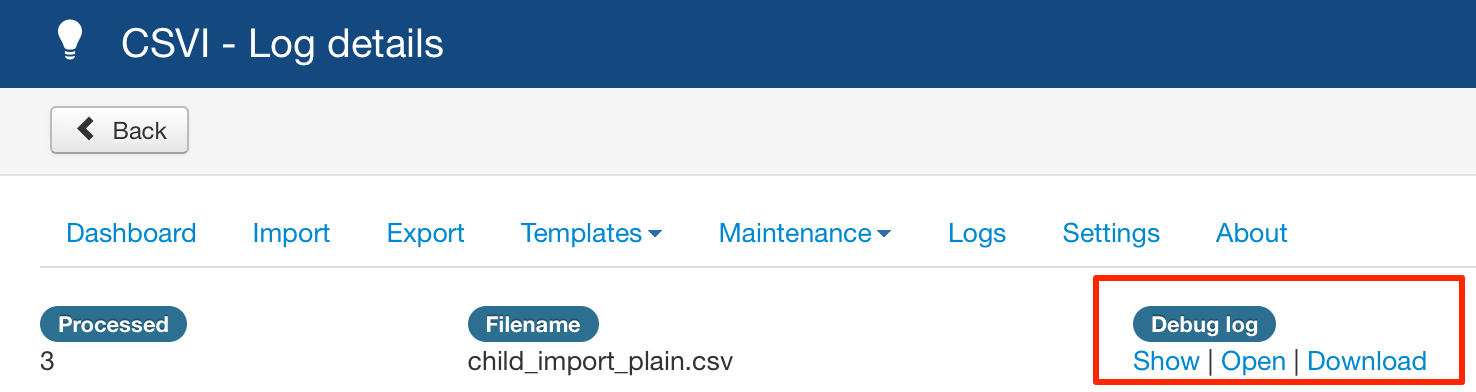
These options are also available if you click on Logs in the menu. - There are 3 options available:
- Show
This will show the debug log in a popup window - Open
This will open the debug log in a new window - Download
This will download the debug log in a zip file or if the debug log is too large, it will download as a text file
- Show
- Now you have a debug log.
Import crashes and no debug log
It can happen that the import crashes and no log details are stored, the debug log is still created but need to be retrieved from the server. The debug logs are stored in the folder logs/ for CSVI 6 and tmp/com_csvi/debug for CSVI 5. Find the last created file in this folder and that will be your debug log for your last import.
Debug information collects a lot of info, it is advised not to use it with large imports, rather use a small sample of a few records.
What to do with the debug output?
Once the debug output is generated it is ready for analysis and can be posted on the forum along with the description of the problem and a sample of the import file. Make sure the debug log is zipped otherwise it cannot be uploaded.
Limiting number of lines in Debug log
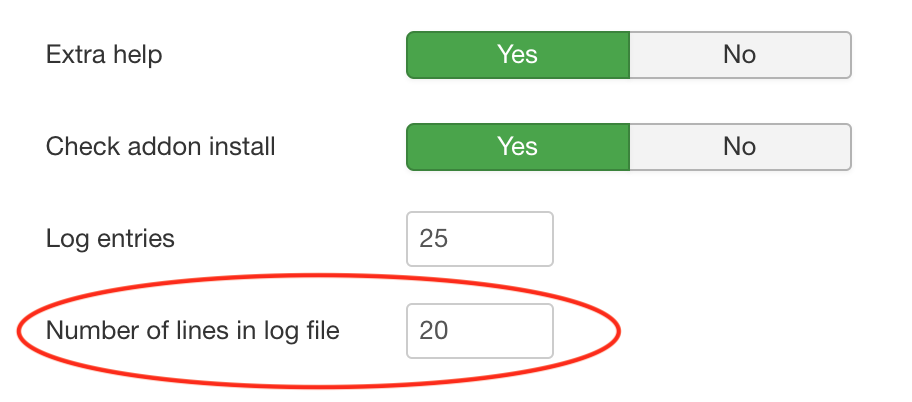
Starting from RO CSVI 7.7.0 version a new feature for limiting the lines in to the debug log has been added. This feature is very helpful in case of Imports with large number of records. Instead of generating a huge debug log with entries of all records and struggling to handling the large debug log file, you can now limit the number of lines in debug log so the generated debug log is small and easy to handle in forum as well as for checking on issues.
To add the number of lines to log file, go to RO CSVI Dashboard page, click on Options button on top right corner, on Site tab set Number of lines in log file field. By default it is 20.