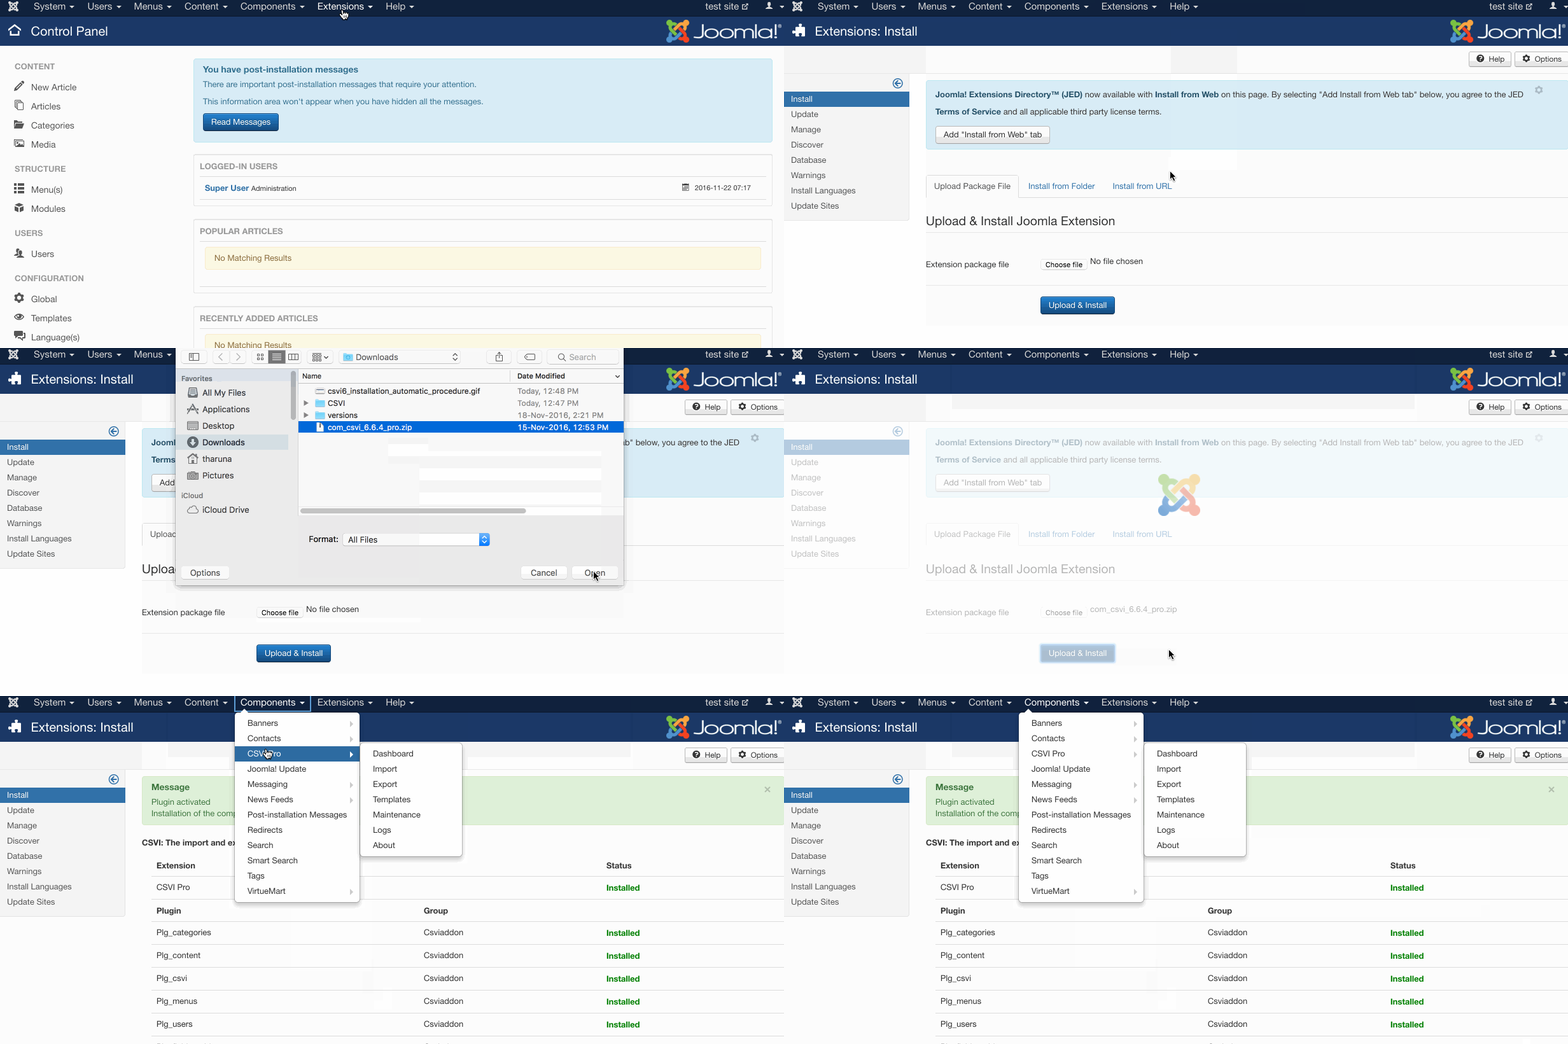
Step to be followed for installing RO CSVI automatically
- Go to the extension manager
- Select the file on your computer to install RO CSVI
- Complete the installation by clicking on the Upload & Install
- After finishing the installation you will see the message 'Installing component was successful'
- RO CSVI is now ready to be used

Manual installation of RO CSVI
In some cases automatic install of RO CSVI fails using Joomla extension manager. This section describes manual installation of RO CSVI using Joomla discover feature.
Copying the files
- Download RO CSVI package from the download section
- Unzip the package on your local computer
- Unzip RO CSVI component on your local computer
- Connect to your website using an FTP client
- Open to the folder administrator/components on the server
- Create a folder named com_csvi on the server
- Open the folder com_csvi on the server
- Copy all files and folders from administrator/components/com_csvi from your local computer to same server location.
- Also copy the files csvi.xml and script.php to the folder administrator/components/com_csvi
- Go back to the main folder
- Open to the folder components on the server
- Create a folder named com_csvi on the server
- Open the folder com_csvi on the server
- Open the folder components/com_csvi on your local computer
- Copy all files and folders to the com_csvi folder on the server
- Go back to the main folder
- Create a folder Rocloud on the server in libraries folder
- Open libraries/Rocloud folder on your local computer
- Copy all files and folders from libraries/Rocloud from your local computer to same server location
- Log in to the administrator section of your website
- Go to System from menu and under Install section click on Discover
- Click on the Discover button in the toolbar
- Select RO CSVI of type Component from the list.
- Click on the Install button in the toolbar
RO CSVI is now ready for use.
You can then install all plugins from RO CSVI packages using Joomla extension manager.