RO CSVI
Checking your PHP version in Joomla
| RO CSVI
PHP 7 is nowadays the default PHP version used by hosting providers. Unfortunately, many hosting providers use older PHP 7 versions. The recommended version is PHP 7.3 or higher but often older PHP versions are still being used. You can check the versions supported by the PHP project. RO CSVI requires a minimum of PHP 7.1. Checking your PHP version in Joomla is very easy.
Fill multiple fields with one value
| RO CSVI
Requirements
- CSVI 5.0+
- VirtueMart 2.0.2
- Joomla 2.5+
- PHP 5.2+
- An existing product import template
- Basic understanding of adding fields to templates
Objective
The objective is to import 1 field from the import file into multiple destination fields. In this example we will import the product name into the fields product name and product short description.
Example data
"product_sku";"product_name"
"AB123";"Product 1"
"CD456";"Product 2"
Setting up the fields
Follow these steps to setup the fields as above:
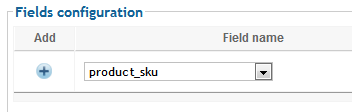
- Select the product_sku field and click on Add
- Select the product_name field and click on Add
- Select the product_s_desc field and click on Add
Now we have all the three fields as shown in this image:
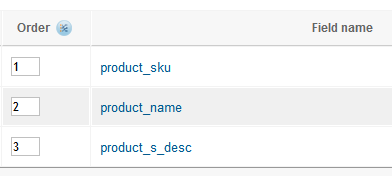
Configuring the additional destination fields
Now we need to set up the product short description to take the value from the product name as shown below:
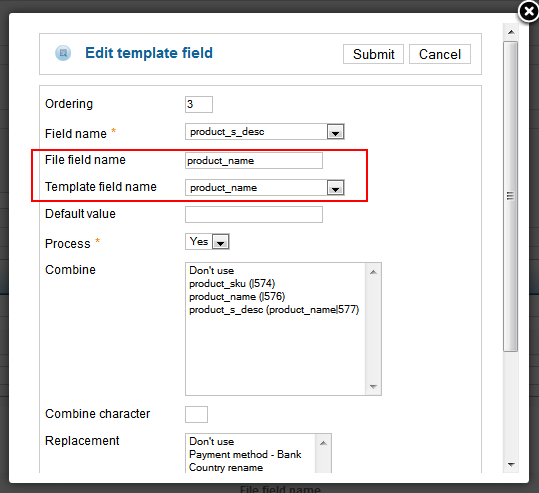
- On the Fields tab click on the product_s_desc field to open the edit screen as shown in the image above
- At File field name fill in the field name as set in the field you want to take the value from. In this example we take it from the product_name field. If this field is empty, add the same name as chosen at Template field name. As this field is empty in the product_name field, we add the full name product_name.
- At the Template field name select from which field the product short description should take its value. We want to take the value from the product_name field, so select the product_name field.
- Click on Submit
To make sure that the import uses these settings we just created the option Use column headers as configuration must be set to No. See the settings here:
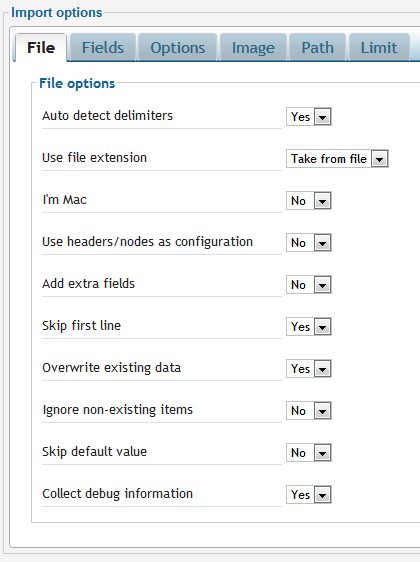
The settings are done and the file options are set now and the template is ready for import.
Subscription questions for RO CSVI
| RO CSVI
What are the benefits of a subscription?
- Quicker releases with fixes and new features
- Access to upgrades
- Access to the support forum
- Support on-going development
Can I install RO CSVI on unlimited sites?
Yes, you can.
Where can I get support?
Support is given on the forum.
How much does a subscription cost?
A subscription costs €72.95 per year. If you are extending your current active subscription you will get a 10% automatic discount.
All prices are excluding tax. Tax will be charged when applicable.
How long is a subscription valid for?
The duration of a subscription is for 1 year after which it is automatically stopped. We will send you a reminder 4 weeks and a second reminder 2 weeks before the subscription expires to inform you. Finally a last notification is send to inform you the subscription has been cancelled. In case you renew your subscription, the remaining reminders are not send.
Are upgrades free?
Upgrades are provided free of charge if you have an active subscription.
Will the program stop working when the subscription ends?
The program will continue to work however you will no longer have access to upgrades and paid member areas of the site.
Where do I buy a subscription?
Does my CSV file look correct?
| RO CSVI
Here is a checklist to check if your CSV file looks correct. Only need to answer the following two checks with yes.
-
First row is column headers
-
Second and every row after is data to import
1. First row is column headers
The first row is only mandatory when the import template has the setting use "Use column headers as configuration" enabled. However having the first row in the CSV file helps knowing what data is in the file.
TIP: always use column headers
The column headers must exist in the availablefields list and have the exact same name. It is not possible to use any other name as this will result in the message "Unsupported fields found".
When using the fields assigned to the template as configuration, then the column header names are not important. Make sure when you use this to enable "skip first line" otherwise your column header row will be imported like a product.
2. Second and every row after is data to import
Ever row after the first row contains the data to be imported. This data must be formatted according to the usage described for each field in the availablefields list.
Important is to use the correct delimiters. The data must be separated with the same delimiters as specified in the template settings. This is explained in detail in the article How to CSVI?.
Example CSV file
If your CSV file does not look like this in a spreadsheet program, you will most likely have troubles importing.
| product_sku | product_name | category_path | product_desc | product_price |
|---|---|---|---|---|
| prodsku1 | Great product 1 | Hardware/Great products | This is the first great product | 10.50 |
| prodsku2 | Great product 2 | Hardware/Great products | This is the second great product | 18.29 |
| prodsku3 | Great product 3 | Software/Great products | This is the third great product | 58.47 |
| etc. | etc. | etc. | etc. | etc. |
Import XML
| RO CSVI
This tutorial will explain how to:
- Analyze the XML file
- Setup an import template for the XML file
- How to import the XML file
Requirements for this tutorial are:
- CSVI Pro 6.0+
- This attached XML file
Analyzing the XML file
Open the attached XML file in an editor. There are a few things to see:
- Root element
- Node element
- Record element
- Item element
Root element
The root element is the <catalog> tag in the file. This contains all the node and record elements. CSVI does not use the root element so we can forget this one.
Node element
The node element is the <products> tag in the file. This contains all the record elements. CSVI does not use the node element either so we can forget this one also.
Record element
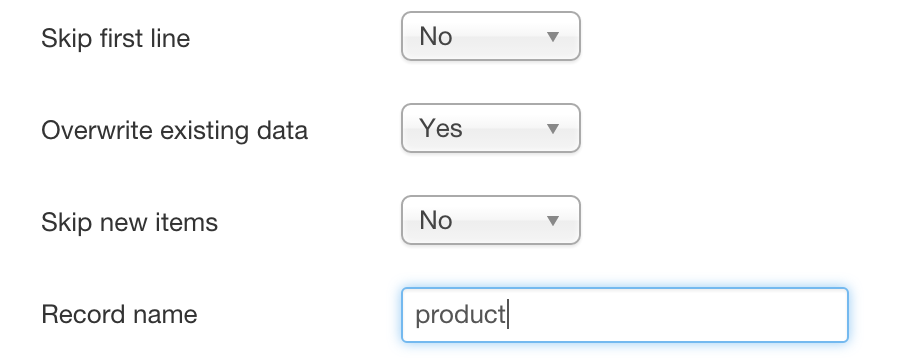
The record element is the <product> tag in the file. This contains all the details of the item in our case. The record element is very important for CSVI, this is how it identifies where to start reading your file. Therefore we need to put the record element in the XML options in the template as shown here. The element is written without the brackets.
Item element
The item elements contain all the item information. This is what we need for setting up the template fields but more about that later.
Setup an import template for the XML file
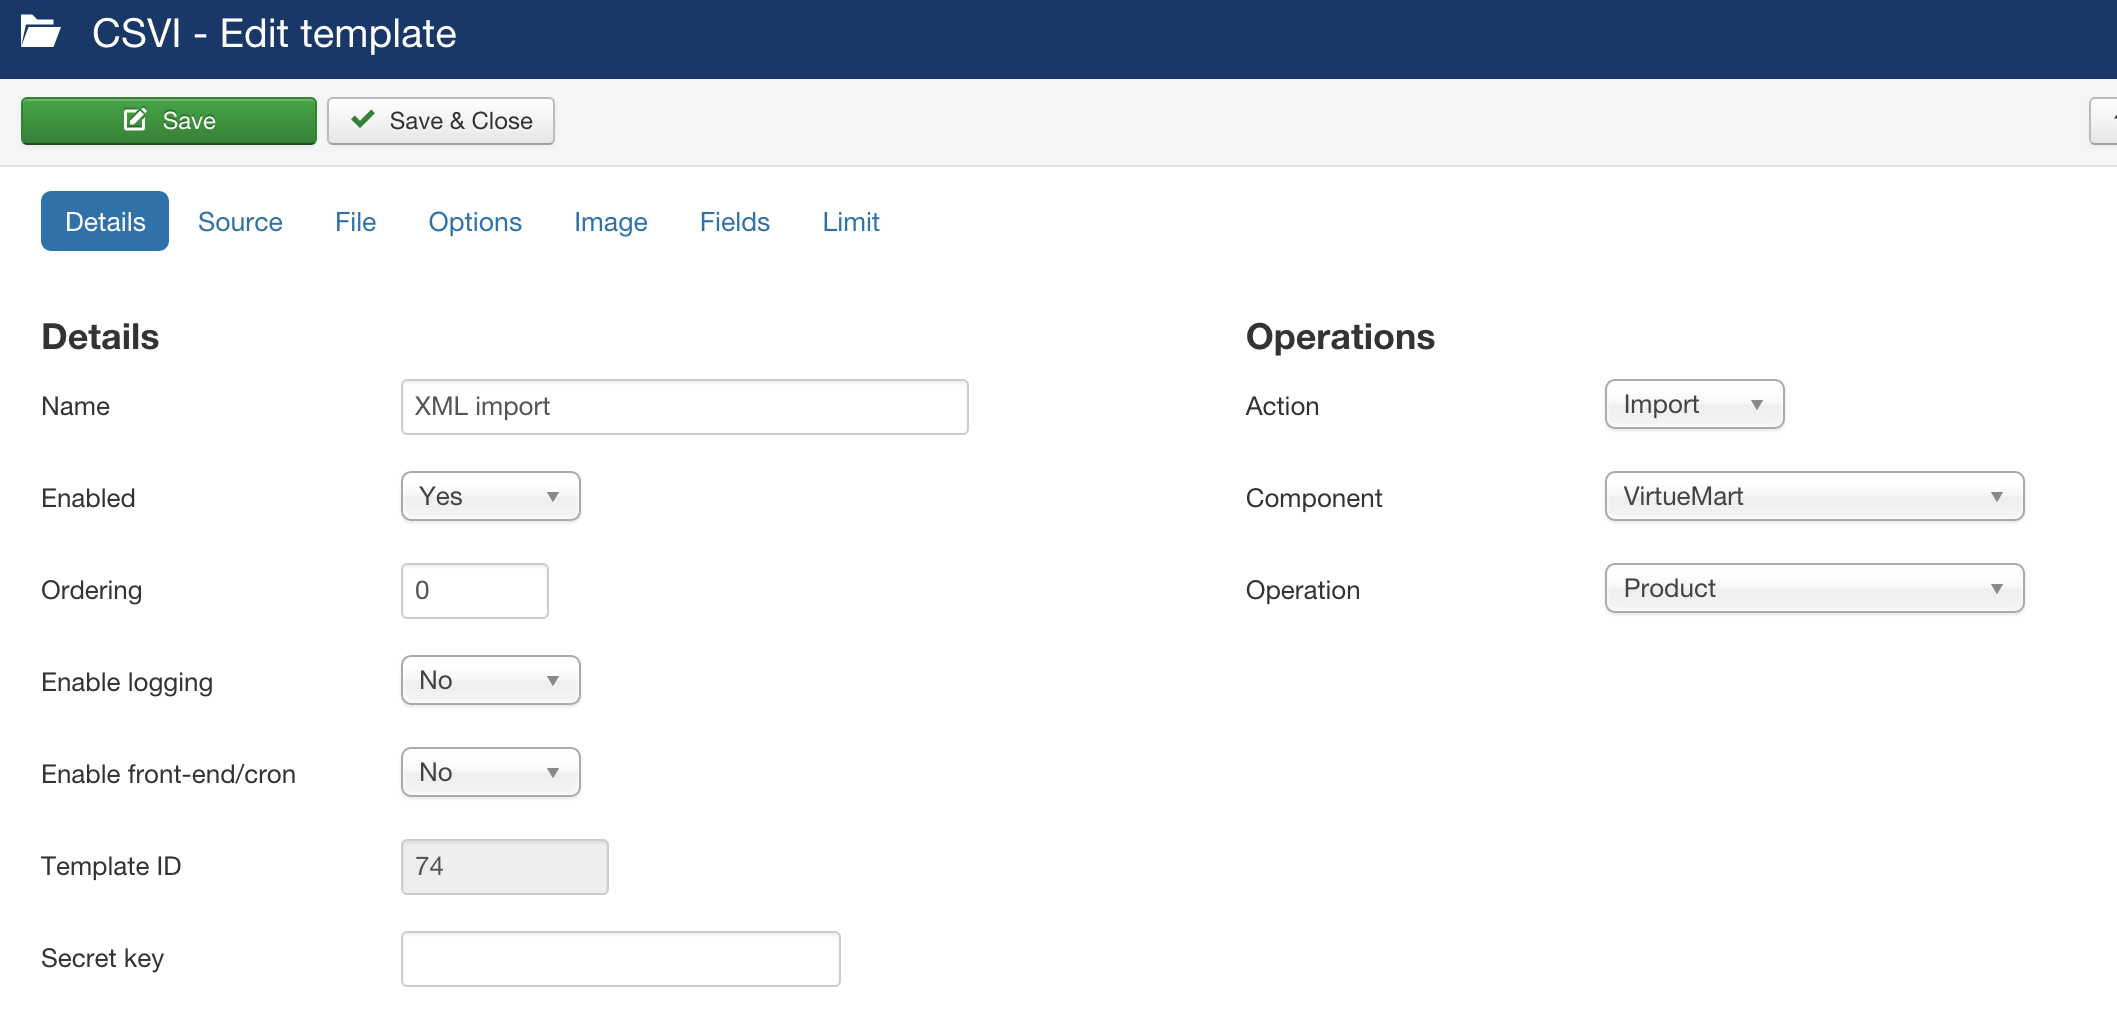
First create a new template by taking these steps:
- Go to Components -> CSVI Pro -> Templates Tab
- Provide a name for the template
- Under Operations make the following selection:
- Import
- VirtueMart
- Product import
- Click on Save or Save & Close
- On the File tab, set Use file for configuration to No
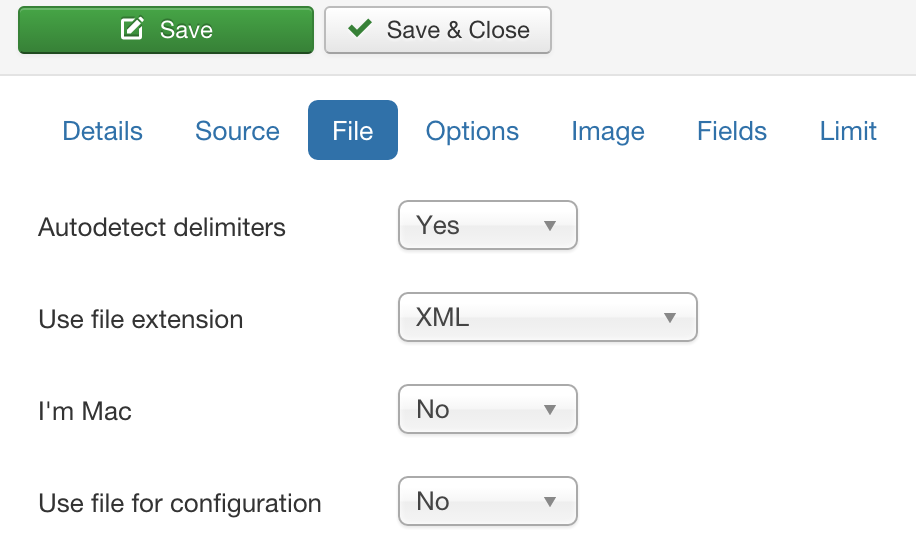
- Now save the template by clicking on the Save or Save & Close button. This step is needed so we can add the fields to the template.
- The template is now ready to be configured
Adding the fields
The most important part of the template are the fields, this is where CSVI is told what to do with the import fields. The order of the fields is not important as CSVI identifies fields based on their name. There is only one case where the order is important, that is with fields with the same name, this will be explained later. All field names are case-sensitive. Pay attention to this. We will take the following steps:
- Identify the XML paths
- Identify the CSVI fields
- Add the fields to the template
Identify XML paths
A field name is created by CSVI based on the path in the XML file, the path always starts from the item element. First we will create the path names of the items in the attached XML file.
- Element: <ID>
Path: ID - Element: <NAME>
Path: NAME - Element: <DESCRIPTION>
Path: DESCRIPTION - Element: <PRICE>
Path: PRICE - Element: <PRICE_BASE>
Path: PRICE_BASE - Element: <PRICE_RES>
Path: PRICE_RES - Element: <IMAGES><IMAGE1>
Path: IMAGES/IMAGE1 - Element: <IMAGES><IMAGE2>
Path: IMAGES/IMAGE2 - Element: <IMAGES><IMAGE3>
Path: IMAGES/IMAGE3 - Element: <IMAGES><IMAGE4>
Path: IMAGES/IMAGE4 - Element: <VIDEO1>
Path: VIDEO1 - Element: <VIDEO2>
Path: VIDEO2 - Element: <VIDEO3>
Path: VIDEO3 - Element: <FEATURES><FEATURE name>
Path: FEATURES/FEATURE/NAME
This path is used multiple times for the other features - Element: <FEATURES><FEATURE>
Path: FEATURES/FEATURE
This path is used multiple times for the other features - Element: <SIZE>
Path: SIZE - Element: <GROUPPRODUCTS>
Path: GROUPPRODUCTS - Element: <STATUS>
Path: STATUS - Element: <CATEGORY>
Path: CATEGORY - Element: <BARCODE>
Path: BARCODE
Identify CSVI fields
Now that we have all the paths identified we need to identify the CSVI fields the paths belong to. A visual guide is available for the fields name to help you identify the fieldnames. Hereby the list of fields for the example XML:
- Path: ID
CSVI: product_sku - Path: NAME
CSVI: product_name - Path: DESCRIPTION
CSVI: product_desc - Path: PRICE
CSVI: product_price - Path: PRICE_BASE
CSVI: skip
This field is skipped because there is no equivalent field available, this applies to all fields being skipped. - Path: PRICE_RES
CSVI: skip - Path: IMAGE/IMAGE1
CSVI: file_url - Path: IMAGE/IMAGE2
CSVI: combine
This field is going to be combined with the file_url field because there is only 1 field available to specify images. - Path: IMAGE/IMAGE3
CSVI: combine - Path: IMAGE/IMAGE4
CSVI: combine - Path: VIDEO1
CSVI: skip - Path: VIDEO2
CSVI: skip - Path: VIDEO3
CSVI: skip - Path: FEATURES/FEATURE/NAME
CSVI: custom_title - Path: FEATURES/FEATURE/NAME
CSVI: combine - Path: FEATURES/FEATURE/NAME
CSVI: combine - Path: FEATURES/FEATURE
CSVI: custom_value - Path: FEATURES/FEATURE
CSVI: combine - Path: FEATURES/FEATURE
CSVI: combine - Path: SIZE
CSVI: skip - Path: GROUPPRODUCTS
CSVI: skip - Path: STATUS
CSVI: published - Path: CATEGORY
CSVI: category_path - Path: BARCODE
CSVI: skip
Add the fields
Now that we have identified the paths and fields, we are ready to add all the fields to the template. We do this by following this procedure:
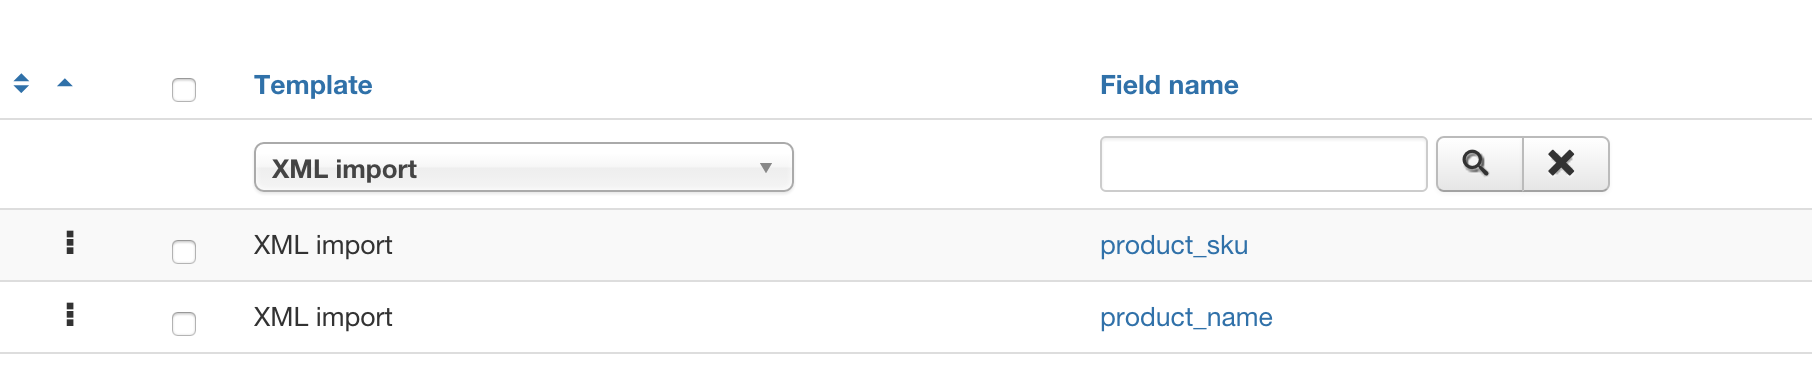
- Click on the Template Fields tab to open the fields section
- From the Field name dropdown select the CSVI field
- In the Your field name field type the XML path. Do not forget that the file field name is case-sensitive.
- Click on the Save or Save & Close
- Repeat these steps for all fields
Combine fields
The next step is to configure the combine fields to make sure all the fields get combined.
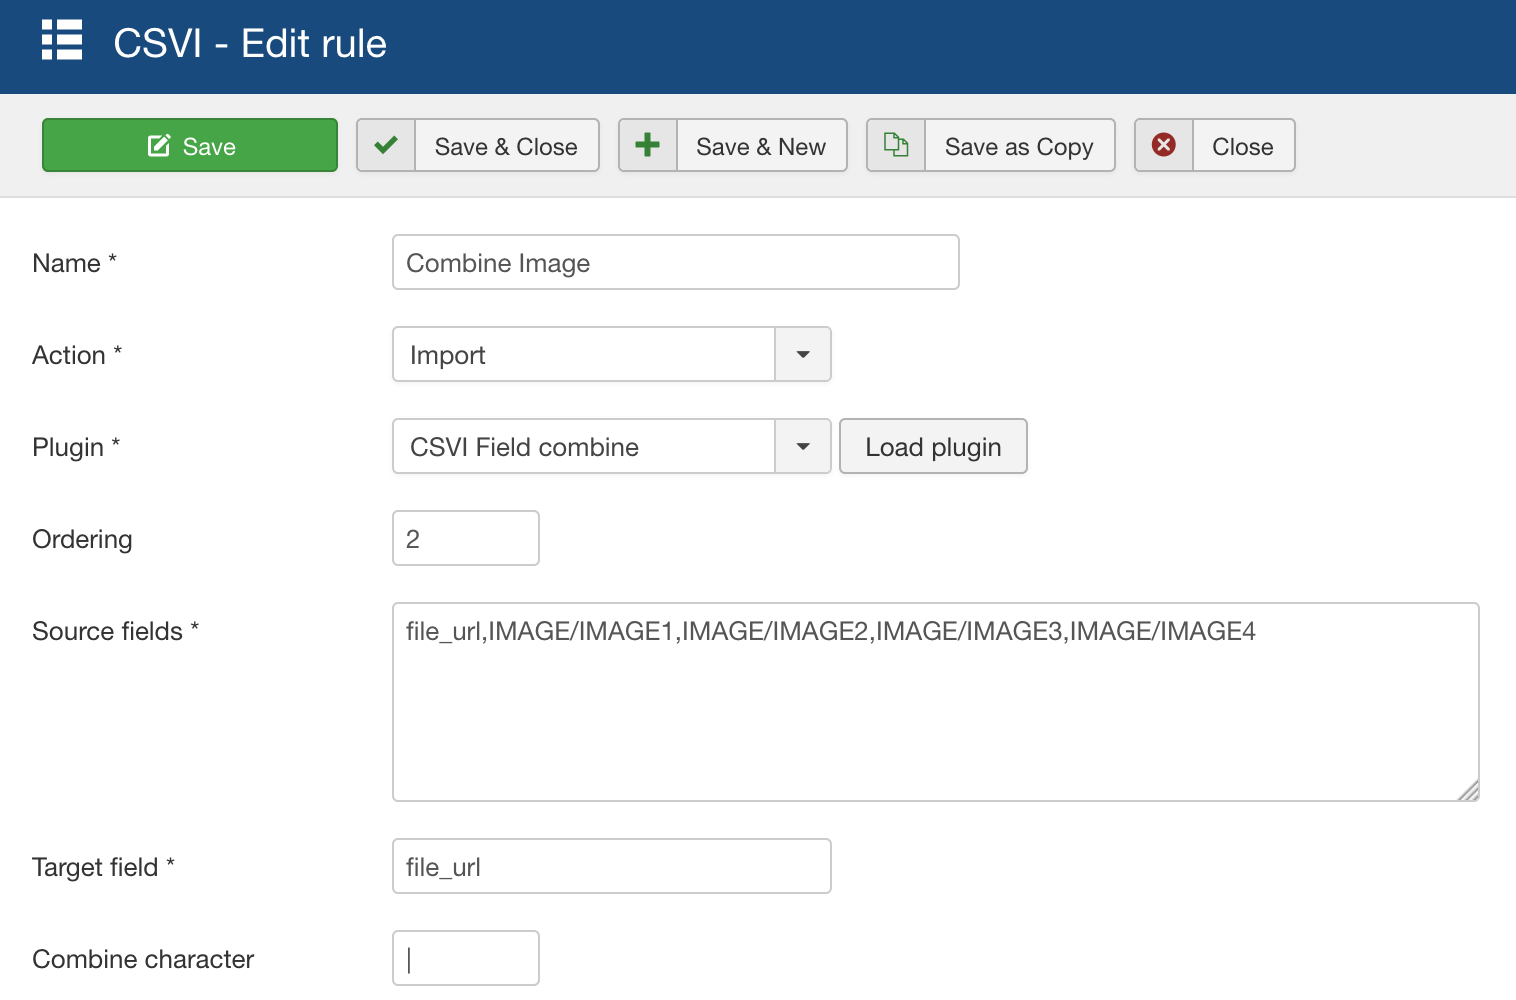
As mentioned earlier, we are going to combine the image fields because there is only 1 field for an image available. To combine the images we need to edit the field name, this is done by clicking on the field name. The steps are:
- Go to Rules
- Click on New
- An edit screen opens as seen on the screenshot above
- Enter a name for the rule that is easy to recognize
- Set the Action to import as we are using this rule for an import
- Choose the Plugin named CSVI Field combine
- Click on Load Plugin
- Click on Save to store the settings and after that we can fill in our fields
- Next we need to define the source fields. These are the fields that we want to combine. We have 4 images in total, the first one is linked to the file_url field and the other 3 need to be combined with the first one. We do this by specifying all the fields we want to combine. Since this is an XML file, we need to use the XML path instead of the CSVI name. So our list will look like this file_url,IMAGE/IMAGE1,IMAGE/IMAGE2,IMAGE/IMAGE3,IMAGE/IMAGE4.
- In the Target field we specify where the combined value is stored. In our case this is the file_url field.
- Next in the Combine character we need to set which character we want to use to combine the fields. Multiple images are always separated by a pipe-symbol |, so we fill in the pipe-symbol.
- Click on Submit to save the changes
- Do the same for the custom_title and custom_value fields.
- The fields are now all added and set up
How to import the XML file
The last step is to import the XML file.
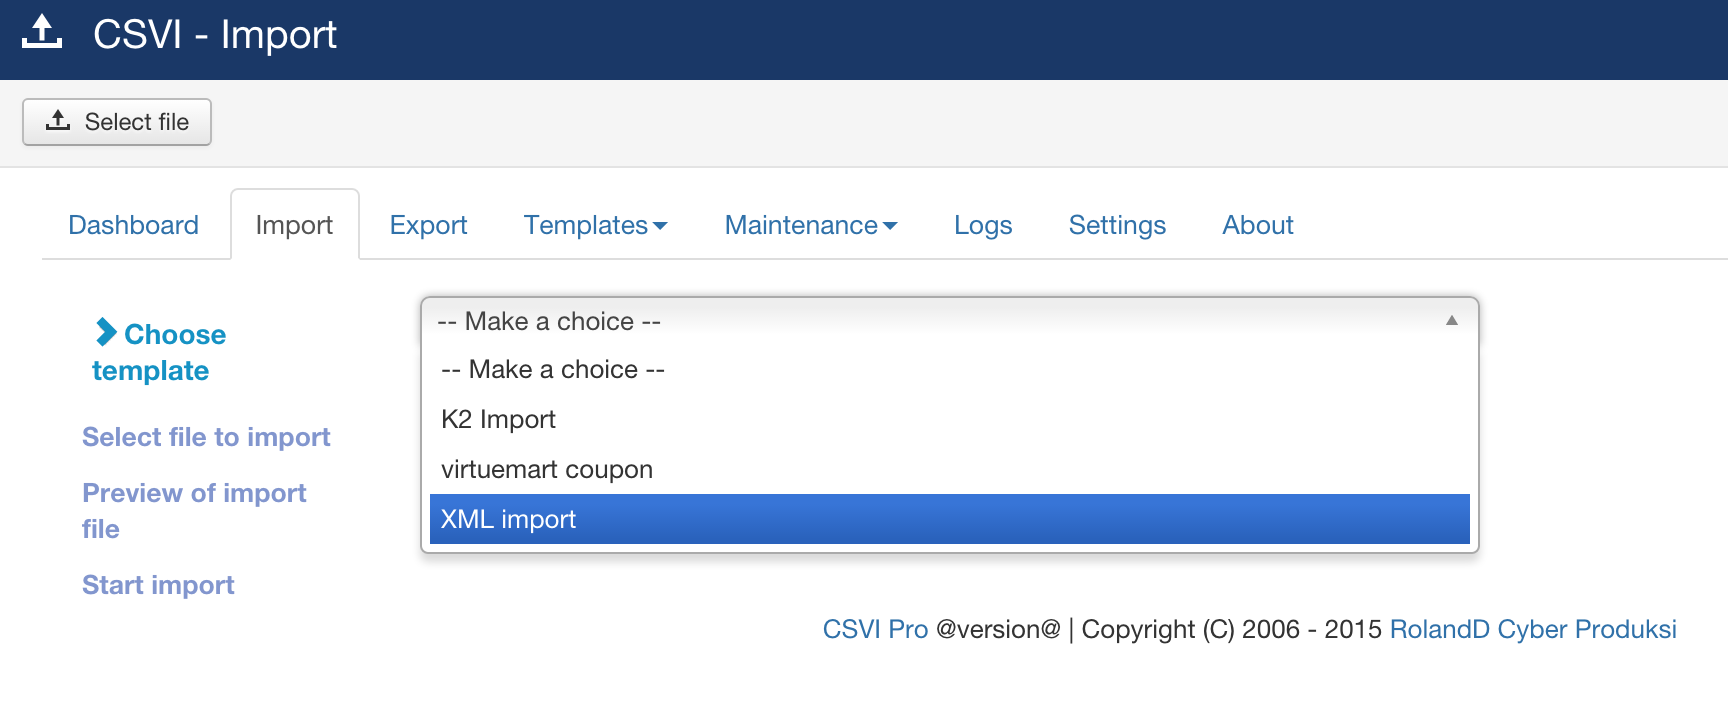
- Click on Import tab
- Select the template created for XML Import
- Click on Select file from top right corner
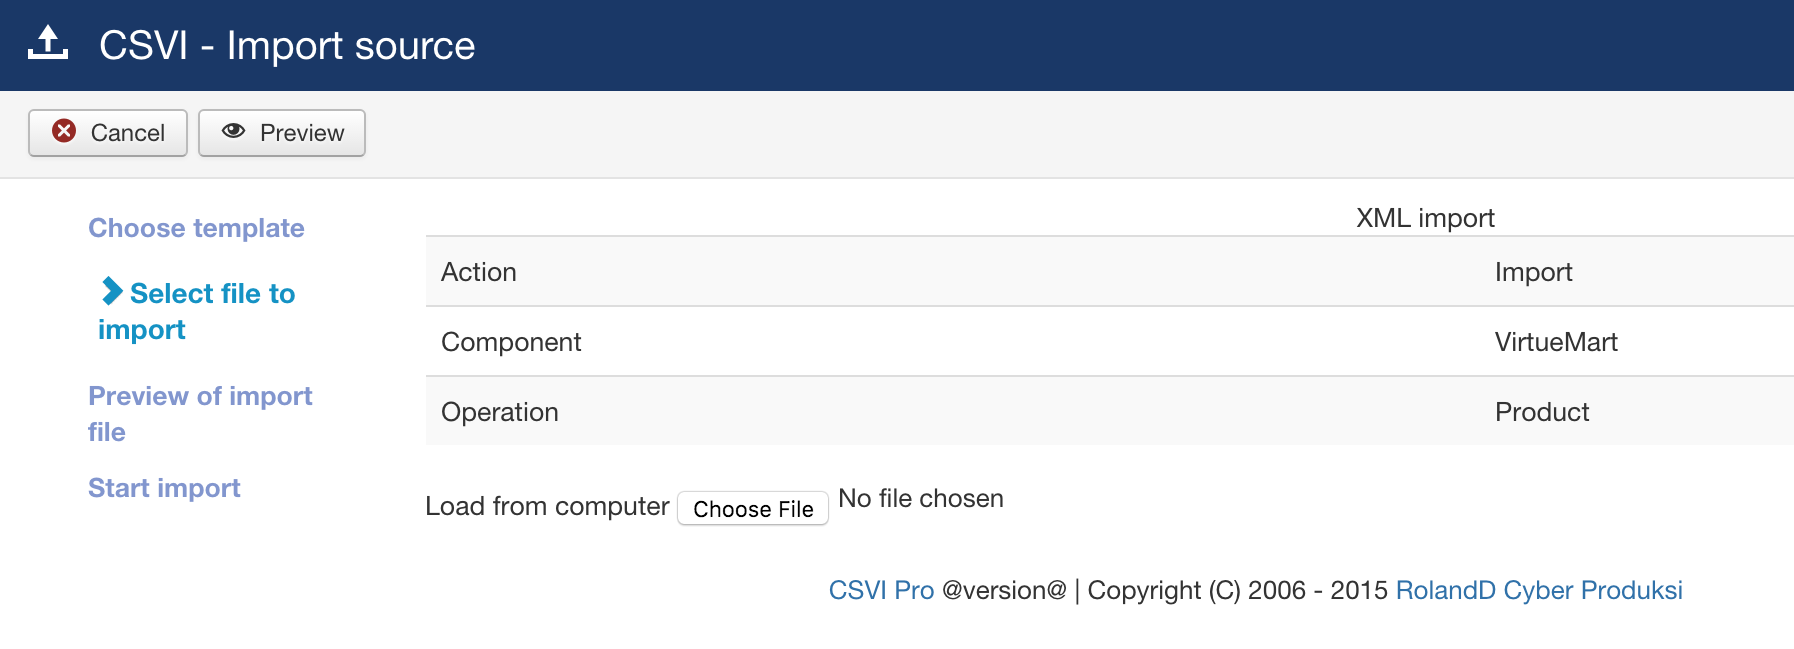
- Click on Choose File (text may vary depending on the browser used)
- Select the file on your computer
- Click on Preview in the top left corner
- CSVI will show the preview of content of the file. Now click on Start Import to start the import of XML file