VirtueMart
Export VirtueMart Products to HikaShop Products
RO CSVI has a new feature of exporting data from one extension and importing into another extension, which we have named the bridge templates. Currently only VirtueMart Products to J2Store Products and VirtueMart Products to HikaShop Products is available. This feature is available from RO CSVI 7.15.0 version onwards. In this document we will explain how to export VirtueMart Products to HikaShop Products.
Multiple Customfields Filter for VirtueMart
Background information
The ability to import custom field filter values and filter them using the Multiple Customfields Filter for Virtuemart.
Creating the custom field
Before you can start to import your filter values, you first need to create a custom field with a plugin of the VirtueMart2 multiple customfield plugin type. Take these steps to create the custom field:
- Click on Custom Fields in the left menu in the Products section
- Click on New
- Fill in the following fields:
- Custom Field Type: Plug-ins
- Title: Color (Remember this name as you will need it later in the CSV file)
- Published: Yes
- Parent: Don't change
- Cart Attribute: No
- Description: Change as you like
- Default: Don't change
- Tooltip: Don't change
- Layout position: Don't change
- Admin Only: No
- Is a list?: No
- Hidden: No
- Select a plug-in: VirtueMart2 multiple customfield plugin
- Click Save
- Go to the bottom of the page and notice there are some settings that can be set.
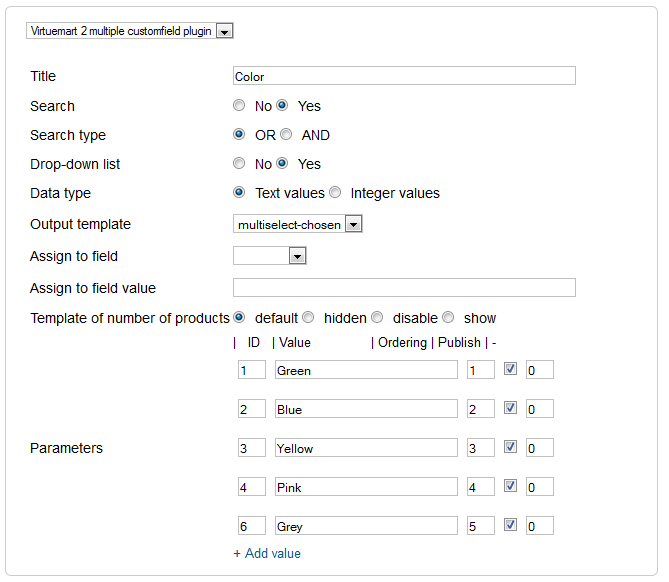
Set the Output template to multiselect-chosen.
For this example fill the parameters with:- Green
- Blue
- Yellow
- Pink
- Grey
- Click on Save & Close
- The Custom field has now been created
Creating the CSV file
An example CSV file for existing products looks like this:
"product_sku";"custom_title";"custom_value";"custom_param";"product_name";"product_in_stock";"product_price"
"10001";"Color";"param";"Blue#Pink#Grey";"Product with filter";"0";"100"
Let's have a closer look at the fields
product_sku
This is the unique code for a product.
custom_title
The name of the custom field. The correct name can be found on the Custom Fields page in VirtueMart in the column named Title. This is the name used in step 3.2 when creating the custom field.
custom_value
This must always be param.
custom_param
The custom_param fields holds all the values you want to assign to the product, each one separated by a #.
product_name
The name of the product.
product_in_stock
The number of products that there are in stock.
product_price
The price of the product. This field is required for the parent product otherwise the selections will not show up.
Multiple parameters
It is possible that you have multiple filter fields that you want to assign to a product, for example Color and Size. The CSV file looks like this:
"product_sku";"custom_title";"custom_value";"custom_param";"product_name";"product_in_stock";"product_price"
"10001";"Color~Size";"param~param";"Blue#Pink#Grey~M#L#S";"Product with filter";"0";"100"
If you have 2 custom titles, there must also be 2 custom values and 2 custom parameters.
VirtueMart Snelstart export
A template can be created by following these steps:
- Go to Components -> CSVI Pro -> Templates
- Click New
- Give the template a name
- Set Action to Export
- Set Component to VirtueMart
- Set Operation to SnelStart
- Click Next: Select Source
- Destination is set default to Download. No need for change.
- Click Next: Select options
- The default values are OK, change if needed.
- Click Next: Select fields
- Fields must be added otherwise there is nothing for CSVI to export. Click Edit template fields.
- A new window opens with the Template fields page. You can add new fields by clicking New or Quick Add.
- When all fields are added you can close the window
- Click Next: Finalize
- All done here
- Click Close to return to the list of templates or Edit if you want to fine-tune the template further.

The Quick Add Option allows you to quickly add multiple fields to a template. It is not possible to set any settings per field here but that can be done after the fields have been added to the template.


Custom Fields For All for VirtueMart
Required fields
You must have the Custom Fields for All plugin for VirtueMart installed and the Custom Fields for All plugin for CSV Improved.
Background information
The ability to import custom field filter values and filter them using the Custom Fields For All. Please note custom fields for all fields are not available as individual template fields. They are grouped under custom_title, custom_value and custom_param fields so they are differentiated with standard VirtueMart custom fields.
Creating the custom field
Before you can start to import your values, you first need to create a custom field with a plugin of the Custom Fields For All plugin type. Take these steps to create the custom field:
- Click on Custom Fields in the left menu in the Products section
- Click on New
- Fill in the following fields:
- Custom Field Type: Plug-ins
- Title: CF4ALL (Remember this name as you will need it later in the CSV file)
- Show Title: Yes
- Published: Yes
- Parent: Don't change
- Cart Attribute: No
- Description: Change as you like
- Default: Don't change (Make sure this field is customfieldsforall)
- Tooltip: Don't change
- Layout position: Don't change
- Admin Only: No
- Is a list?: No
- Hidden: No
- Select a plug-in: Custom Fields for All plugin
- Click Save
- Go to the bottom of the page and notice there are some settings that can be set.
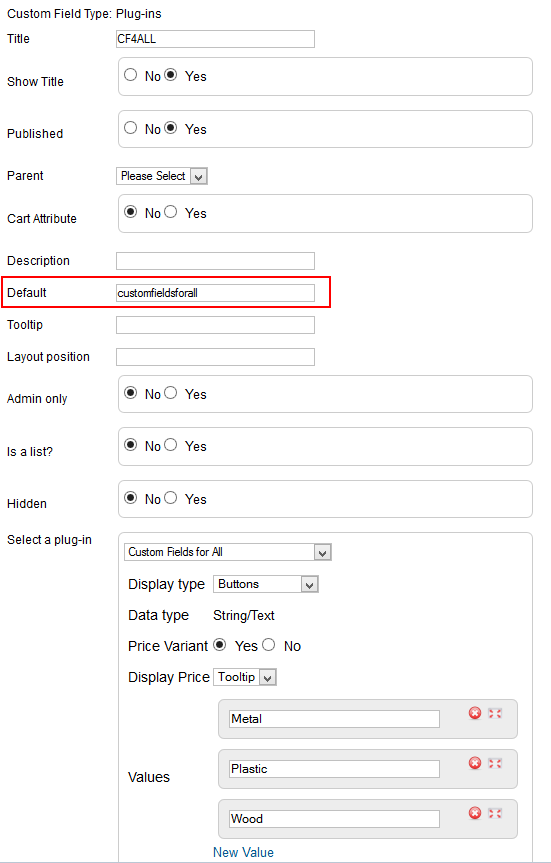
For this example fill the parameters with:
- Metal
- Plastic
- Wood
- Click on Save & Close
- The Custom field has now been created
Creating the CSV file
An example CSV file for existing products looks like this:
"product_sku";"custom_title";"custom_value";"custom_param";"product_name";"product_in_stock";"product_price";"product_parent_sku"
"10001";"CF4ALL";"customfieldsforall";"Wood";"Product with filter";"0";"100";""
"100011";"CF4ALL";"customfieldsforall";"Plastic";"First Child Product with filter";"1";"";"10001"
"100012";"CF4ALL";"customfieldsforall";"Metal";"Second Child Product with filter";"1";"";"10001"
Let's have a closer look at the fields
product_sku
This is the unique code for a product.
custom_title
The name of the custom field. The correct name can be found on the Custom Fields page in VirtueMart in the column named Title. This is the name used in step 3.2 when creating the custom field.
custom_value
This must always be customfieldsforall.
custom_param
The custom_param fields holds all the values you want to assign to the product.
product_name
The name of the product.
product_in_stock
The number of products that there are in stock.
product_price
The price of the product. This field is required for the parent product otherwise the selections will not show up.
product_parent_sku
The SKU of the parent product if it is a child product.
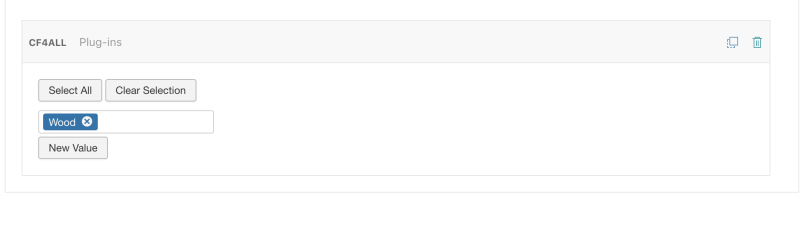
Results after import
After import the custom field values can be checked in VirtueMart Product edit page and on Custom fields tab.
Parameters with pricing
You can also add pricing to the custom fields if you have chosen for the price variant. The field custom_price must be added to the import file. The CSV file looks like this:
"product_sku";"custom_title";"custom_value";"custom_param";"custom_price";"product_name";"product_in_stock";"product_price";"product_parent_sku"
"10001";"CF4ALL";"customfieldsforall";"Wood";"9.99";"Product with filter";"0";"100";""
"100011";"CF4ALL";"customfieldsforall";"Metal";"9.99";"Child product with filter";"0";"";"10001"
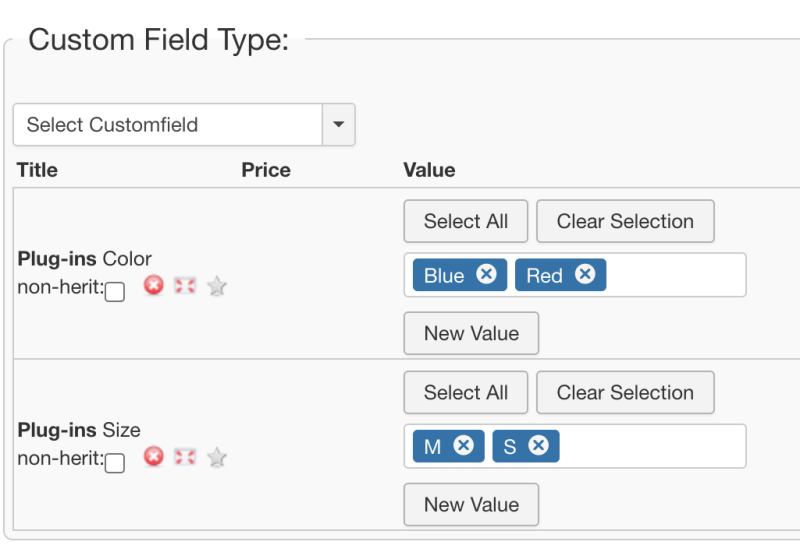
Multiple parameters
It is possible that you have multiple filter fields that you want to assign to a product, for example Color and Size. The CSV file looks like this:
"product_sku";"custom_title";"custom_value";"custom_param";"product_name";"product_in_stock";"product_price";"product_parent_sku"
"10001";"Color~Size";"customfieldsforall~customfieldsforall";"Blue~M";"Product with filter";"0";"100"
"100011";"Color~Size";"customfieldsforall~customfieldsforall";"Red~L";"Child product with filter";"0";"100";"10001"
If you have 2 custom titles, there must also be 2 custom values and 2 custom parameters.
Results after import
After import the custom field values can be checked in VirtueMart Product edit page and on Custom fields tab.
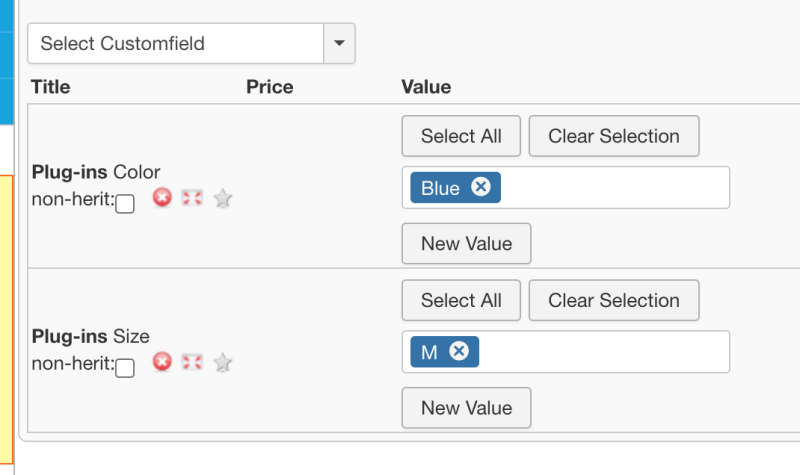
For child product there is an option to inherit parent values. So child product gets its own values and an option to inherit parent values.
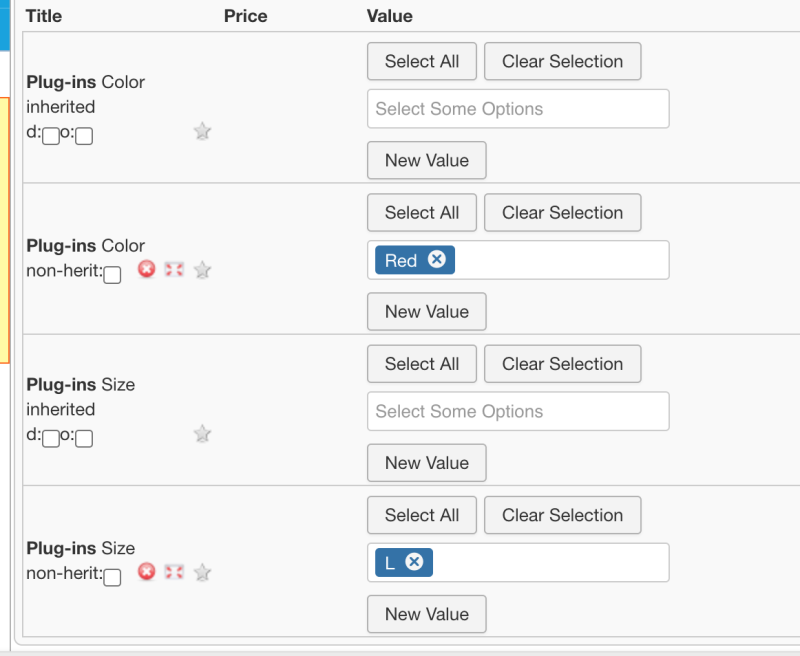
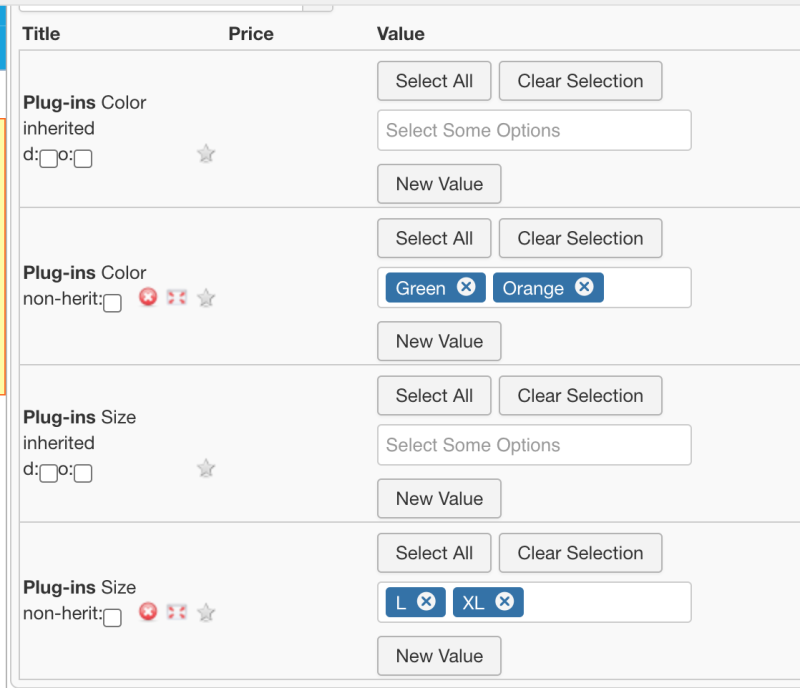
Multiple parameters with multiple values
It is possible that you have multiple filter fields that you want to assign to a product with multiple selected values for example Color and Size. The CSV file looks like this:
"product_sku";"custom_title";"custom_value";"custom_param";"product_name";"product_in_stock";"product_price";"product_parent_sku"
"10001";"Color~Size";"customfieldsforall~customfieldsforall";"Red#Blue~S#M";"Product with filter";"0";"100";""
"100011";"Color~Size";"customfieldsforall~customfieldsforall";"Green#Orange~L#XL";"Child product with filter";"0";"100";"10001"
If you have 2 custom titles, there must also be 2 custom values and 2 custom parameters.
Results after import
After import the custom field values can be checked in VirtueMart Product edit page and on Custom fields tab.
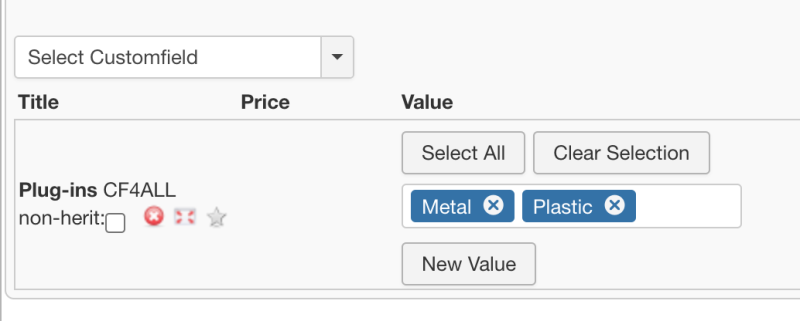
Multiple parameters with the same name
In case you want to assign the same custom field to one product but with different values you can do so by adding the custom_multiple field to your import file. The CSV file looks like this:
"product_sku";"custom_title";"custom_value";"custom_param";"custom_multiple";"product_name";"product_in_stock";"product_price";"product_parent_sku"
"10001";"CF4ALL~CF4ALL";"customfieldsforall~customfieldsforall";"Metal~Plastic";"Y~Y";"Product with filter";"0";"100";""
"100011";"CF4ALL~CF4ALL";"customfieldsforall~customfieldsforall";"Wood~Leather";"Y~Y";"Child product with filter";"0";"100";"10001"
Results after import
After import the custom field values can be checked in VirtueMart Product edit page and on Custom fields tab.
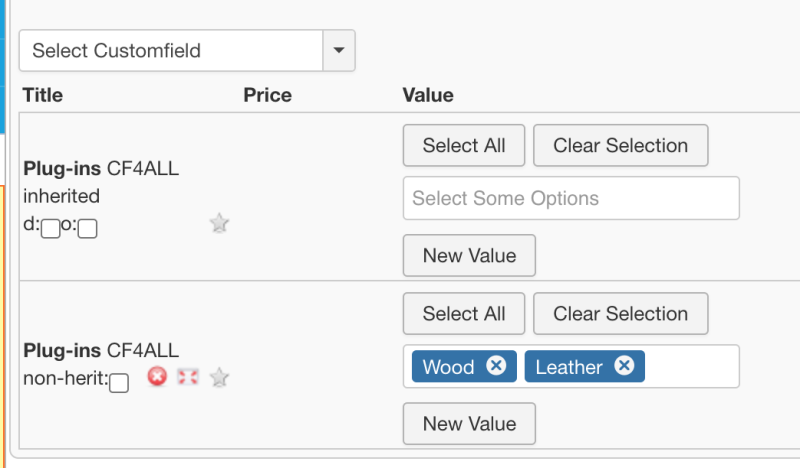
Override and Disabler
It is also possible to set the override and disabler values to the custom field on import.
To set override for a custom field use custom_override field. This field can take two values Y or N.
To set disabler for a custom field use custom_disabler field. This field can take two values Y or N.
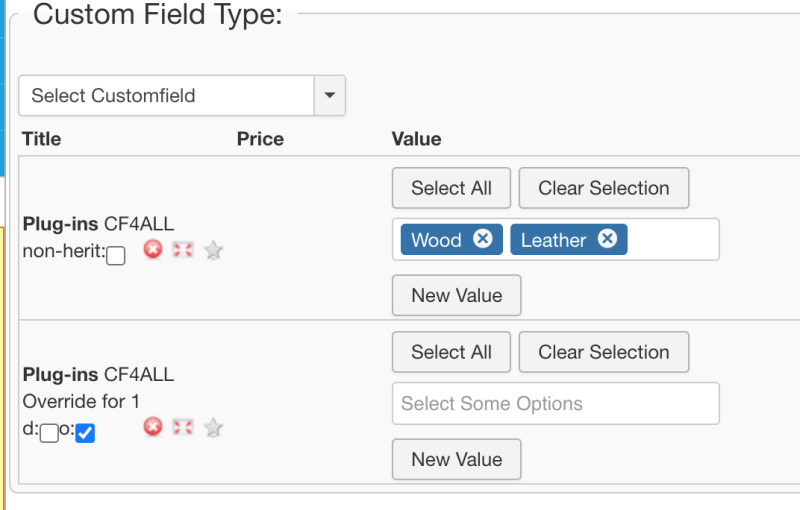
An example content with custom_override field is
"product_sku";"custom_title";"custom_value";"custom_param";"custom_multiple";"product_name";"product_in_stock";"product_price";"product_parent_sku";"custom_override"
"10001";"CF4ALL~CF4ALL";"customfieldsforall~customfieldsforall";"Metal~Plastic";"Y~Y";"Product with filter";"0";"100";"";""
"100011";"CF4ALL~CF4ALL";"customfieldsforall~customfieldsforall";"Wood~Leather";"Y~Y";"Child product with filter";"0";"100";"10001";"Y~N"
Result after import
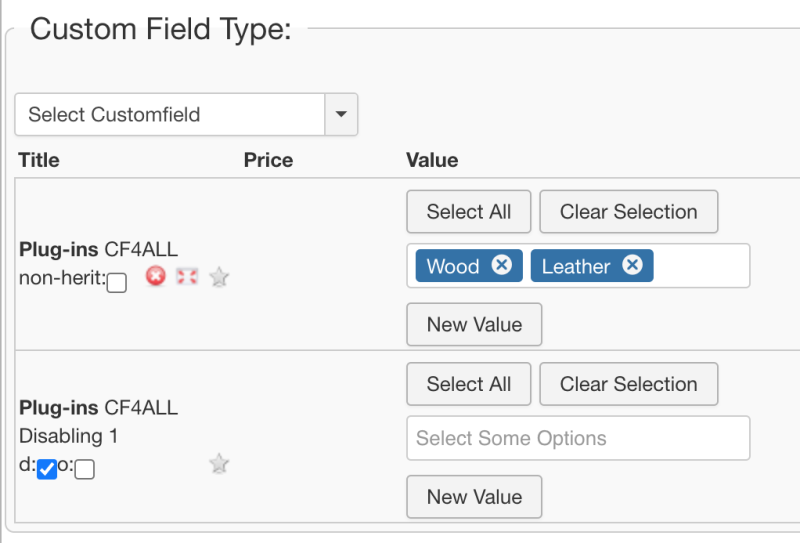
An example content with custom_disabler field is
"product_sku";"custom_title";"custom_value";"custom_param";"custom_multiple";"product_name";"product_in_stock";"product_price";"product_parent_sku";"custom_disabler"
"10001";"CF4ALL~CF4ALL";"customfieldsforall~customfieldsforall";"Metal~Plastic";"Y~Y";"Product with filter";"0";"100";"";""
"100011";"CF4ALL~CF4ALL";"customfieldsforall~customfieldsforall";"Wood~Leather";"Y~Y";"Child product with filter";"0";"100";"10001";"Y~N"
Result after import
Multi language import
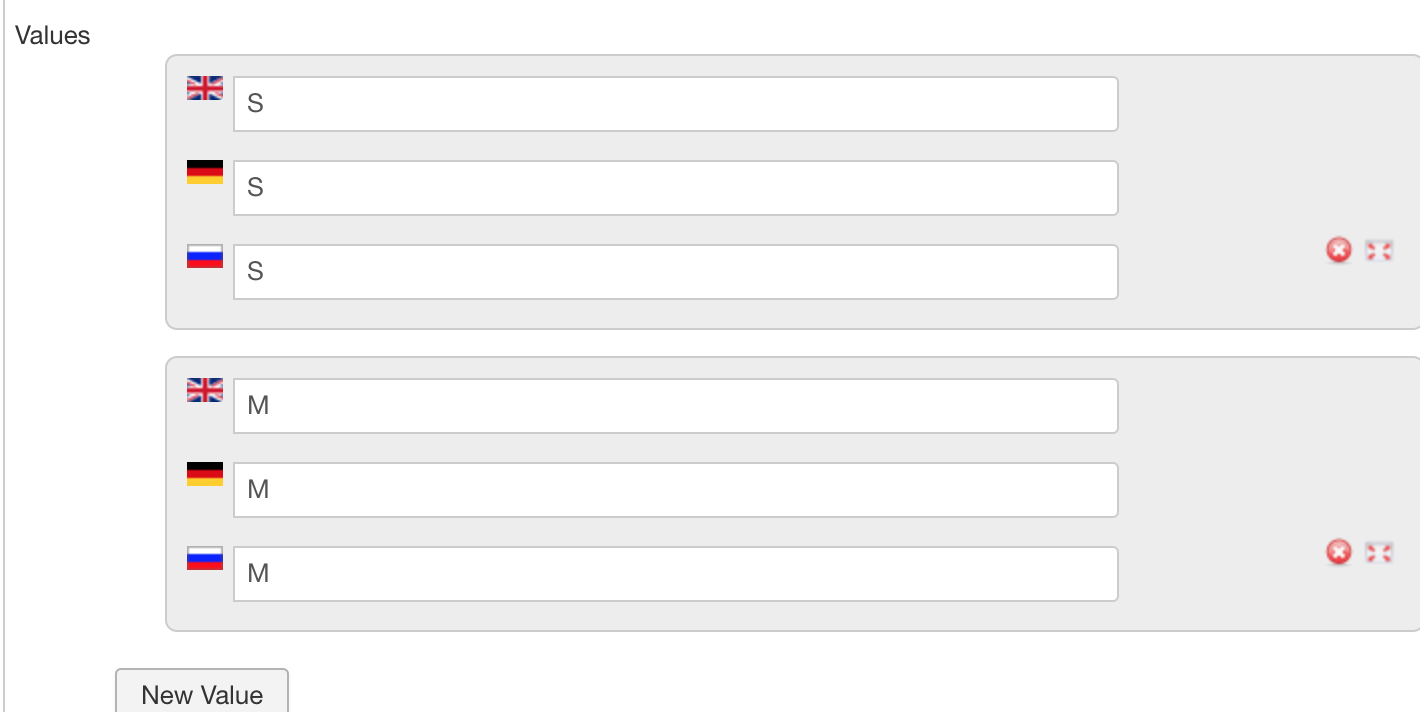
Starting from 7.5.0 version CSVI has support for importing custom fields for all for multiple languages. The example content explains how to import custom fields for all for Dutch and Russian languages. Same format can be followed for other languages. Follow the below steps to import multi language custom fields.
- Make sure that you have needed languages installed in Joomla language manager
- Set the multiple languages in VirtueMart Configuration page.
- Create custom fields for Custom fields for all for Size and Color as explained above
- Update available fields in CSVI
- Run the import by setting custom values as in the below example content.
"product_sku";"custom_title";"custom_value";"custom_param";"product_name";"product_in_stock";"product_price";"custom_param_de_de";"custom_param_ru_ru"
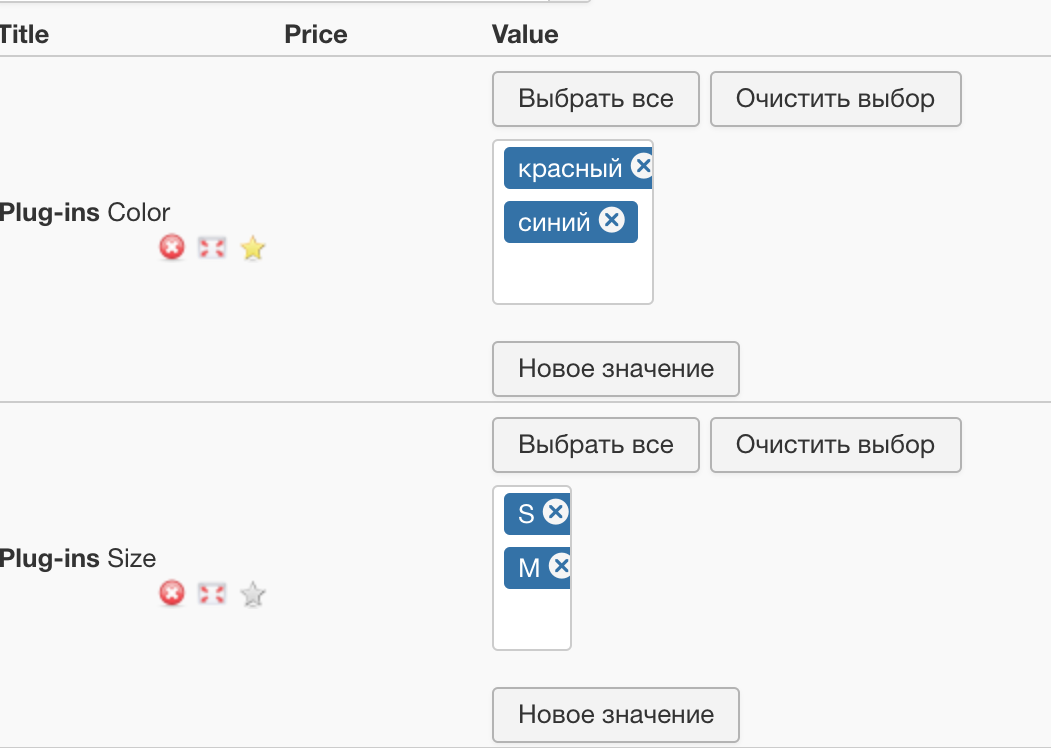
"10001";"Color~Size";"customfieldsforall~customfieldsforall";"Red#Blue~S#M";"Product with filter";"0";"100";"Rood#Blauw~S#M";"красный#синий~S#M"You can now check the imported values on VirtueMart Custom fields page.
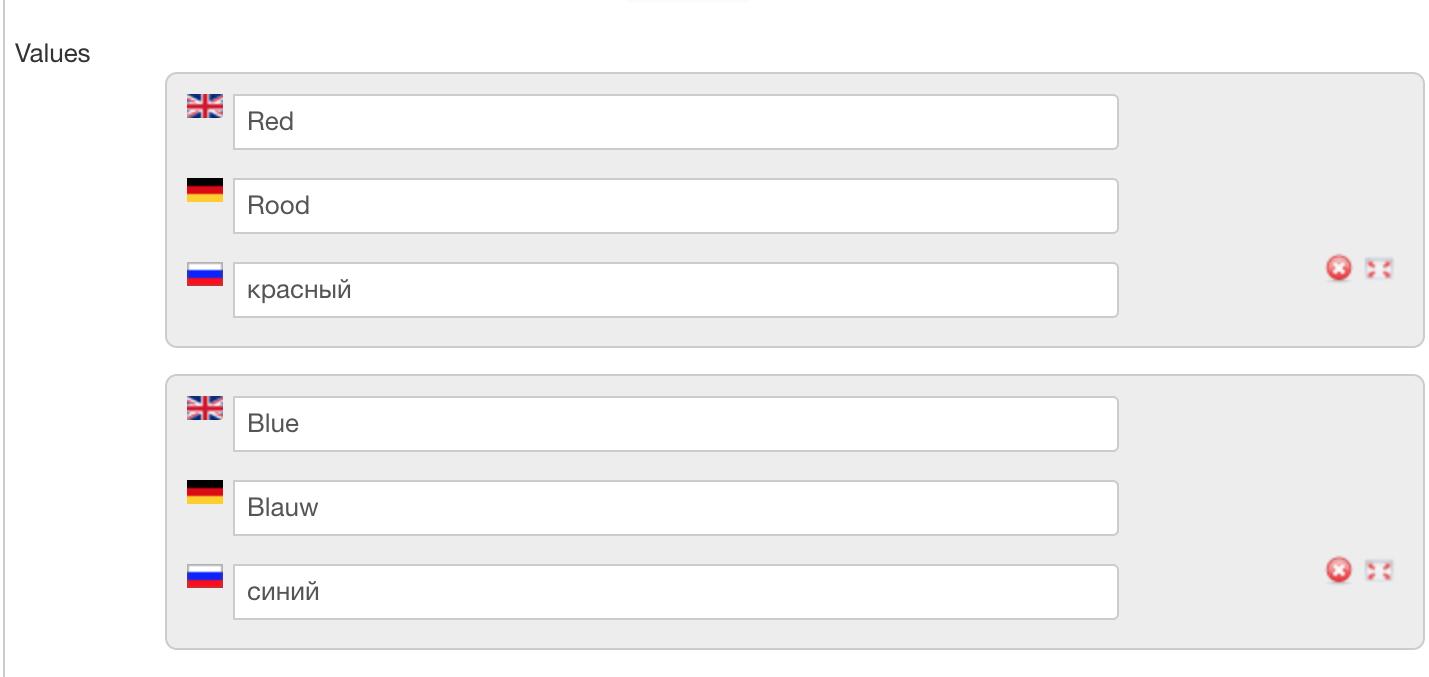
The custom fields values can also be seen from VirtueMart Products page for the default language in Joomla. For example if the default language set in Joomla Language manager is Russian then the values imported in field custom_param_ru_ru can be seen in VirtueMart Products page and on Custom fields tab.
Export of Custom Fields For All
Custom fields for all fields can be exported in two ways. They can be added as individual template field or use custom_title, custom_value and custom_param field in your export template to get custom fields for all field values. These fields can be added as any other template field for export template. If you do not see the CF4ALL fields then update available fields.
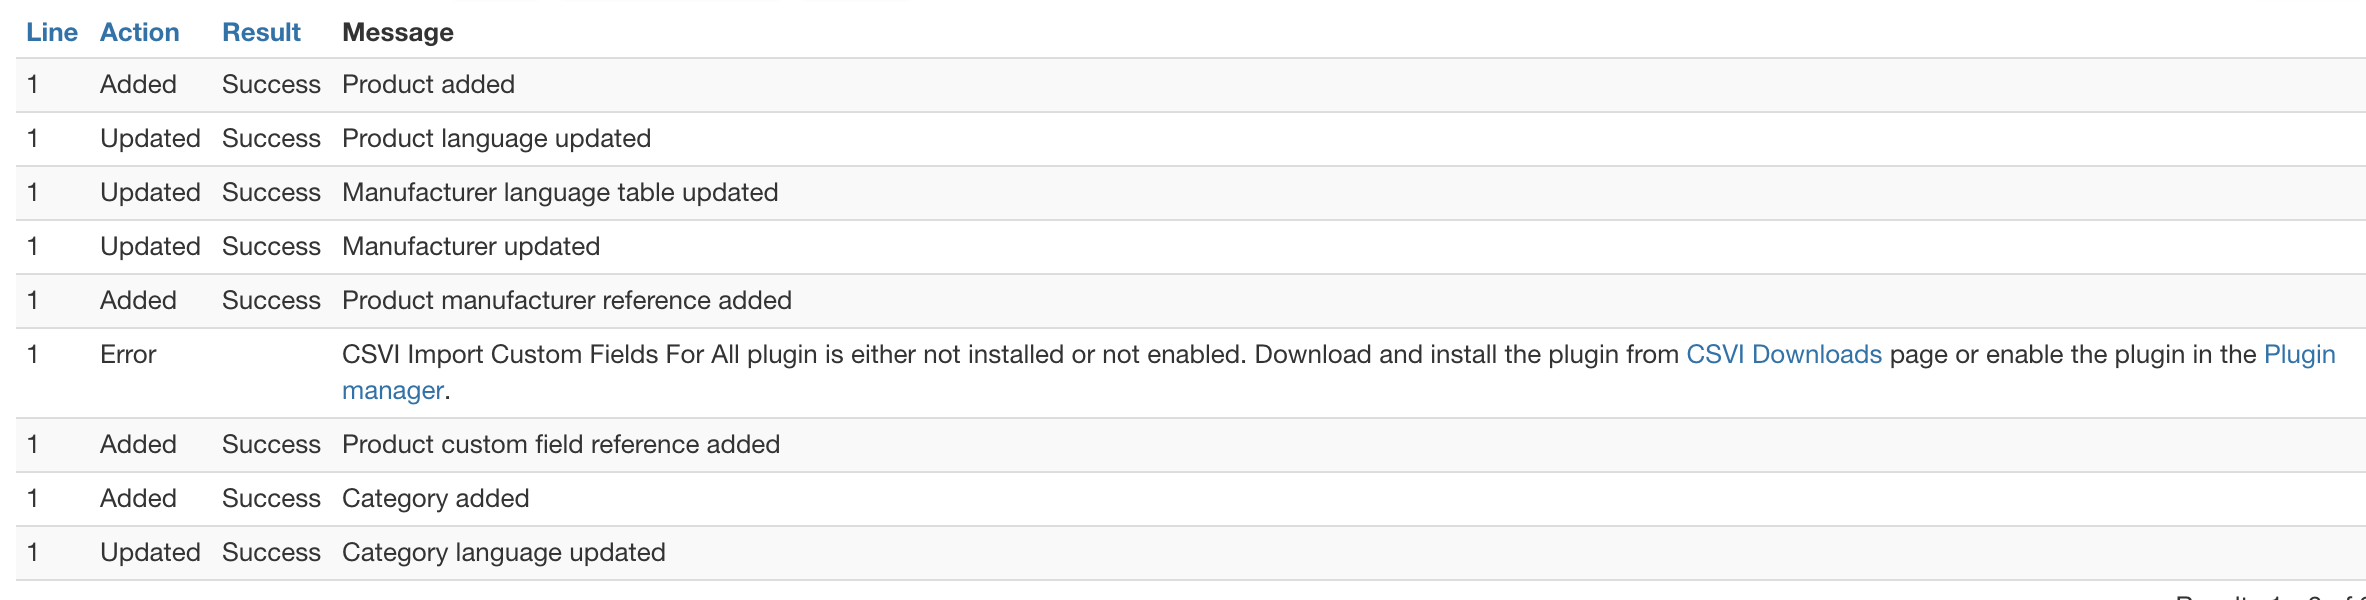
Troubleshooting
When running the import of custom fields for all, if the values are not added to a product. Make sure that you have CSVI customfields for all plugin installed and enabled.
CSVI shows a message if the plugin is not installed in the debug log area on import.
More articles on this subject
VirtueMart Ratings import
This tutorial explains how to create a VirtueMart ratings import template, add the fields and how to run the import. Step by step we show you how to perform each task. A video will show you the steps in action so you can follow that as well.