HikaShop
Import HikaShop Category Images
| HikaShop
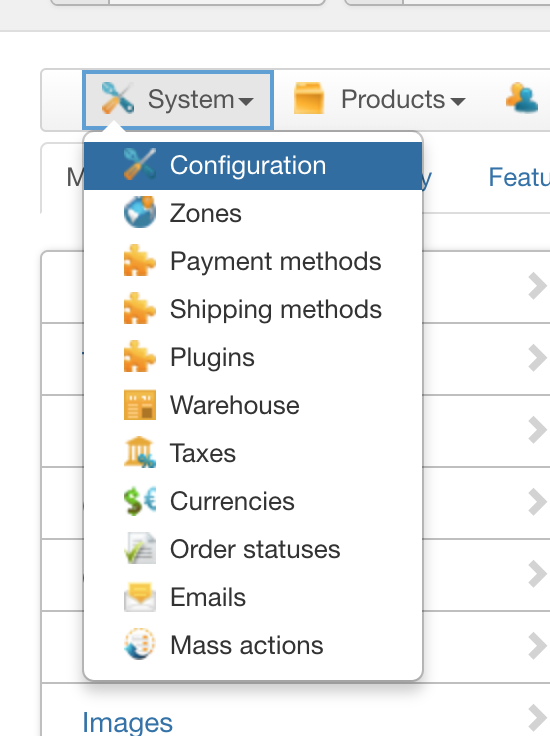
This article explains on how to import images of HikaShop Categories using CSVI. Before starting with import there are few preperations to be done. The default path for saving HikaShop images is the upload path set in HikaShop configuration page. You can check this path by going to Joomla administrator menu >> Components >> HikaShop >> System >> Configuration and under Files section. Make sure that you want to use the same folder for your images.

Next step is to upload all the images to this folder so CSVI will link these images to categories on import.
How does CSVI know where to locate your images? This is a combination of 2 settings:
- Path set in the HikaShop Configuration for Upload folder
- Name in the CSV file
On import CSVI combines these 2 settings to get the full path to the image. As an example the path in the configuration is set to images/com_hikashop/upload and the file_path field in the CSV file is set to example.jpg. This will create a full path of images/com_hikashop/upload/example.jpg. This is the correct path.
And using the category_path field in import file, CSVI will link the image to the category.
Preparing the template
Images are imported using HikaShop Category import template. You can have any number of fields for your category import but to import images make sure you also have file_path field as one of the import fields.

Adding the fields
Your template might already have some fields, for the images we require two needed fields:
- category_path
- file_path
category_path
The full path of the category
file_path
The name of the image to link to the category. Multiple images seperated by |. Example image1.jpg|image2.jpg|image3.jpg
Setting the template image options
The Image tab has a lot of options for managing your images. For now we will look at the general options. The most important option here is the Process images.
- Yes
This means that CSVI will perform all the image options set for example, create a thumbnail - No
This means that CSVI will not do any image processing.
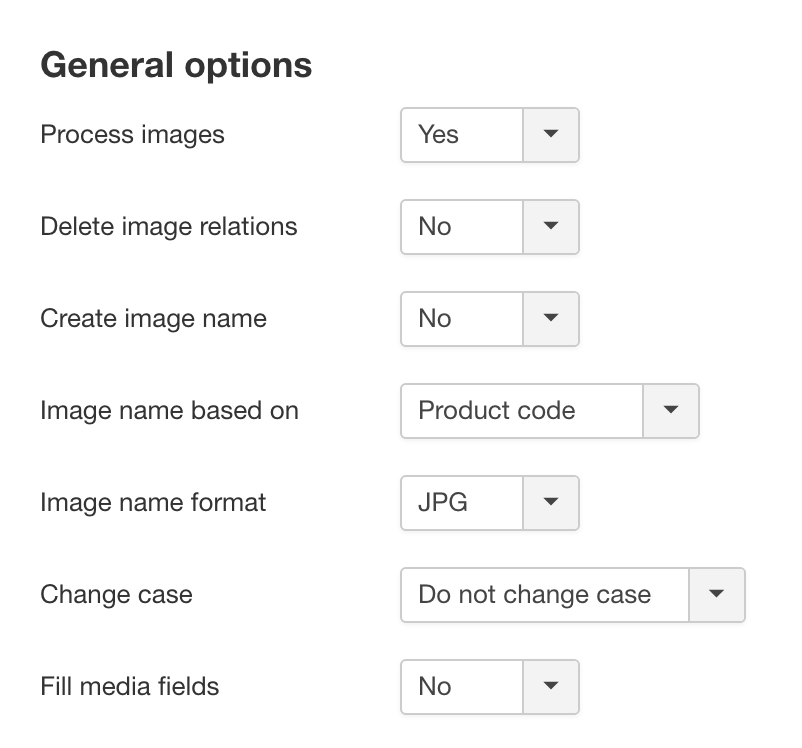
We set the Process images to Yes and then configure the thumbnail settings because we want to let CSVI create a thumbnail.
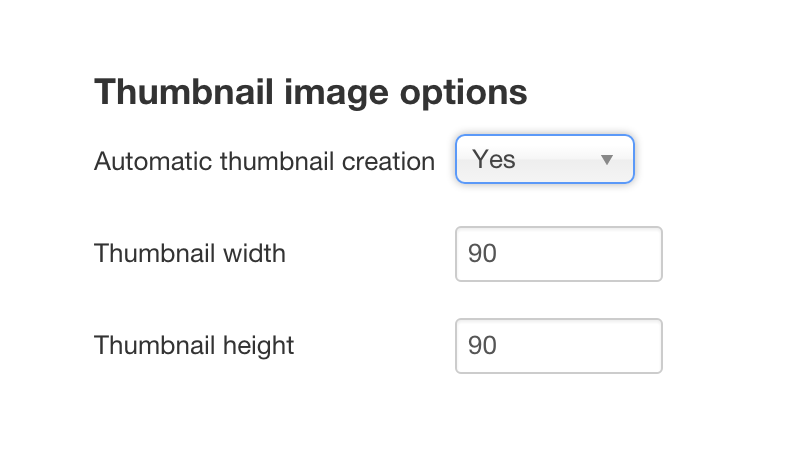
To enable the thumbnail creation set the option Automatic thumbnail creation to Yes and if you want set the thumbnail size you would like.
Creating the import file
In your import file, you need to add column to import image
- file_path
Here you put the name of the main image for example hammer.png
Let's create our CSV file, extending the CSV file created in the HikaShop Category Import tutorial, we now get:
category_path,category_type,category_description,category_published,file_path
shoes/men-shoes,product,Category for organising men shoes,1,menshoes.jpg
shoes/women-shoes,product,Category for organising women shoes,1,womenshoes.jpg
Save these 2 lines in a file or download the file by clicking here.
This completes the second step of the image path, we now have a complete path of images/com_hikashop/upload/menshoes.jpg
Import time
With our template configured and our file created, we are ready to import.
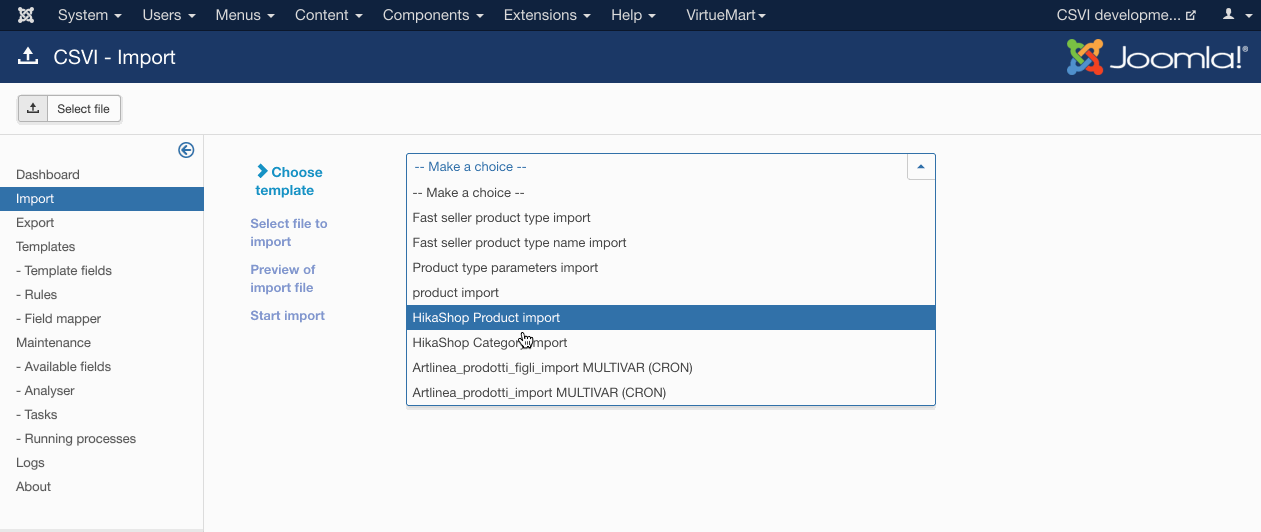
- Select the template from the CSVI import page.
- Click on Select File.
- On the source option we will load the file from our computer. Click on Choose File and select your import file. Then click on the Preview button in the top right hand corner.
- The list of fields in CSV would be shown as preview. Now click on Start import in the top right hand corner.
- Run the import
What's next?
The next thing you can do is, experiment. There are a lot of more features in CSVI you can use for example:
- Watermark images
- Store remote images on your server
- Resize large images
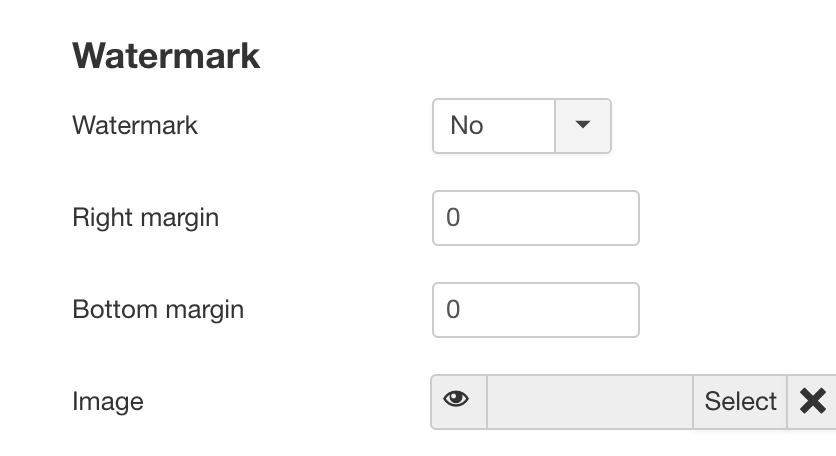
Watermark images
Watermarking images with CSVI is made easy. Set the Watermark image option to yes and upload the image you need to use as watermark and its done. CSVI will do the rest.
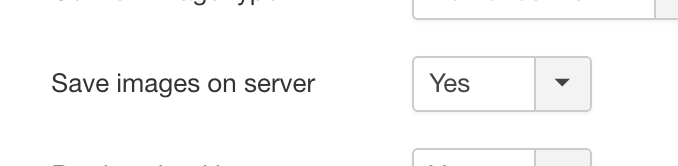
Store remote images on server
With CSVI it is possible to import images from remote server. On Image tab set Save images on server option to Yes and in file_path give the remote URL of the image. Thats it. CSVI will download the remote image to your local server and link it to the category.
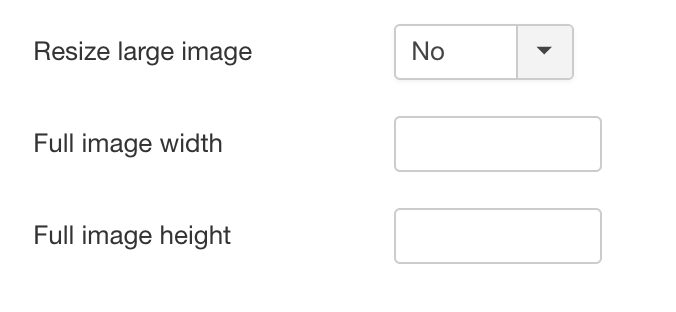
Resize large images
While importing images if you want to resize the large images set Resize image option to Yes and set the required height and width.
More articles on this subject
HikaShop import multiple prices for a product
| HikaShop
We have learnt on how to do a basic price import from HikaShop Price import document. This is an extended document which explains on how multiple prices for a product can be imported with quantity range.
Consider an example product with no price set in the HikaShop products view. By running th below sample import content three prices with different minimum quantity would be added.
product_code;price_value;price_min_quantity;price_access
10001;140;2;Editor
10001;120;3;Editor
10001;110;4;Editor
Create a HikaShop price import template by following the steps below
- Go to Components -> CSVI Pro -> Templates
- Click New
- Give the template a name
- Set Action to Import
- Set Component to HikaShop
- Set Operation to Price
- Click Next: Select Source
- Source is set default to Load from your computer. No need for change.
- Click Next: Select options
- The default values are OK, change if needed.
- Click Next: Select fields
- Nothing needed here as we set to Use column headers as configuration in step 10.
- Click Next: Finalize
- All done here
- Click Close to return to the list of templates or Edit if you want to fine-tune the template further.
Add template fields needed for the template. In this case of import content the template fields are product_code,price_value,price_min_quantity and price_access
- Go to Components -> CSVI Pro -> Templates
- Click on Template fields
- In the Search Tools select your template
- Click on New to add a single field or click on Quick Add to add multiple fields.
Quick Add
The Quick Add Option allows you to quickly add multiple fields to a template. It is not possible to set any settings per field here but that can be done after the fields have been added to the template.
Run the import from CSVI import page
- Go to Components -> CSVI Pro -> Import
- Select the template created earlier
- Click Select file
- Select the file to import
- Click Preview
- You now see a preview of the file as to how CSVI sees the file
- Click Start import
- The import is run
- The Log details page will be shown with information regarding the import if the Enable logging is enabled in the template

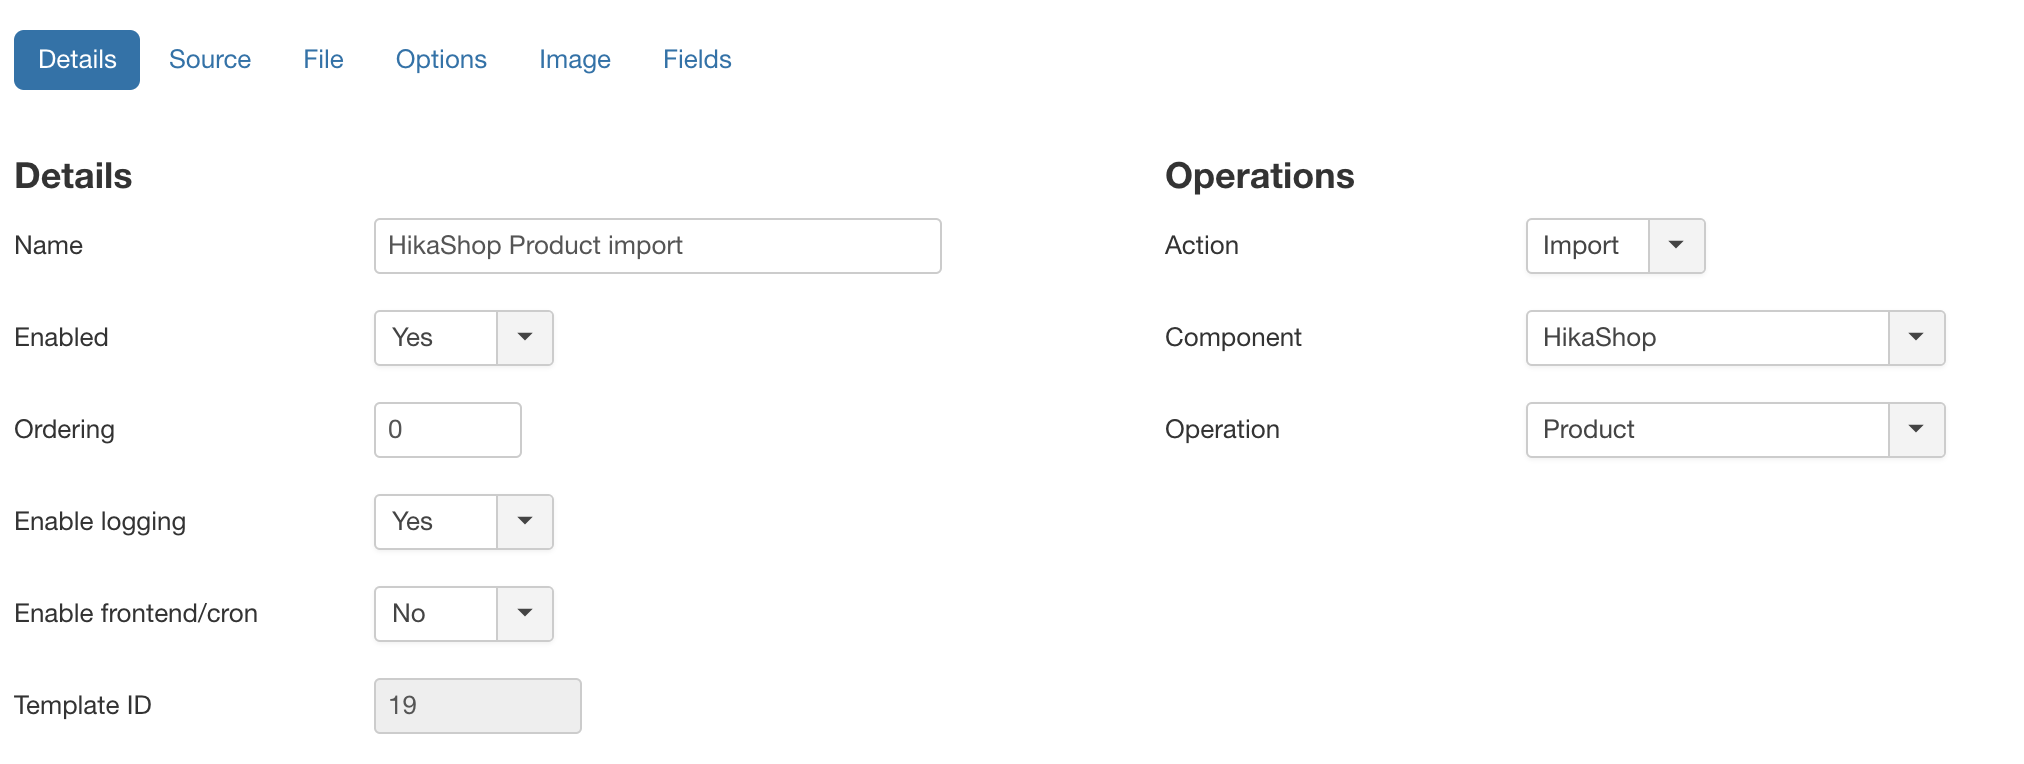
Import HikaShop Product Images
| HikaShop
This article explains on how to import images of HikaShop Products using RO CSVI. Before starting with import there are few preparations to be done. The default path for saving HikaShop images is the upload path set in HikaShop configuration page. You can check this path by going to Joomla administrator menu >> Components >> HikaShop >> System >> Configuration and under Files section. Make sure that you want to use the same folder for your images.
Next step is to upload all the images to this folder so RO CSVI will link these images to products on import.
How does RO CSVI know where to locate your images? This is a combination of 2 settings:
- Path set in the HikaShop Configuration for Upload folder
- Name in the CSV file
On import RO CSVI combines these 2 settings to get the full path to the image. As an example the path in the configuration is set to images/com_hikashop/upload and the file_path field in the CSV file is set to example.jpg. This will create a full path of images/com_hikashop/upload/example.jpg. This is the correct path.
And using the product_code field in import file, RO CSVI will link the image to the product.
Preparing the template
Images are imported using HikaShop Product import template. You can have any number of fields for your product import but to import images make sure you also have file_path field as one of the import fields.
Adding the fields
Your template might already have some fields, for the images we require two needed fields:
- product_code
- file_path
product_code
The SKU of the product
file_path
The name of the image to link to the product. Multiple images seperated by |. Example image1.jpg|image2.jpg|image3.jpg
Setting the template image options
The Image tab has a lot of options for managing your images. For now we will look at the general options. The most important option here is the Process images.
- Yes
This means that RO CSVI will perform all the image options set for example, create a thumbnail - No
This means that RO CSVI will not do any image processing.
We set the Process images to Yes and then configure the thumbnail settings because we want to let RO CSVI create a thumbnail.

To enable the thumbnail creation set the option Automatic thumbnail creation to Yes and if you want set the thumbnail size you would like.
Creating the import file
In your import file, you need to add column to import image
- file_path
Here you put the name of the main image for example hammer.png
Let's create our CSV file, extending the CSV file created in the HikaShop Product import tutorial, we now get:
product_code,product_name,product_description,product_published,file_path
H01,Hammer,A great hammer to let out all your frustration,1,hammer.jpg
Save these 2 lines in a file or download the file by clicking here.
This completes the second step of the image path, we now have a complete path of images/com_hikashop/upload/hammer.jpg
Import time
With our template configured and our file created, we are ready to import.
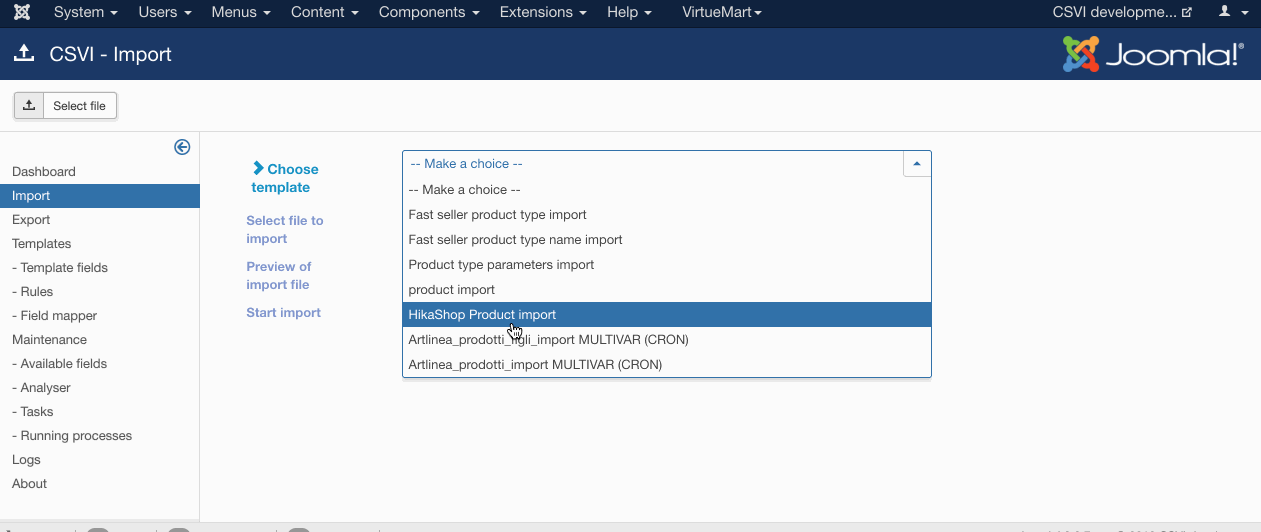
- Select the template from the RO CSVI import page.
- Click on Select File.
- On the source option we will load the file from our computer. Click on Choose File and select your import file. Then click on the Preview button in the top right hand corner.
- The list of fields in CSV would be shown as preview. Now click on Start import in the top right hand corner.
- Run the import
What's next?
The next thing you can do is, experiment. There are a lot of more features in RO CSVI you can use for example:
- Watermark images
- Store remote images on your server
- Resize large images
Watermark images
Watermarking images with RO CSVI is made easy. Set the Watermark image option to yes and upload the image you need to use as watermark and its done. RO CSVI will do the rest.
Store remote images on server
With RO CSVI it is possible to import images from remote server. On Image tab set Save images on server option to Yes and in file_path give the remote URL of the image. Thats it. RO CSVI will download the remote image to your local server and link it to the product.
Resize large images
While importing images if you want to resize the large images set Resize image option to Yes and set the required height and width.
HikaShop Product Export
| HikaShop
Creating the export template
A template can be created by following these steps:
- Go to Components -> CSVI Pro -> Templates
- Click New
- Give the template a name
- Set Action to Export
- Set Component to HikaShop
- Set Operation to Product
- Click Next: Select Source
- Destination is set default to Download. No need for change.
- Click Next: Select options
- The default values are OK, change if needed.
- Click Next: Select fields
- Fields must be added otherwise there is nothing for CSVI to export. Click Edit template fields.
- A new window opens with the Template fields page. You can add new fields by clicking New or Quick Add.
- When all fields are added you can close the window
- Click Next: Finalize
- All done here
- Click Close to return to the list of templates or Edit if you want to fine-tune the template further.

Add the fields to export
Template fields can be added by following these steps:
- Go to Components -> CSVI Pro -> Templates
- Click on Template fields
- In the Search Tools select your template
- Click on New to add a single field or click on Quick Add to add multiple fields.
Quick Add
The Quick Add Option allows you to quickly add multiple fields to a template. It is not possible to set any settings per field here but that can be done after the fields have been added to the template. 
Run the export
The export can be run by following these steps:
- Go to Components -> CSVI Pro -> Export
- Select the template created earlier
- Click Export
- The export is run
- The Log details page will be shown with information regarding the export if the Enable logging is enabled in the template

HikaShop Characteristic Export
| HikaShop
Creating the export template
A template can be created by following these steps:
- Go to Components -> CSVI Pro -> Templates
- Click New
- Give the template a name
- Set Action to Export
- Set Component to HikaShop
- Set Operation to Characteristic
- Click Next: Select Source
- Destination is set default to Download. No need for change.
- Click Next: Select options
- The default values are OK, change if needed.
- Click Next: Select fields
- Fields must be added otherwise there is nothing for CSVI to export. Click Edit template fields.
- A new window opens with the Template fields page. You can add new fields by clicking New or Quick Add.
- When all fields are added you can close the window
- Click Next: Finalize
- All done here
- Click Close to return to the list of templates or Edit if you want to fine-tune the template further.

Add the fields to export
Template fields can be added by following these steps:
- Go to Components -> CSVI Pro -> Templates
- Click on Template fields
- In the Search Tools select your template
- Click on New to add a single field or click on Quick Add to add multiple fields.
Quick Add
The Quick Add Option allows you to quickly add multiple fields to a template. It is not possible to set any settings per field here but that can be done after the fields have been added to the template. 
Run the export
The export can be run by following these steps:
- Go to Components -> CSVI Pro -> Export
- Select the template created earlier
- Click Export
- The export is run
- The Log details page will be shown with information regarding the export if the Enable logging is enabled in the template
