Generic child variant for VirtueMart would help you to show products with different size settings keeping one product as a base which would be the parent product. All you need to do is create generic child variant custom field type in VirtueMart and link it among your products. Generic variant is a individual product by itself so it has its own description, images and details as how a normal product would do.
Generic child variant for VirtueMart - Example content
An example import for importing Men shoes with different sizes is explained in this document.
product_sku;product_parent_sku;product_name;custom_title;custom_value
 SH10001;;Men shoe basic size;Shoe size;product_name
 SH100017;SH10001;Men shoe size 7;Shoe size;product_name
 SH100018;SH10001;Men shoe size 8;Shoe size;product_name
 SH100019;SH10001;Men shoe size 9;Shoe size;product_name
 SH1000110;SH10001;Men shoe size 10;Shoe size;product_name
Create Generic child variant for VirtueMart custom field
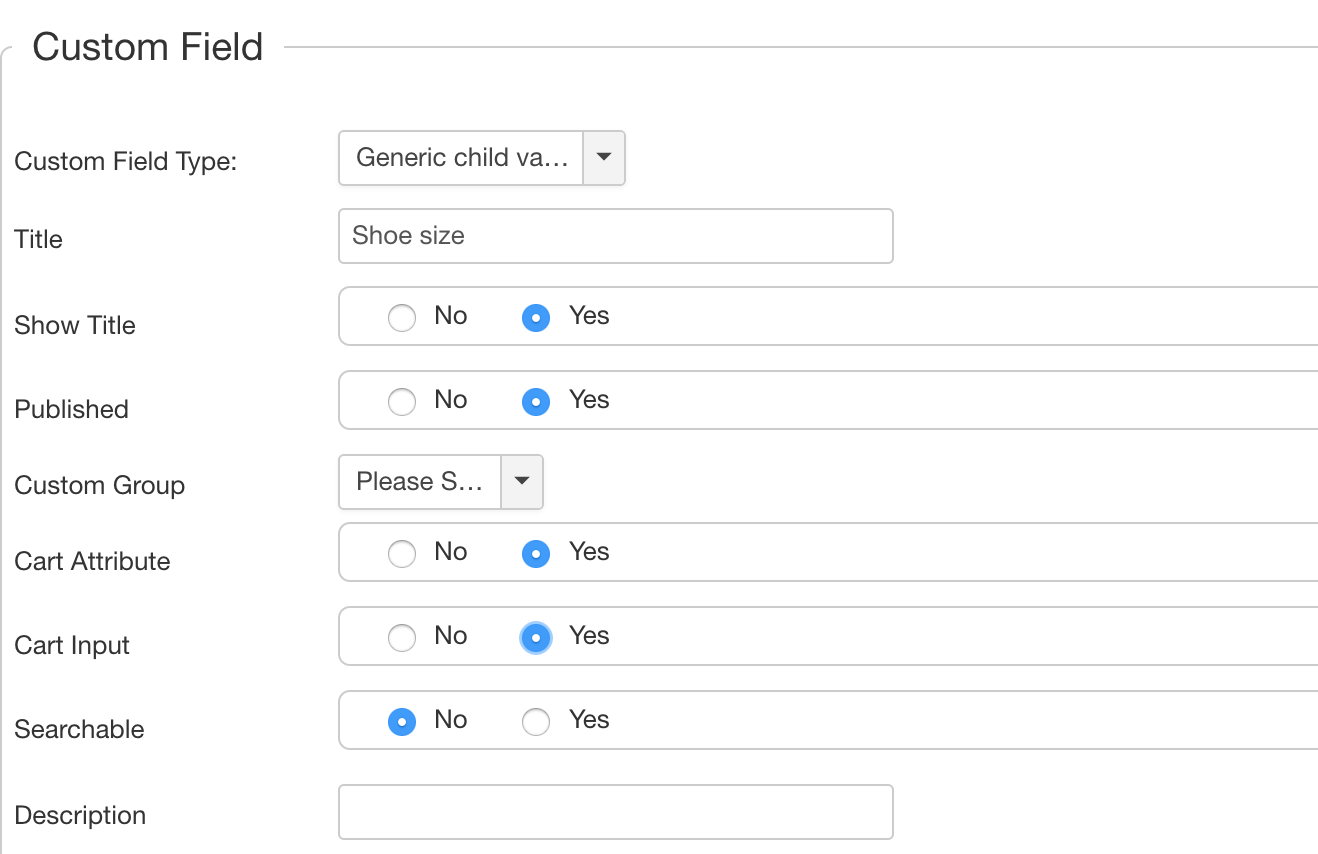
So to import the above content the first thing which needs to be done is to create a custom field Shoe size in VirtueMart custom fields page as shown below.

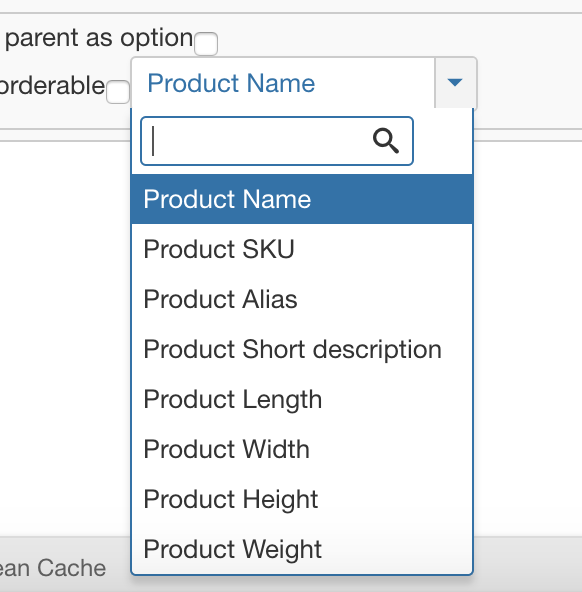
Note that in the example import content above custom_title has been set to the custom field name Shoe size and custom_value as product_name. There are few other options available for custom_value instead of product_name. The list of product fields available are shown in the image below. You can set the needed product field in the custom_value field as per your need.

Now that all the settings are done and the import content is ready, time to import the products using VirtueMart product operation in CSVI.
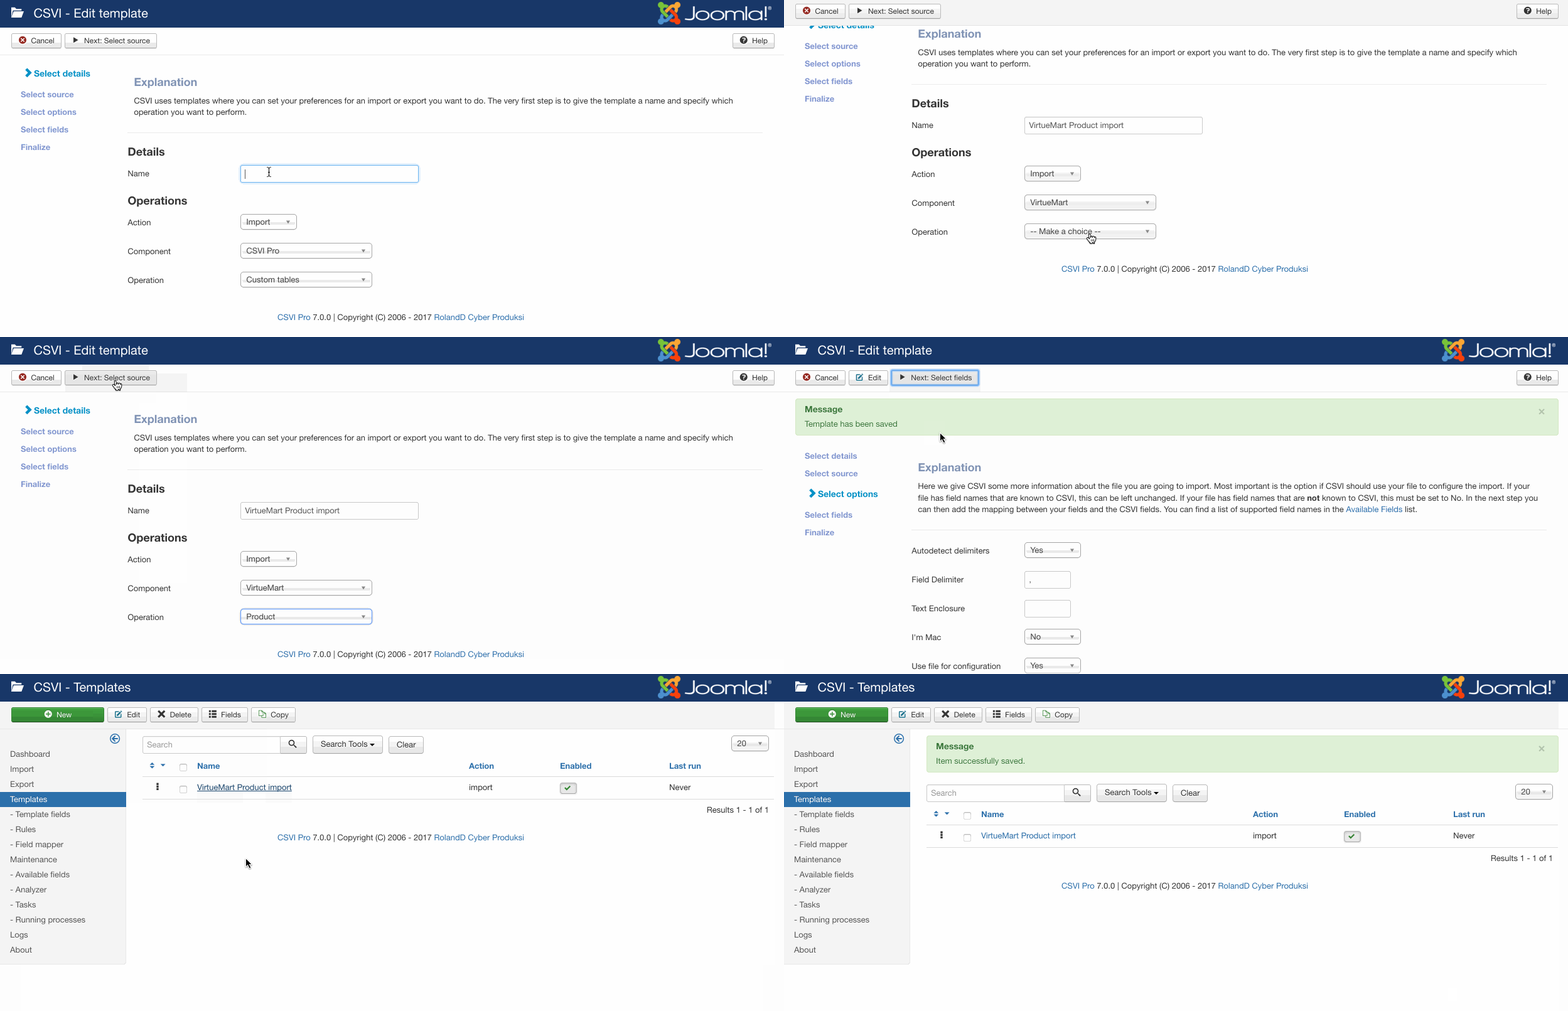
Create a template by following these steps:
- Go to Components -> CSVI Pro -> Templates
- Click New
- Give the template a name, say for example VirtueMart Product import
- Set Action to Import
- Set Component to VirtueMart
- Set Operation to Product
- Click Next: Select Source
- Source is set default to Load from your computer. No need for change.
- Click Next: Select options
- The default values are OK, change if needed.
- Click Next: Select fields
- Nothing needed here as we set to Use column headers as configuration in step 10.
- Click Next: Finalize
- All done here
- Click Close to return to the list of templates or Edit if you want to fine-tune the template further.

Template fields can be added by following these steps:
- Go to Components -> CSVI Pro -> Templates
- Click on Template fields
- In the Search Tools select your template
- Click on New to add a single field or click on Quick Add to add multiple fields.
Quick Add
The Quick Add Option allows you to quickly add multiple fields to a template. It is not possible to set any settings per field here but that can be done after the fields have been added to the template.
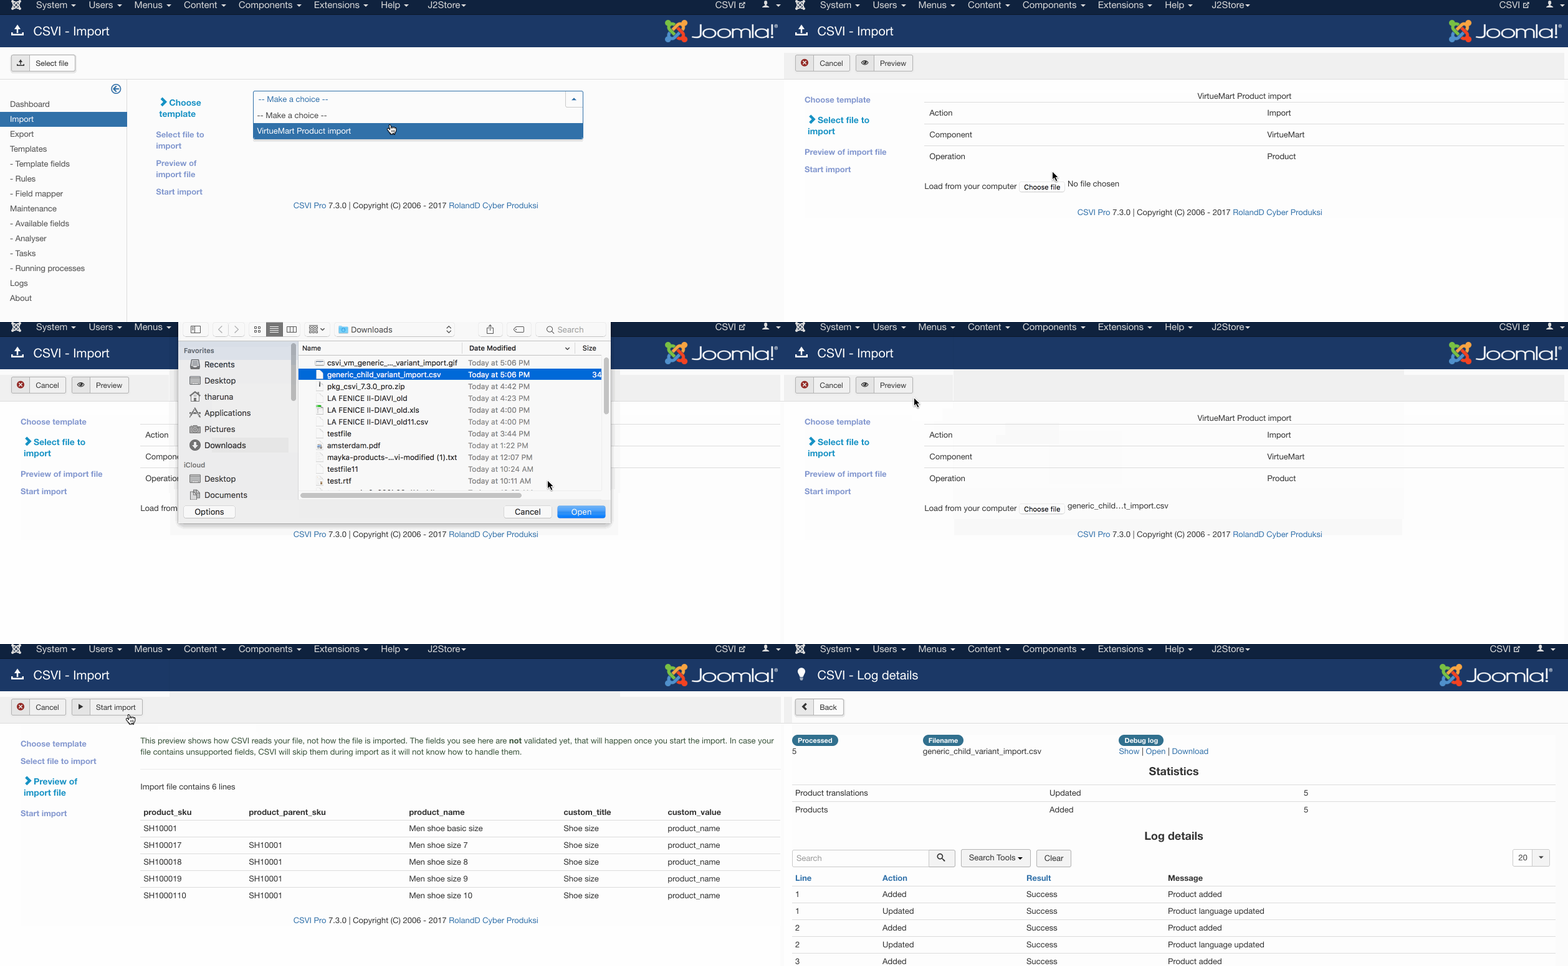
Run the import by following these steps:
- Go to Components -> CSVI Pro -> Import
- Select the template created earlier with name VirtueMart product import
- Click Select file
- Select the file to import
- Click Preview
- You now see a preview of the file as to how CSVI sees the file
- Click Start import
- The import is run
- The Log details page will be shown with information regarding the import if the Enable logging is enabled in the template.

Also note that if you would like to include the parent product in the list on the front end then add another field to the import content custom_param with value withParent="1"|parentOrderable="0"|wPrice=0|. So the example import content would be
product_sku;product_parent_sku;product_name;custom_title;custom_value;custom_param
 SH10001;;Men shoe basic size;Shoe size;product_name;withParent="1"|parentOrderable="0"|wPrice=0|
 SH100017;SH10001;Men shoe size 7;Shoe size;product_name;withParent="1"|parentOrderable="0"|wPrice=0|
 SH100018;SH10001;Men shoe size 8;Shoe size;product_name;withParent="1"|parentOrderable="0"|wPrice=0|
 SH100019;SH10001;Men shoe size 9;Shoe size;product_name;withParent="1"|parentOrderable="0"|wPrice=0|
 SH1000110;SH10001;Men shoe size 10;Shoe size;product_name;withParent="1"|parentOrderable="0"|wPrice=0|
More articles on this subject