RO CSVI Supports import from Google sheets starting with 7.17.0 version. In this document we explain step by step the procedure for setting up the Google account API.
Before doing any import or export settings we need to do few Google account settings so the generated keys can be used in RO CSVI import and export templates.
Sites that have their token stored in the template can continue to use that because if no global token is setup the template token will be used. In case a global token is created, this will take precedence over any template token. The option for generating a token in the template won't be available any longer once a global token is setup.
Setting up a Google Client
- Go to https://console.developers.google.com/
-
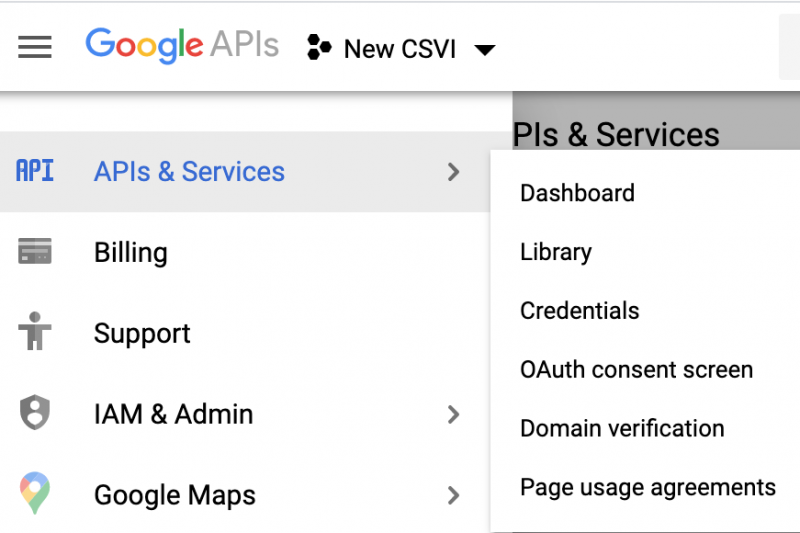
Click on API & Services and then Dashboard
-
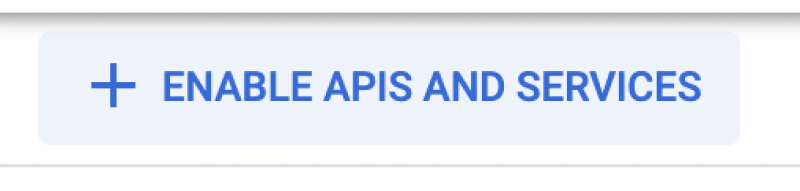
Enable Google sheet API by clicking on Enable APIs and Services button on top
-
In the top menu bar click on the Search products and resources field
-
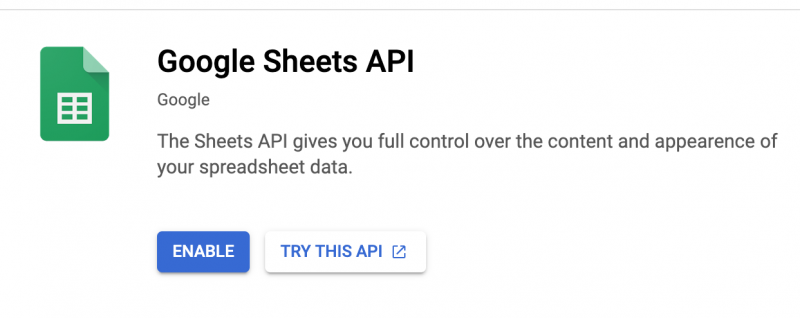
In the search field enter Google sheets, select the API and enable it.
-
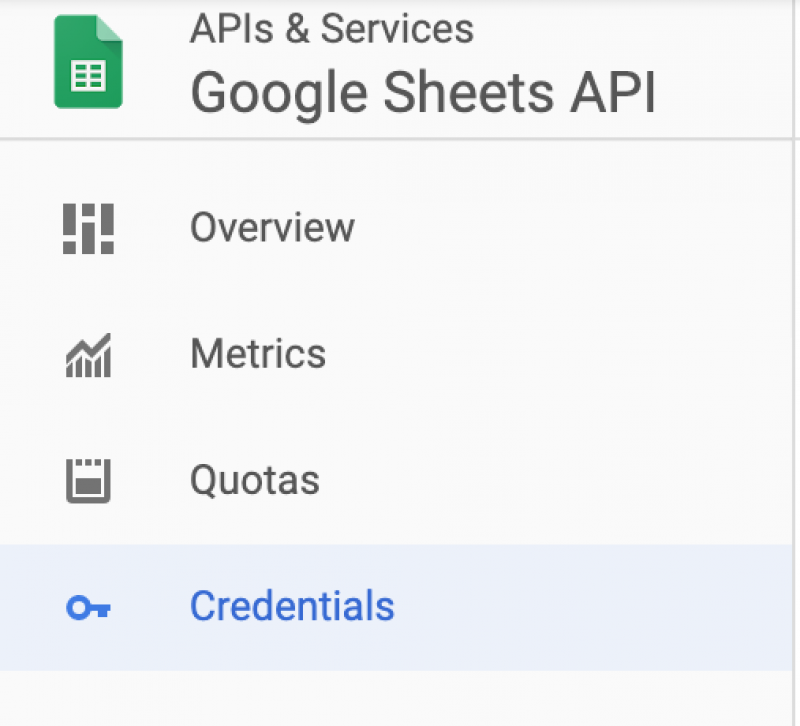
Go to Credentials page to create OAuth Client ID and a client secret key.
-
Click on Create Credentials button on top and select OAuth Client ID

-
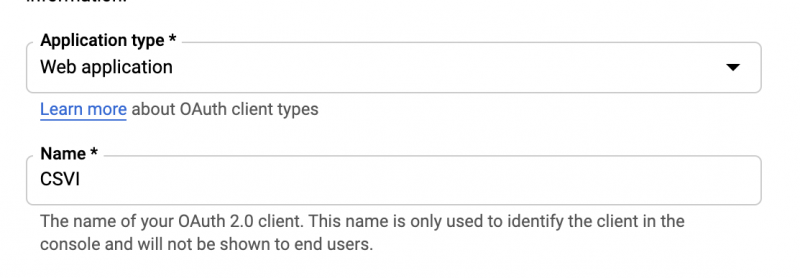
Select Application type as Web application and give a name for OAuth client ID. Here we have set it as CSVI.
-
In the Authorized redirect URIs section click on ADD URI
-
Put in the URL https://<DOMAIN>/administrator/index.php?option=com_csvi&task=maintenance.storeToken
This DOMAIN must be the same domain as where RO CSVI is being used
- Click on the Create button
-
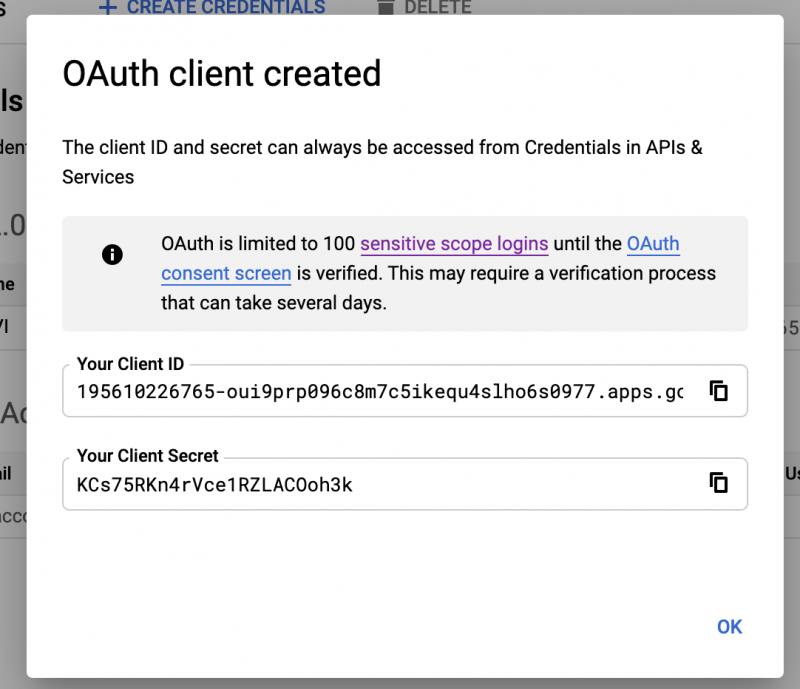
You will see Client ID and Client Secret Key generated. Note them down and keep them safe.
-
Click on Done and now you have OAuth Client id and Client secret ready.

-
Now they can be used in RO CSVI
Setup the global token
To create a global token, take the following steps:
- Click on System in the left menu
- Click on Global Configuration
- Click on RO CSVI in the component list on the left
- Click on the Google API tab
- Enter your Client ID as created in the Google OAuth client
- Enter your Client Secret as created in the Google OAuth client
- Click on Save
- Click on the button Generate Access Token
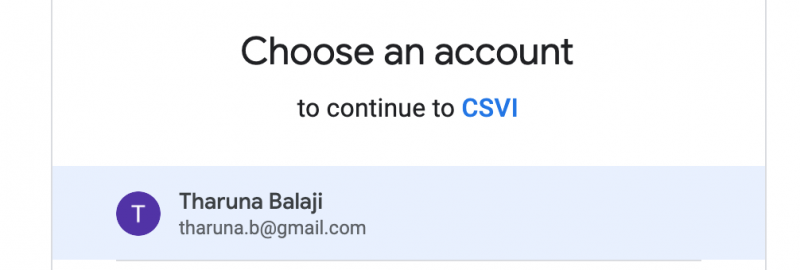
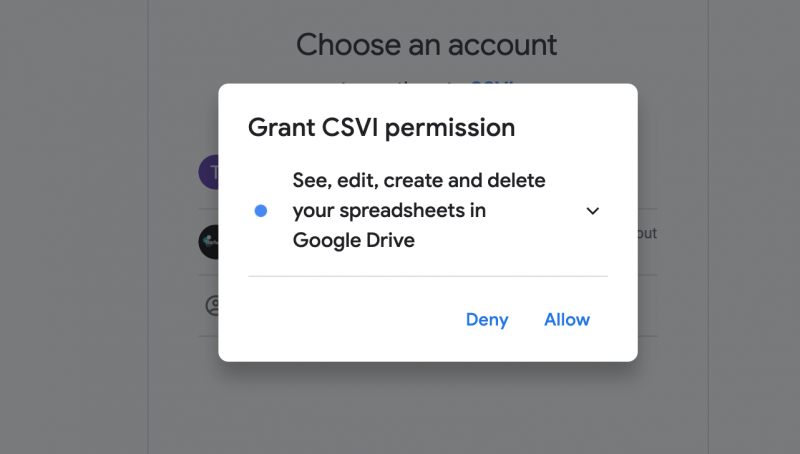
- You will be redirected to Google page to select your Google account and will be asked to allow access for the API for the account.
-
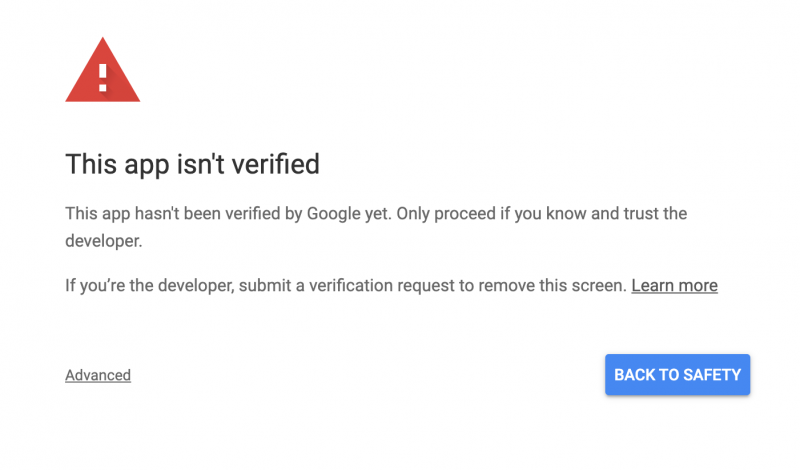
You may now see a warning that the app is not verified. In case you see the This app isn't verified page, there can be several reasons for that:
- The way you configured the scopes in the app requires verification by Google and this hasn't been completed yet. This is however not necessary for the integration to work. This is generally used when you are making your application available to the general public.
- The app is configured that it doesn't require verification by Google
Go to the Manage Consent Screen and edit your consent screen to allow for the Google verification process to verify your consent. On the edit page of the consent screen you will find a number of links and helpful information on how to deal with issues and the verification process. You can get more details on this verification process on the Unverified Apps page. You can click on Advanced and click on Go to CSVI (Unsafe) link to continue. In your case this will display the name of the app you have given in Google.
-
Allow access for the authorization named CSVI or whichever name you have given the project to manage your spreadsheets.
-
Confirm your choices with CSVI or whichever name you have given the project

- You should end up on the template listing with the message that the token has been generated.
- You can double check by clicking on the Options button and check the values on the Google API tab
You can also go to the global configuration by clicking on the Options button in the template list. This adds a return=xxx parameter to the URL, make sure to remove that from the URL when you are going to generate an access token.
Multiple websites
In case you have multiple websites that each need their own token, you need to setup different projects. To setup different projects do the following:
- Go to the Google Cloud API Dashboard
- In the top left corner you will see the name of your project, click on there to create new projects or to select an existing project. The button in the image is called RO CSVI Consent
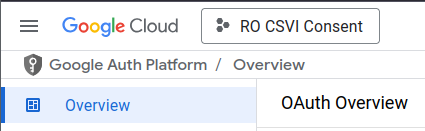
- Click on Overview to configure your project
- Once the project is configured, you need to create a new client for this project as explained above in the Setting up a Google client
Reset Google integration
If for some reason the integration with Google is corrupt or the refresh token is lost, you can always reset the Google integration and start over as new. The refresh token is only issued once when you authorize the application in Google.
Follow these steps to reset the Google integration:
- Go to https://myaccount.google.com/connections
- Remove the authorizations for your domain
- Redo the steps as outlined above under Setup the global token