The installation of RO Users requires a few steps to be taken as there are some pre-requisites to meet. The main installation is a regular Joomla installation where you upload the installation package and Joomla will install the files. Once that is done you can configure the settings according to your needs and wishes.
Requirements
The following requirements must be met before you can start using RO Users:
- Joomla 3.8+
- PHP 7.2+
- Access to cron jobs
- A bounce email
Installation
Follow these steps to install RO Users in Joomla:
- Go to Extensions -> Manage -> Install
- Select Upload Package File
- Select the package by clicking on browse for file
- Joomla will now install RO Users
Configuration
General Settings
There are a number of settings you can configure to fine-tune how RO Users work. The tooltips provide detailed information on what each setting does.
Mailbox Settings
A bounce address is used for when you send out an email but it cannot be delivered, the mailserver knows where to return the undelivered message. RO Users requires to have a bounce address setup as it will use this to analyze any bounce emails. When an email has bounced as being undeliverable for example, the user will immediately be deleted and not send anymore emails.
Configure the mailbox settings as you would in an email client. Ask your hosting provider which settings to use for your mail account. The default is to use imap as this is currently the default protocol.
Users Settings
When users get deleted but they are linked to an article and someone tries to access the article, the error JUser: :_load: Unable to load user with ID will be shown. By choosing an existing user here, RO Users will replace invalid user IDs with the ID of the selected user.
Logs Settings
The output of the cronjob can be send to different locations. In case you want to keep track of what has been going on you can set RO Users to log to file, so you can check the logfile at a later point in time.
Cron job
Cron command requirements
The cron command is a combination of a few settings:
- The PHP executable
- The path to cron.php
- The arguments
Let's take a closer look at these requirements.
PHP executable
The PHP executable is the program that processes the cron script. How the PHP executable is called completely depends on your host, check with them where your PHP executable resides. Some examples of the PHP executable are:
- php
- /usr/local/bin/php
This is often PHP 5.3 and unsupported - /usr/local/bin/php55
This will use PHP 5.5.x - /usr/local/bin/php56
This will use PHP 5.6.x - /usr/local/bin/php70
This will use PHP 7.0.x
Make sure to check with your host how to call the correct PHP version for your system.
Path to the cron job file
The file that processes the user accounts is called rouser.php, this file can be called directly from the command line. The file is located in /cli/rouser.php. It is important to know where the file is as you need to use the path to build the cron command. The full path needs to be the complete path to the rouser.php file. The full path depends on your host, check with them what your path needs to be. Some examples of the full path are:
- /home/domain/public_html/cli/rouser.php
- /www/cli/rouser.php
Arguments for the script
There are several arguments that need to be passed on to make the script work. These arguments are:
- --username
A username of a user account that is allowed to delete users
- --password
The password belonging to the supplied username.
- --hostname
The URL of the website. This is used to create the opt-out link in the email sent out to users.
Build the cron command
Including the arguments the full command can look like this:
/usr/local/bin/php /home/domain/public_html/cli/rouser.php --username="admin" --password="admin" --hostname="https://example.com/"
Make sure this command is all on one line. In a cron job you cannot span a command across multiple lines.
Need help?
The cron command comes with a built-in help screen. You can get the help screen by issuing this command:
/usr/local/bin/php /home/domain/public_html/cli/rouser.php --help
Setting up the cron command
How to setup the cron command depends on your host. Check with them how to set it up for your site. There are 2 control panel systems used often, these are cPanel and DirectAdmin, instructions for these follow here.
cPanel
- Login to cPanel for your site
- Click on Cron Jobs in the Advanced area.
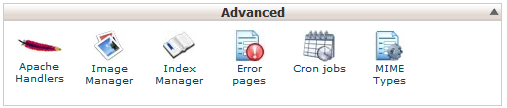
- Select the time you want the job to run in the Add New Cron Job
- Fill in your cron command in the Command box

- Click on Add New Cron Job
- The job is now scheduled
DirectAdmin
- Login to DirectAdmin for your site
- Click on Cronjobs in the Advanced Features area
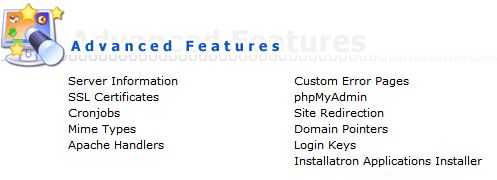
- Fill in the time you want the job to run in the Create a New Cron Job
- Fill in your cron command in the Command box
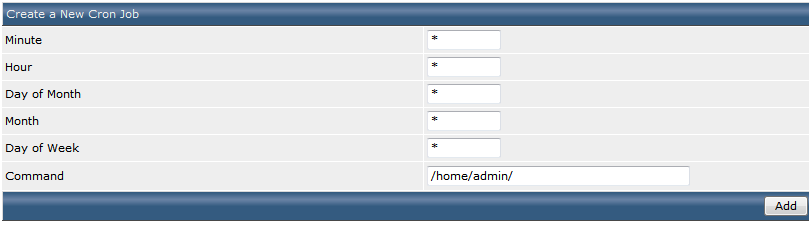
- Click on Add
- The job is now scheduled
The output
The script will output what it has done and the output looks like this:
Starting up the magic box...
Start clearing the queue
Done clearing the queue
Start cleaning out the bounced emails
Bounce messages found: 2
Finished cleaning out the bounced emails
Start queueing users
Going to add 464 users to the queue
Done queueing users
Start processing users with no last visit date
End processing users with no last visit date
Start sending first reminders
Sending a first reminder to 5 users
Done sending first reminders
Start sending second reminders
Done sending second reminders
Start processing deletions
End processing deletions
Shutting down the magic box...
Summary
Now that all is setup, the final step is to test if the cron job runs as expected. You should definitely try this first on a test environment where mails are setup to not be delivered or delivered in a fake account as you do not want to send out real messages while testing.