VirtueMart
VirtueMart Custom Fields export
This tutorial explains how to create a VirtueMart custom fields export template, add the fields and how to run the import. Step by step we show you how to perform each task. A video will show you the steps in action so you can follow that as well.
Creating a template
A template can be created by following these steps:
- Go to Components -> RO CSVI -> Templates
- Click New
- Give the template a name
- Set Action to Export
- Set Component to VirtueMart
- Set Operation to Custom field
- Click Next: Select Source
- Destination is set default to Download. No need for change.
- Click Next: Select options
- The default values are OK, change if needed.
- Click Next: Select fields
- Fields must be added otherwise there is nothing for CSVI to export. Click Edit template fields.
- A new window opens with the Template fields page. You can add new fields by clicking New or Quick Add.
- When all fields are added you can close the window
- Click Next: Finalize
- All done here
- Click Close to return to the list of templates or Edit if you want to fine-tune the template further.
Adding template fields
- Go to Components -> RO CSVI ->Template fields
- In the Search Tools select your template
- Click on New to add a single field or click on Quick Add to add multiple fields.
Quick Add
The Quick Add Option allows you to quickly add multiple fields to a template. It is not possible to set any settings per field here but that can be done after the fields have been added to the template.
Run the export
- Go to Components -> RO CSVI -> Export
- Select the template created earlier
- Click Export
- The Log details page will be shown with information regarding the export if the Enable logging is enabled in the template
Video showing the process
VirtueMart Manufacturer Categories export
This tutorial explains how to create a VirtueMart Manufacturer categories export template, add the fields and how to run the export. Step by step we show you how to perform each task. A video will show you the steps in action so you can follow that as well.
Importing Multi Variant custom field
Recently VirtueMart introduced a new way of dealing with articles that can contain variants like clothes for example. They have named this custom field Multi Variant. Unlike a text field this is a pretty complicated custom field as it has many options.
CSVI deals with 2 settings:
- Ramifications
CSVI only supports the Use custom label option. - Values
The ramifications are for CSVI just field names and they are available as regular field names. By making the ramifications available as regular available fields the values become also regular values. There is one catch, the parent product must have two fields called multi_variant_title and multi_variant_fields. The multi_variant_title is the name of the Multi Variant custom field you created and the multi_variant_fields is the list of ramifications to use.
In this example we will use a t-shirt as our product to sell. Our t-shirt is available in the sizes S/M/L/XL and the colors Green/Blue/Red/Purple. Looking at our t-shirt we can already tell what our ramifications and values are. Let's break it down.
Ramifications
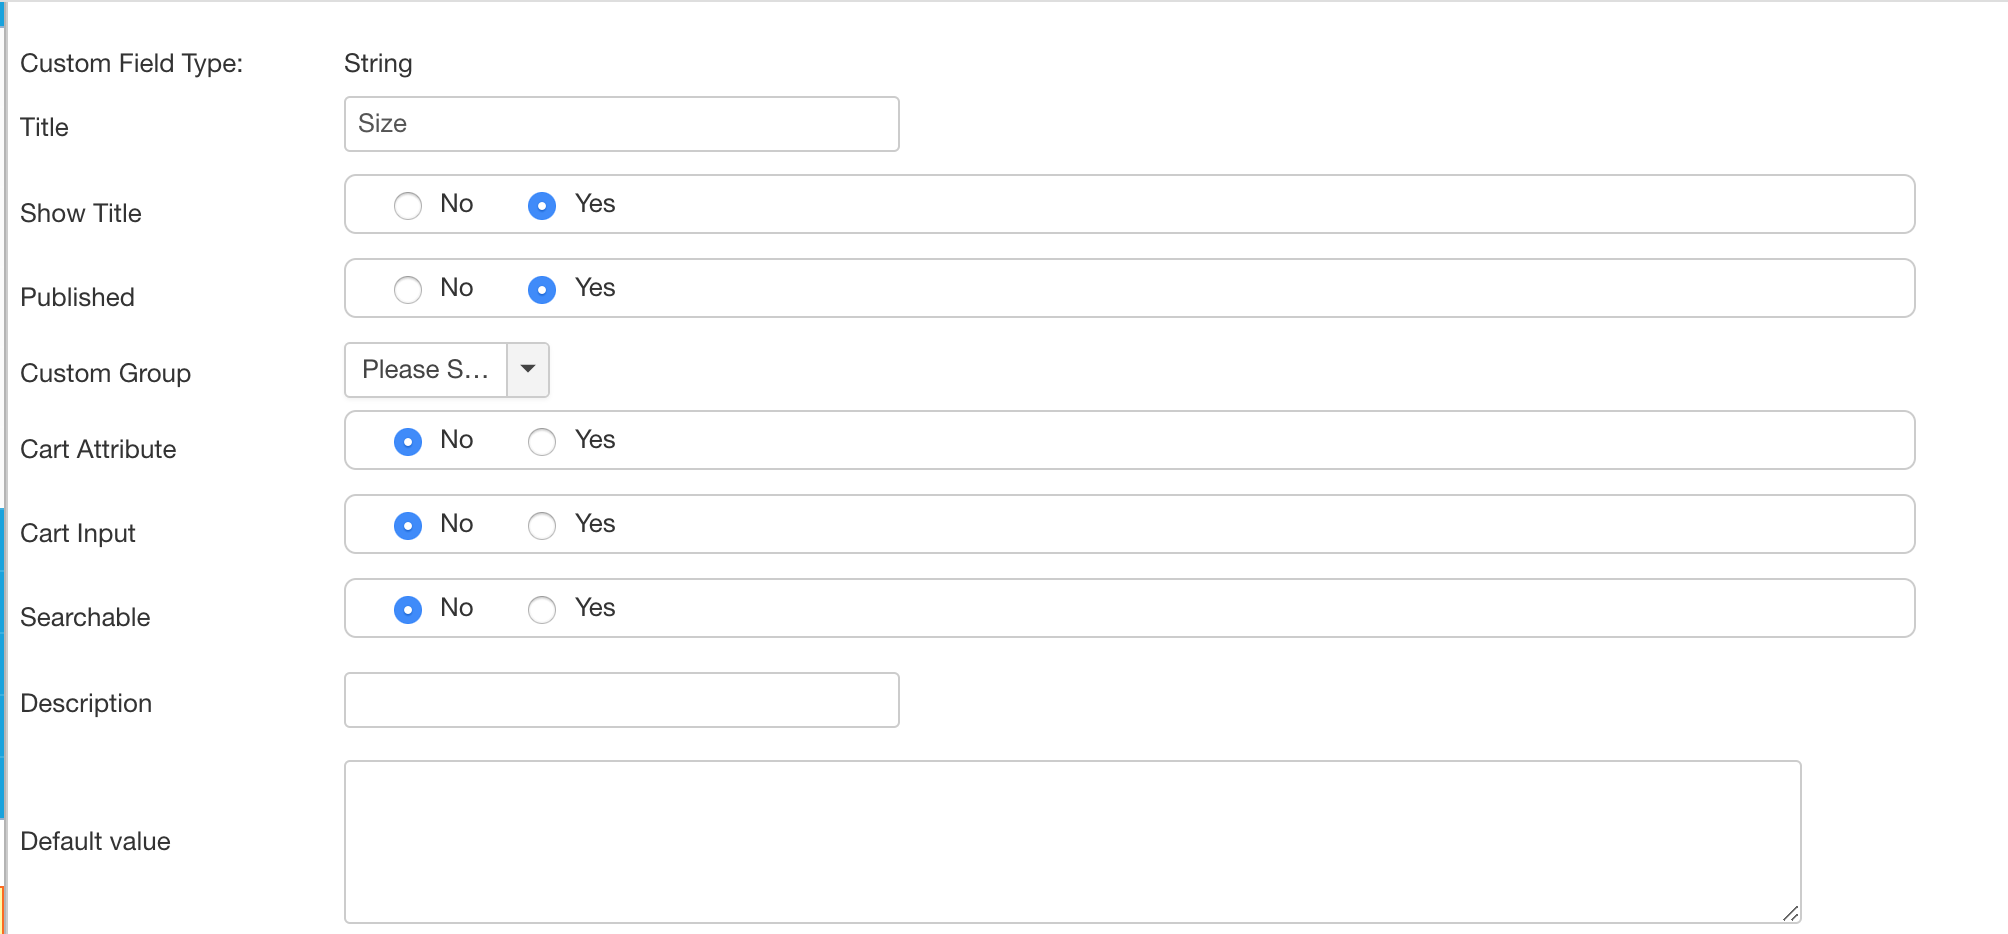
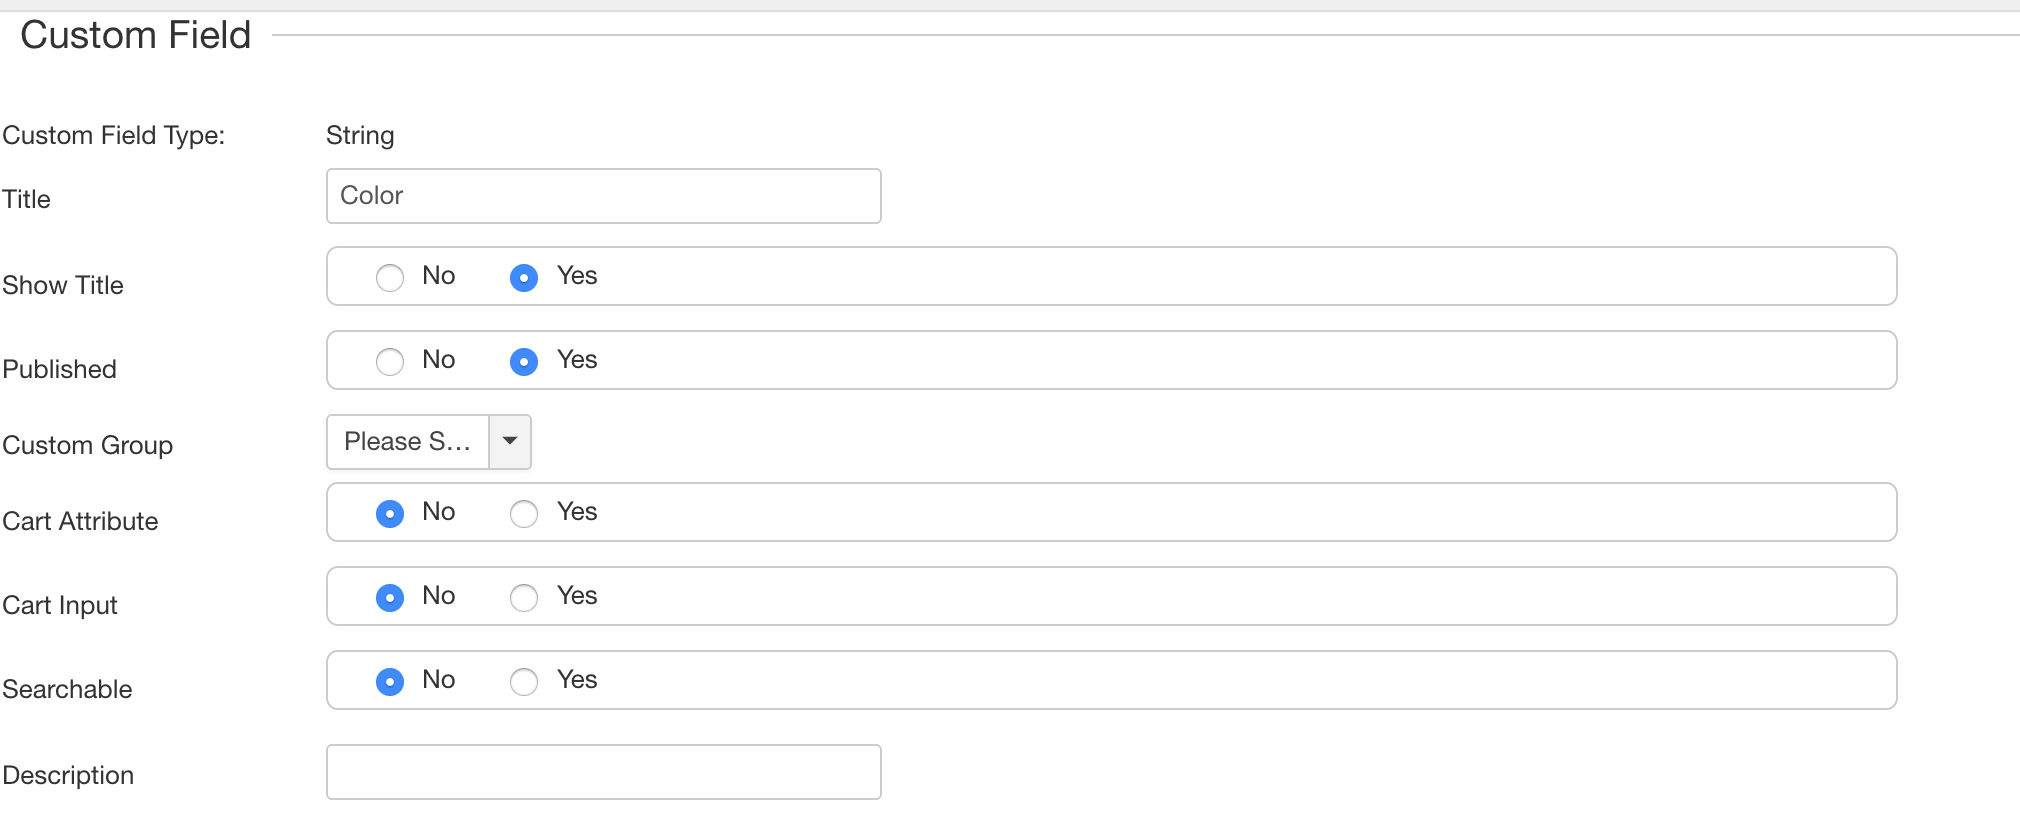
With our t-shirt we have 2 ramifications, they are Size and Color. In VirtueMart when you add a Multi Variant to a product you must specify the available options for each ramification, this is not needed for CSVI. CSVI will fill these in with the values found in your CSVI file. Create two string custom fields Size and Color from VirtueMart Custom fields page.
Values
As mentioned above we also know which values we want to use. The sizes are S/M/L/XL and the colors are Green/Blue/Red/Purple. We don't have to do anything with them now because CSVI will use them if they are found. Any value found will be used, so if your import file contains the size XXL and the color Yellow, this will be added as well.
Straighten out our products
Our t-shirt needs to be divided into the different combinations we have in stock. Let's say we have these t-shirts in stock:
| Size | Color |
| S | Green |
| M | Green |
| L | Green |
| S | Purple |
| M | Purple |
| L | Red |
| XL | Red |
| S | Blue |
So with these t-shirts in stock, we know which products we want to import. Now we need to give each product a unique code so we can identify which product the customer ordered.
| product_sku | product_parent_sku | Size | Color |
| SHIRT-S-GREEN | S | Green | |
| SHIRT-M-GREEN | SHIRT-S-GREEN | M | Green |
| SHIRT-L-GREEN | SHIRT-S-GREEN | L | Green |
| SHIRT-S-PURPLE | SHIRT-S-GREEN | S | Purple |
| SHIRT-M-PURPLE | SHIRT-S-GREEN | M | Purple |
| SHIRT-L-RED | SHIRT-S-GREEN | L | Red |
| SHIRT-XL-RED | SHIRT-S-GREEN | XL | Red |
| SHIRT-S-BLUE | SHIRT-S-GREEN | S | Blue |
Since SHIRT-S-GREEN is the first t-shirt, this also becomes the parent product. The rest of our t-shirts need to be linked to the parent product so we know it is a variation of that first t-shirt.
Prepare the CSV file
Now that we have a good overview of our t-shirts we can make the CSV file ready for import. The only missing pieces are the multi_variant_title and multi_variant_fields fields to tell CSVI which fields to use for the Multi Variant. For the multi_variant_fields each value is separated with a ~ symbol.
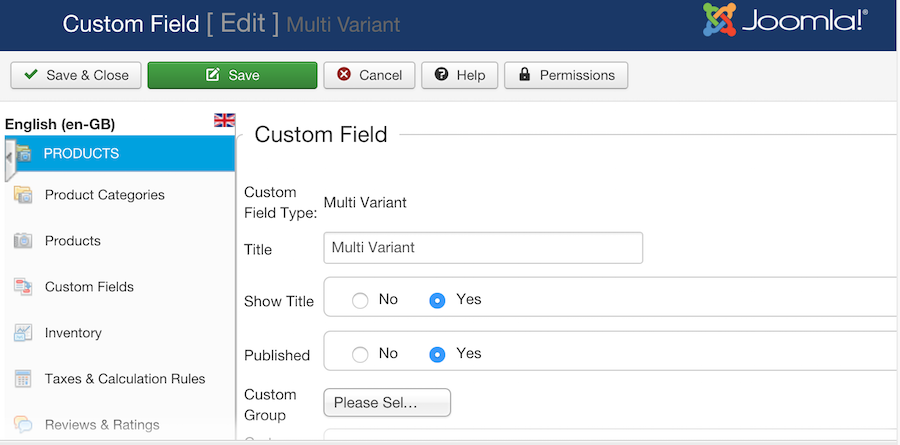
Please note that the multi_variant_title should be same as the title set for multi variant custom fields on Virtuemart custom fields interface. As per the above screenshot the title is Multi Variant which is given in the below CSV file.
Also multi_variant_fields would be the title of the ramifications, In this case it is Size and Color.
| product_sku | product_parent_sku | Size | Color | multi_variant_title | multi_variant_fields |
| SHIRT-S-GREEN | S | Green | Multi Variant | Size~Color | |
| SHIRT-M-GREEN | SHIRT-S-GREEN | M | Green | ||
| SHIRT-L-GREEN | SHIRT-S-GREEN | L | Green | ||
| SHIRT-S-PURPLE | SHIRT-S-GREEN | S | Purple | ||
| SHIRT-M-PURPLE | SHIRT-S-GREEN | M | Purple | ||
| SHIRT-L-RED | SHIRT-S-GREEN | L | Red | ||
| SHIRT-XL-RED | SHIRT-S-GREEN | XL | Red | ||
| SHIRT-S-BLUE | SHIRT-S-GREEN | S | Blue |
Once the import is done, Multi variant custom values can be checked from Virtuemart edit products page in virtuemart administrator interface and in custom fields tab.
Order of import
Import should be done twice for multi variants, First import will store the custom fields and the second import will import the custom fields. The order of import is:
- Import the parent products
- Import the child products or both the parents and the children
Instead of making 2 separate files with one for the parents and one for the children, you can use 1 file with both the parent and the children in there. This will generate a message saying there are unsupported fields, this is expected because the available fields have not yet been updated. This can be safely ignored, and on the second import, all will be fine.
Important
The Multi Variant custom field must already be created before you run the import, otherwise CSVI can't link the custom field to the product.
Use of noninheritable field
Starting from RO CSVI 8.14.0 version, we support use of noninheritable field for parent products in Multi Variants.
Sample CSV file for using noninheritable field
product_sku,product_parent_sku,published,Size,Color,multi_variant_title,multi_variant_fields,noninheritable
SHIRT-S-GREEN,,1,S,Green,Multi Variant,Size~Color,Y
SHIRT-M-GREEN,SHIRT-S-GREEN,1,M,Green
SHIRT-L-GREEN,SHIRT-S-GREEN,1,L,Green
SHIRT-S-PURPLE,SHIRT-S-GREEN,1,S,Purple
SHIRT-M-PURPLE,SHIRT-S-GREEN,1,M,Purple
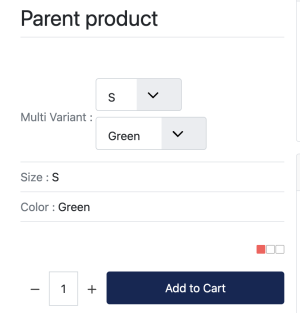
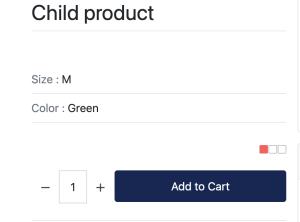
With import of noninheritable field child products do not inherit parent values. Which means parent product should have the option to select values but child products should show only their assigned values and should not have an option to select parent or other child product values. See attached screenshot on how it looks on frontend.
VirtueMart Users export
A template can be created by following these steps:
- Go to Components -> CSVI Pro -> Templates
- Click New
- Give the template a name
- Set Action to Export
- Set Component to VirtueMart
- Set Operation to Users info
- Click Next: Select Source
- Destination is set default to Download. No need for change.
- Click Next: Select options
- The default values are OK, change if needed.
- Click Next: Select fields
- Fields must be added otherwise there is nothing for CSVI to export. Click Edit template fields.
- A new window opens with the Template fields page. You can add new fields by clicking New or Quick Add.
- When all fields are added you can close the window
- Click Next: Finalize
- All done here
- Click Close to return to the list of templates or Edit if you want to fine-tune the template further.

The Quick Add Option allows you to quickly add multiple fields to a template. It is not possible to set any settings per field here but that can be done after the fields have been added to the template.


VirtueMart Waitinglists export
This tutorial explains how to create a VirtueMart Waiting lists export template, add the fields and how to run the export. Step by step we show you how to perform each task. A video will show you the steps in action so you can follow that as well.